How to Build Your Own Timber Garden Furniture

The Step-by-Step DIY Guide

The DIY Checklist:
What You’ll Need

Constructing your own timber garden bench, chair, or table is an incredibly rewarding project. Because of Ireland's damp, highly variable climate, outdoor furniture must be constructed with durability in mind. Using pressure-treated timbers, rustproof exterior fixings, and robust water-resistant adhesives ensures your furniture stands up to years of damp Irish winters and sunny summer afternoons alike.
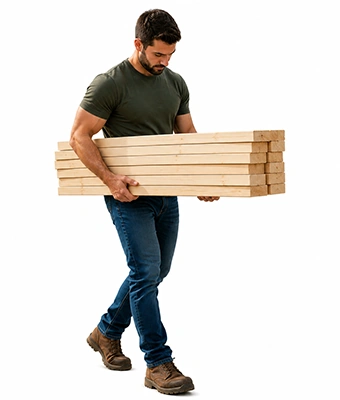
Man holding wood

1.

SAFETY
GEAR
(PPE)

Dust Mask (P2 or FFP2): Critical for keeping hazardous treated-timber sawdust out of your lungs when cutting or sanding.

Safety Glasses: Protects your eyes from flying timber splinters, sanding debris, and adhesive drops.

2.

TOOLS &
EQUIPMENT

Orbital Sander & Sandpaper Sheets: For smoothing rough sawn timber faces, removing splinters, and rounding off edges. Use a mix of 80-grit (coarse) and 120-grit (medium) sandpaper.

Cordless Drill & Driver Bits: High-performance drill for boring pilot holes and driving exterior screws quickly and securely.

Combination Square & Tape Measure: Essential for taking accurate measurements and ensuring all joints are joined at perfect 90-degree angles.

Sharp Pencil: For making crisp, easily visible cutting and drilling layout marks.

3.

Materials, Fixings & Accessories

Pre-Cut Timber Packs: Pressure-treated construction-grade planed timber (such as 44mm x 94mm or 38mm x 89mm profiles) standard for sturdy frame construction.

Exterior Screws: Corrosion-resistant structural wood screws (typically 70mm to 80mm long) to ensure rustless stability in damp environments.

Water-Resistant Wood Glue: Heavy-duty D4-rated exterior wood adhesive to reinforce structural joint faces before screwing them together.

Timber Oil or Outdoor Paint: High-quality breathable exterior wood stain, preservative oil, or weather-resistant garden paint.

Hardware Sets (Optional): Flat bracket plates, corner braces, or coach bolts depending on your preferred joinery design.

Top Tip: Source D4-Rated Water-Resistant Glue.
Standard interior wood glues are water-soluble and will completely break apart in damp garden conditions. Always buy adhesive explicitly labeled as D4-rated water-resistant polyurethane or specialized exterior PVA. Applying glue along the shoulders of your joints creates a watertight seal that keeps rot out of joint gaps.
Top Tip: Avoid Split Ends with Pilot Holes.
Pressure-treated exterior timbers are highly susceptible to splitting when heavy timber screws are driven near the ends of a board. To keep your structural frames strong, always pre-drill pilot holes using a drill bit slightly narrower than the screw shank before driving the screws home.

Step-by-Step DIY Installation Guide

STEP

01

Set Up & Measure Twice
Dry Workspace Prep:
Choose a flat, level work area, such as a garage floor or outdoor patio slab.
Mark Cuts Accurately:
Using your tape measure, combination square, and a sharp pencil, mark out your custom cut lines across all sides of your timber boards to ensure straight, square cuts.

STEP

02

Sizing & Smoothing the Timber
Cut to Length:
Carefully make your structural cuts. Immediately use your orbital sander or a hand-sanding block with 80-grit sandpaper to smooth any rough end-grain faces.
Ease the Edges (Arris Chamfering):
Run your sander along all sharp linear board edges at a 45-degree angle. Rounding off these edges prevents painful splinters and helps protective paint layers stick better.

STEP

03

Dry Fitting & Drill Pilot Holes
Dry Frame Test:
Lay out your timber components flat on the ground to inspect the alignment.
Drill Holes:
Using your cordless drill, drill straight pilot holes through the face of your overlapping frames. Make sure to space your screws at least 25mm away from any timber ends to prevent cracking.

STEP

04

Glue & Assemble structural frames
Apply Adhesive:
Apply a neat ribbon of your D4 water-resistant wood glue onto the contacting joints.
Drive the Fixings:
Press the joint firmly together, align your pilot holes, and drive your heavy-duty corrosion-resistant exterior screws home until the heads sit slightly below the wood surface. Wipe away any squeezed-out wet glue immediately with a damp cloth.

STEP

05

Install Seat Slats & Support Bracing
Slat Alignment:
Lay your seat and backrest slats in place. Use small 5mm spacer tiles or scrap timber offcuts to create matching drainage gaps between each slat.
Final Screws:
Pre-drill and screw each slat securely to the supporting frame. Secure any angled bracing to ensure the frame does not wobble when loaded.

STEP

06

Sanding & Weatherproof Seal Coating
Fine Sanding:
Switch to 120-grit sandpaper on your sander and go over the entire finished build to clear away handling marks or glue residue. Brush away all dust.
Apply Protective Finish:
Using a synthetic paint brush, apply a generous coat of your chosen timber oil or outdoor paint. Work the coating deep into the end-grain timber faces, as these soak up water fastest. Let dry and apply a second coat.
How to Build Your Own Timber Garden Furniture: Irish DIY Guide

Timber Garden Furniture Calculator

1. Define Furniture Component Packs
Component Label
Length (m)
Quantity Required
2. Timber Profiles & Coatings
Timber Furniture Structure Preview

Estimated Materials Required

Total Linear Metres: 0.00 m
Pre-Cut Timber Packs (2.4m Lengths): 0 Packs
Exterior Wood Screws (100pc Box): 0 Boxes
D4 Water-Resistant Glue: 0 Bottles
Outdoor Protection Oil/Paint: 0 Litres
Sandpaper Mixed Grain Packs: 1 Pack
Standard Timber Yield Specs:
Timber Pack Sizes: Calculations are based on standard trade packs of 2.4-metre length timbers to reduce waste during custom cutting.
Screws & Glue Matrix: Average of 4 heavy-duty screws and roughly 15ml of water-resistant D4 glue estimated per structural connection point.


Get the Weekly Top Tip

Practical advice from real Topline store teams, straight to your inbox.

Locally

Owned,

Genuinely

Irish

Contact Us
Amalgamated Hardware PLC
Trading as: Topline
Naas Industrial Estate,
Naas
Co. Kildare
W91P228

Email: info@topline.ie
Follow Us
© 2026 Amalgamated Hardware PLC. All rights reserved