How to Mount and Wire Weatherproof Outdoor Lights

The Step-by-Step DIY Guide

The DIY Checklist:
What You’ll Need

Installing outdoor lighting is a fantastic way to brighten your driveway, secure dark side passages, or illuminate patio entertainment areas. Due to damp and wet weather conditions in Ireland, outdoor electrical setups require specialised waterproof materials. Utilizing a safe, extra-low-voltage (12V) LED kit allows home DIY enthusiasts to install garden and wall lighting safely without requiring a registered electrical contractor for the outdoor runs.
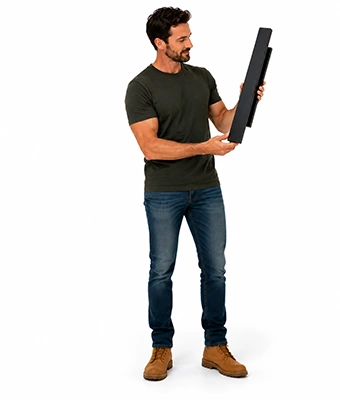
Man holding light to be mounted

1.

SAFETY
GEAR
(PPE)

Safety Glasses: Essential eye protection against masonry dust and flying debris during wall drilling.

Heavy-Duty Gloves: Protects hands from abrasive brickwork and potential wire pinches.

2.

TOOLS &
EQUIPMENT

Combi Drill & Masonry Drill Bits: Used to drill mounting holes in solid external brick or concrete blocks.

Screwdriver Set (Insulated/VDE): Rated screwdrivers to safely secure electrical terminals and mounting plates.

Wire Strippers & Side Cutters: For cleanly removing wire outer insulation and cutting cables to length.

Tape Measure & Pencil: To map out equal distances and height lines between light fixtures.

Hammer: For securing cable clips neatly along mortar joints or timber panels.

3.

Materials, Fixings & Accessories

Low-Voltage LED Outdoor Light Kit: Safe, energy-efficient 12V garden or wall lights complete with an IP-rated outdoor transformer.

Low-Voltage Outdoor-Rated Cable: Heavy-duty, double-insulated cable designed to withstand cold and moisture.

Cable Clips: Correctly sized clips to run and secure electrical cable along brick or timber paths.

IP-Rated Weatherproof Connectors: High-quality gel-filled or screw-tight connectors that prevent dampness from shorting out wire joins.

Timers / Controller: An automated plug-in timer, photocell sensor (dusk-to-dawn), or smart hub to automate your lights.

Masonry Wall Plugs & Screws: Weather-resistant (galvanised or brass) screws and matching wall plugs to securely anchor light brackets to masonry.

Outdoor Weatherproof Power Socket Enclosure: A lockable, IP66-rated wet-use socket enclosure if plugging the transformer into an existing outdoor socket.

Top Tip: Run Cables Safely.
Although low-voltage 12V cabling is inherently safe from severe electric shocks, it can still easily be damaged by lawnmowers, garden shears, or spade edges. Always protect exposed cable runs by clipping them up high out of sight, threading them through protective conduit, or burying them at least 450mm deep with protective warning tape laid overhead.
Top Tip: Elevate and Protect Your Connections.
Irish dampness is highly persistent. Water can wick along wires and puddle inside low-lying connection points. Always use IP67 or IP68 rated gel-filled connectors, elevate wire connections slightly off the wet ground where possible, and point wire entries downward so gravity pulls running water away from terminal seals.

Step-by-Step DIY Installation Guide

STEP

01

Plan Your Layout & Test the Kit
Map Out the Positions:
Decide where your transformer will sit (ideally indoors, inside a dry garage, or inside an IP66-rated weatherproof outdoor box) and plan the path for your low-voltage cable run to each light location.
Pre-Test the Kit:
Unpack your LED kit and lay it out on a clean, dry floor inside. Connect the lights, transformer, and controller together temporarily and plug it in to ensure all components and bulbs are working perfectly before installation.

STEP

02

Prepare the Wall Mounts
Mark Up Holes:
Hold the first mounting bracket or light base against the exterior wall. Use your spirit level to verify it is straight, then mark the screw holes with a pencil.
Drill into Masonry:
Put on your safety glasses. Fit a masonry drill bit that matches your wall plugs to your combi drill. Select the hammer setting and drill straight holes to the depth of the wall plugs. Tap the wall plugs flush into the holes.

STEP

03

Mount the Light Brackets
Fix to Wall:
Align the mounting bracket over your wall plugs and screw them firmly in place using weather-resistant screws.
Route Entry Cables:
Thread the fixture's power tail through the bracket's rubber cable gland or rear access channel, making sure the seal is tight and not pinched.

STEP

04

Run the Main Power Cable
Lay the Cable Path:
Route your main low-voltage power cable along the planned path from the transformer site to the furthest light fixture. Leave 300mm of slack at each light location to make wiring connections easy.
Clip and Secure:
Use cable clips spaced every 300mm to hold the cable neatly in place. Lay clips along mortar lines rather than directly on the face of hard bricks to prevent the pins from bending.

STEP

05

Make Waterproof Connections
Strip Wire Ends:
Use your wire strippers to expose roughly 10mm of copper wire on your main cable and light tails.
Seal the Joins:
Insert the matching wires into your IP-rated weatherproof connectors (typically connecting positive to positive, negative to negative). If using gel-filled connectors, press them firmly closed with pliers until the protective sealant squeezes around the wires. Tighten any outer compression glands to secure the watertight seal.

STEP

06

Install the Transformer and Timer
Mount the Controller:
Secure your low-voltage transformer close to your power source. Hook up your timer or photocell controller in-line between the transformer and your lights.
Plug In and Set:
Connect the main run cable to the low-voltage output terminals on the transformer. Plug the transformer into your power source. Programme your timer to turn on at your preferred schedule, or test your photocell by briefly covering the sensor face to simulate nighttime.
How to Mount and Wire Weatherproof Outdoor Lights: Irish DIY Guide

Outdoor Lighting Kit Calculator

1. Define Your Lighting Run
Run / Zone Name
Number of Lights
Run Length (m)
2. Product Configurations
Outdoor Lighting Layout Preview

Estimated Basket Materials Required

Total Lights Needed: 0 Lights
Total Cable Required: 0.00 m
Min. Transformer Capacity: 0W (12V)
IP-Rated Gel Connectors: 0 Connectors
Cable Clips Needed: 0 Clips
Masonry Fixing Sets: 0 Sets (Screws + Plugs)
Automated Timers / Controller: 1 Unit
Safety & Voltage Drop Rules:
Transformer Capacity: Always select a transformer rated at least 20% higher than the combined wattage of your lights to prevent overheating.
Fixing Frequency: Run cables along flat surfaces using 1 clip per 300mm to prevent sagging. Secure each light bracket with 2 masonry fixings.


Get the Weekly Top Tip

Practical advice from real Topline store teams, straight to your inbox.

Locally

Owned,

Genuinely

Irish

Contact Us
Amalgamated Hardware PLC
Trading as: Topline
Naas Industrial Estate,
Naas
Co. Kildare
W91P228

Email: info@topline.ie
Follow Us
© 2026 Amalgamated Hardware PLC. All rights reserved