How to Lay Outdoor Patio Tiles

The Step-by-Step DIY Guide

The DIY Checklist:
What You’ll Need

Creating an outdoor tiled patio is a fantastic way to extend your living space into the garden. In Ireland's damp, frost-prone climate, laying outdoor tiles requires meticulous attention to sub-base prep and drainage. Using the right materials—such as frost-rated porcelain or stone tiles, flexible polymer-modified adhesive, and a sturdy aggregate base—will ensure your patio stays level, crack-free, and beautiful for years to come.
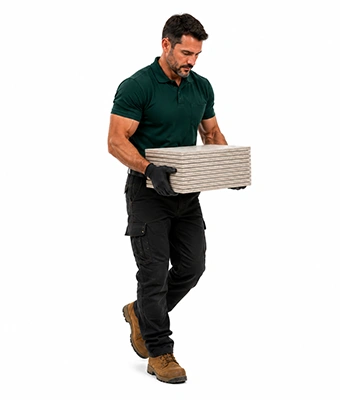
Man carrying tiles

1.

SAFETY
GEAR
(PPE)

FFP2 / P2 Dust Mask: Essential protection when mixing dry sand/cement and cutting tiles, protecting your lungs from hazardous silica dust.

Safety Glasses: Protects your eyes from flying stone chips, tile shards, and cement splashes.

Heavy-Duty Work Gloves: Safeguards hands from abrasive tile edges and prevents alkaline chemical burns from wet mortar and cement.

Knee Pads: Highly recommended to keep you comfortable and protected while working on your knees on hard ground.

2.

TOOLS &
EQUIPMENT

Wet Tile Saw or Angle Grinder: Fitted with a continuous diamond rim blade to achieve clean, crisp cuts on dense outdoor tiles.

Notched Trowel (10mm to 12mm): For combing out thick, structured adhesive beds to secure the tiles properly.

Plasterer’s Whisk / Paddle Mixer: Fitted to a drill to blend sand, cement, adhesive, and grout compounds easily.

Heavy Rubber Mallet: For tapping tiles safely into the wet bedding layer without cracking them.

Spirit Levels (600mm & 1200mm): Absolutely critical to ensure consistent, gentle drainage slopes and flat tiling courses.

Rake and Shovel: For spreading hardcore and sand-cement mixtures evenly.

Grout Squeegee & Sponge: For working grout smoothly into the joints and washing away excess residue.

3.

Materials, Fixings & Accessories

Frost-Rated Outdoor Tiles: High-density, slip-resistant outdoor porcelain or stone tiles (typically 20mm thick).

Flexible Tile Adhesive (C2 Class): Highly polymer-modified, frost-resistant tile adhesive designed for exterior concrete and bedding installations.

Tile Spacers: Large-profile exterior spacers (typically 4mm to 6mm) to guarantee uniform, rain-draining grout lines.

Grout & Sealer: Weatherproof exterior jointing grout, plus a quality impregnating sealer (if using natural stone).

MOT Type 1 / Clause 804 Hardcore: Crushed stone aggregate sub-base material to form a solid, draining foundation layer.

Sharp Sand & Cement: Mixed to lay a semi-dry mortar screed base or a solid slurry primer.

Top Tip: Plan a Gentle Fall for Drainage.
Rainwater must never pool on your outdoor tiles, especially with Irish winter frosts. Always lay your patio with a subtle, consistent slope (called a "fall") away from any adjacent buildings. A fall of 1:80 is ideal—meaning for every 800mm of patio run, the level should drop by 10mm.
Top Tip: Don't Skip the Slurry Primer Bond!
Dense outdoor porcelain tiles have an incredibly low water absorption rate (less than 0.5%). Because of this, standard mortar won't stick to them directly. Always paint the back of each tile with a polymer-cement slurry primer immediately before placing it onto your wet bedding layer to lock it permanently in place.

Step-by-Step DIY Installation Guide

STEP

01

Excavation and Ground Preparation
Mark Your Limits:
Pin out the patio boundary lines using wooden stakes and high-visibility builder's string lines.
Dig Out the Site:
Dig down roughly 150mm to 200mm deep. Ensure the bottom of the excavated trench is firm, free of roots, and sloped away from any house walls.

STEP

02

Lay and Compact the Hardcore Sub-Base
Fill the Base:
Spread Clause 804/MOT Type 1 hardcore throughout the trench to a depth of roughly 100mm.
Compact It Firmly:
Use a mechanical compactor plate (wacker plate) to pack the hardcore down tightly. Go over the entire area at least three times, leaving a rock-solid, level base.

STEP

03

Lay the Sand and Cement Bedding Layer
Mix the Bedding Mortar:
Mix 4 parts sharp sand with 1 part general-purpose cement to create a semi-dry bedding mortar. It should hold its shape when squeezed in your hand without dripping excess water.
Screed the Bed:
Spread the mortar bed roughly 40mm thick over your compacted sub-base. Use a long, straight timber edge to screed the surface flat, keeping your drainage slope profile in mind.

STEP

04

Prime and Lay Your Tiles
Apply Slurry Primer:
Mix your polymer slurry primer to a thick, paint-like consistency. Wear your gloves, safety glasses, and knee pads. Brush a liberal layer of primer across the entire backside of your first tile.
Place the Tile:
Gently place the primed tile onto the wet mortar bed. Lay down your next tile, using your 4mm to 6mm tile spacers to maintain straight, even joints.
Beat to Level:
Tap the tiles firmly with your heavy rubber mallet. Constantly check with your spirit level to ensure the tiles sit flat with one another and follow your drainage fall.

STEP

05

Cut Perimeter Borders
Measure and Score:
Measure any gaps along the patio edges or around obstacles. Mark cut lines onto your tiles with a pencil.
Make the Cuts:
Put on your dust mask, ear defenders, and safety glasses. Use your wet tile saw or angle grinder fitted with a diamond blade to cut the tiles along your pencil marks. Remember to apply primer to the back of these cut pieces before laying them.

STEP

06

Grout and Clean
Wait for Cure:
Let the laid patio sit undisturbed for at least 24 hours to allow the mortar and adhesive to cure fully.
Apply Exterior Grout:
Force your weatherproof outdoor grout deep into the joints using a grout squeegee, working in diagonal passes.
Sponge Clean:
Once the grout starts to set (typically 15 to 30 minutes), clean the tile faces with a damp sponge. Keep rinsing the sponge in clean water to prevent leaving a cloudy grout haze.
How to Lay Outdoor Patio Tiles: Irish DIY Guide

Outdoor Patio Tile Calculator

1. Define Patio Dimensions
Area Label
Length (m)
Width (m)
2. Material Dimensions & Buffers
Patio Assembly Cross-Section Preview

Estimated Basket Materials Required

Total Surface Area: 0.00 m²
Frost-Rated Patio Tiles: 0 Tiles
Clause 804 Hardcore (Bulk Bags): 0 Bags (approx. 1 tonne)
Sharp Sand (25kg Bags): 0 Bags
General Purpose Cement (25kg): 0 Bags
Flexible Adhesive C2 (20kg Bags): 0 Bags
Exterior Tile Grout (10kg Bags): 0 Bags
Standard Retail Basket Yield Rules:
Aggregates: One standard aggregate bulk bag (approx. 1 tonne) covers roughly 5 to 6 m² at 100mm compacted depth.
Mortar Bed Mix: Calculated at a 4:1 ratio. 1 bag of 25kg cement and 4 bags of 25kg sharp sand cover roughly 1 m² at 40mm depth.
C2 Adhesive Cover: A 20kg bag of flexible outdoor adhesive covers roughly 4 m² when applied with a 10mm to 12mm notched trowel.


Get the Weekly Top Tip

Practical advice from real Topline store teams, straight to your inbox.

Locally

Owned,

Genuinely

Irish

Contact Us
Amalgamated Hardware PLC
Trading as: Topline
Naas Industrial Estate,
Naas
Co. Kildare
W91P228

Email: info@topline.ie
Follow Us
© 2026 Amalgamated Hardware PLC. All rights reserved