How to Organise Your Garage or Utility Room with Shelving

The Step-by-Step DIY Guide

The DIY Checklist:
What You’ll Need

Organising a garage or utility room with vertical storage maximises your floor space, clears up clutter, and makes tools and home goods easy to access. Irish block and masonry walls require heavy-duty anchoring to safely support heavy items, while plasterboard utility room walls demand targeted stud-fixing. Make sure you pick up the complete, secure basket of tools and hardware before beginning.
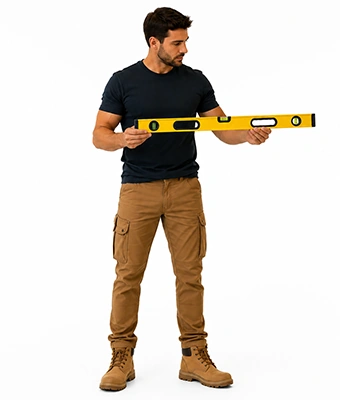
Man holding a level

1.

SAFETY
GEAR
(PPE)

Heavy-Duty Work Gloves: Protects hands from splinters, metal burrs on brackets, and blisters while drilling and handling raw materials.

Safety Glasses: Essential eye protection against flying concrete masonry dust, wood splinters, and paint chips during drilling.

2.

TOOLS &
EQUIPMENT

SDS Hammer Drill or Combi Drill: Necessary for driving masonry bits deep into hard blockwork, or standard bits into wooden framing studs.

Masonry Drill Bits (matching your wall plug sizes, e.g., 6mm or 8mm): Carbide-tipped drill bits designed for clean block penetration.

Stud Finder: Essential for plasterboard-finished utility room walls to secure brackets directly into solid timber studs.

Spirit Level (600mm size recommended): Crucial to ensure vertical standards are hung straight and horizontal shelves finish perfectly level.

Measuring Tape & Pencil: For mapping out even distances between upright supports and shelf heights.

Masking Tape: Great for marking drilling depths on drill bits and locating wall marks without permanently scratching walls.

Screwdriver Set or Drill Driver Bits: For driving and securing various heavy-duty fixing screws home.

Step Ladder: For comfortably and safely reaching upper storage zones.

3.

Materials, Fixings & Accessories

Adjustable Twin-Slot Upright Shelving Units, Slatwall, or Pegboard Panels: The core structural organisation elements to hold your baskets and hooks.

Heavy-Duty Anchor Bolts: Strong expansion masonry anchors to lock high-load brackets directly into solid brick or concrete blockwork.

Wall Plugs (various sizes, matching screws): Medium-duty nylon expansion plugs for lighter wall-mounting applications.

Screws (various lengths, e.g., 40mm, 50mm, and 60mm wood screws): Heavy gauge screws to secure standards, brackets, and panels.

Storage Accessories: A variety of hanging hooks, wire baskets, and heavy cable organisers to clear smaller items.

Clear Storage Boxes & Labels: Damp-proof plastic boxes with lids to store loose parts safely, labelled for quick identification.

Top Tip: Know Your Wall Type first!
Most Irish garages are constructed of solid concrete blockwork or brick. Heavy timber shelving or shelving holding heavy items (like paint tins and car batteries) must be anchored using concrete screws or nylon wall plugs paired with heavy-duty lag screws. For utility rooms with drywall-on-timber-stud structures, you must anchor your shelving brackets directly into the vertical timber studs rather than relying on plasterboard fixings.
Top Tip: The Masking Tape Depth Gauge.
When drilling deep holes into solid masonry, it is easy to under-drill or over-drill. Measure the length of your wall plug against your masonry drill bit, and wrap a small piece of masking tape around the bit at that exact depth. Stop drilling as soon as the tape dust-guard brushes the wall surface. This guarantees your plugs sit flush with the wall face.

Step-by-Step DIY Installation Guide

STEP

01

Plan Your Zone Layout & Map Wall Studs
Outline Your Targets:
Aim to mount shelves at user-friendly heights (typically starting 400mm off the ground up to 2000mm high). Space vertical upright brackets roughly 600mm to 800mm apart to prevent shelf bowing under heavy loads.
Map Out the Substructure:
Use your stud finder on dry-lined walls to mark where underlying timber studs run. On bare garage block walls, visually inspect the surface for sound mortar joints, aiming to drill directly into solid block centers rather than soft mortar gaps.

STEP

02

Install Your Primary Upright Standard
Mark the First Hole:
Position your first twin-slot upright standard on the wall at your target height. Use a pencil to mark the topmost screw hole.
Drill and Anchor:
On masonry, drill using your hammer drill and a masonry bit, push in your wall plug, and drive a screw through the upright standard to hold it loosely in place.
Plumb It Perfectly:
Place your spirit level along the side of the hanging upright standard. Gently swing the bottom until it is perfectly vertical (plumb). Mark the remaining screw points down the wall with your pencil, rotate the bracket aside, drill those holes, push in the plugs, and screw the standard firmly to the wall.

STEP

03

Space and Align Secondary Uprights
Set Even Spacing:
Measure 600mm or 800mm sideways from your first upright to position your second standard.
Level Horizontally:
Fit shelf brackets into the top slot of both uprights. Place your spirit level across the two brackets. Adjust the height of the second upright until the bubble in your level rests perfectly centered in the middle of the glass vials, then mark the first mounting screw hole of the second upright.
Secure the Upright:
Drill, plug, and screw the second upright in place, double-checking alignment with your level before tightening all screws fully down.

STEP

04

Mount Shelving, Pegboard, or Slatwall Panels
Assemble the Shell:
Click your twin-slot shelf brackets securely into the desired slots on the upright standards. Tap them down gently with your gloved hand to seat them properly.
Lay and Screw Shelves:
Place your wooden, composite, or wire shelves onto the brackets. Secure the underside of the shelves to the brackets using small 15mm wood screws to prevent them from sliding or tipping forward.
Hang Panels (Pegboard/Slatwall):
If using pegboards, ensure you mount them with small timber spacer batten strips behind the panels. This creates the necessary 20mm gap behind the board for hook prongs to insert easily.

STEP

05

Organise with Accessories and Boxes
Categorise Your Storage:
Group your items by weight and frequency of use. Place heavier bulk items on bottom shelves (heavy paint cans, toolboxes) and frequently-used lighter items at waist-to-chest height.
Box and Label:
Pack loose nuts, screws, electrical components, and garden chemicals into clear, stackable plastic boxes. Affix a clear, legible label on the front face of each storage box.
Hook It Up:
Clip pegs, custom baskets, and cable organisers onto your pegboard or slatwall panels to keep hand tools and power cords off workbenches.
How to Organise Your Garage or Utility Room with Shelving: Irish DIY Guide

Garage & Utility Shelving Calculator

1. Define Shelving Wall Sections
Wall Location Label
Length (m)
No. of Shelves High
2. Product Specifications & Configurations
Shelving Wall Layout Preview

Estimated Basket Materials Required

Total Shelving Length: 0.00 m
Upright Wall Standards (1m): 0 Pcs
Heavy-Duty Shelf Brackets: 0 Pcs
Timber Shelving Boards (1m): 0 Boards
Heavy-Duty Wall Plugs & Screws: 0 Pcs
Anchor Bolts (High Load): 0 Pcs
Accessory Hooks & Baskets: 0 Pcs
Clear Storage Boxes & Labels: 0 Pcs
Standard Shelving Basket Yield Rules:
Upright Spacing: Calculated with vertical standards spaced every 600mm to prevent shelf bending.
Fixing Counts: Assumes 4 structural screw fixings per 1m upright standard. For solid walls, 2 heavy-duty expansion anchor bolts are allocated per upright for bottom/mid high-load security.


Get the Weekly Top Tip

Practical advice from real Topline store teams, straight to your inbox.

Locally

Owned,

Genuinely

Irish

Contact Us
Amalgamated Hardware PLC
Trading as: Topline
Naas Industrial Estate,
Naas
Co. Kildare
W91P228

Email: info@topline.ie
Follow Us
© 2026 Amalgamated Hardware PLC. All rights reserved