How to Upcycle and Paint Your Garden Furniture

The Step-by-Step DIY Guide

The DIY Checklist:
What You’ll Need

Upcycling weathered wooden or metal garden furniture is a brilliant way to transform your outdoor living space while protecting your structural assets from dampness. Due to Ireland's highly changeable weather, external furniture must be sealed and coated to a high standard. To complete this job successfully, you will need a comprehensive basket of abrasives, repair fillers, high-performance protective paints, and the correct tools.
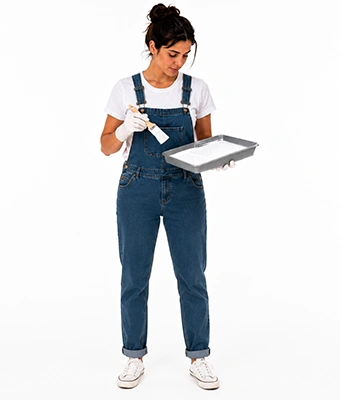
Lady carrying paint tray

1.

SAFETY
GEAR
(PPE)

Respirator Mask (P2 or FFP2 rating): Protects your lungs from fine paint particles, old lead-based paint dust, and strong solvent fumes during sanding and prep work.

Protective Work Gloves: Nitrile or heavy-duty gloves to protect skin from harsh stripping chemicals, paint solvents, and splinters.

2.

TOOLS &
EQUIPMENT

Orbital Sander & Sandpaper: An electric orbital sander speeds up prep work. Sandpaper sheets in assorted grits (80-grit coarse, 120-grit medium, and 240-grit fine) are required for manual edges and finishing.

Paintbrushes & Small Foam Roller: A combination of high-quality synthetic paintbrushes for tight joints, and a 100mm small foam roller for flat table-top and panel surfaces.

Paint Scraper or Heat Gun: For stripping away thick layers of cracked, peeling, or flaking old paint down to bare wood.

Small Screwdriver Set: To remove handles, structural hinges, brackets, and metal fittings before painting.

Lint-Free Rags: For wiping down clean wood with solvents, removing fine dust particles, and cleaning tools.

Drop Sheet or Heavy-Duty Polythene Tarp: To shield lawn, patio, or workshop flooring from paint drops and sanding mess.

3.

Materials, Fixings & Accessories

Exterior Wood Paint / Wood Oil: High-durability microporous paint or nourishing outdoor timber oil that allows the timber to breathe while repelling external dampness.

Exterior Wood or Metal Primer: A robust undercoat matching your target surface to prevent tannin bleed-through and guarantee excellent paint adhesion.

Exterior Wood Filler: To patch up dry rot pockets, cracks, and deep splits on exposed timber joints.

Solvent / Degreaser: Methylated spirits or white spirit to thoroughly strip grease, wax, and fine sanding dust from all surfaces.

Fine-Grade Steel Wool or Abrasive Pad: For keying glossy surfaces and buffing between finish coats without leaving deep scratches.

Exterior-Grade Waterproof Wood Glue: High-strength D4-standard polyurethane glue to fix loose joints, slats, or structural furniture arms.

High-Tack Masking Tape: For clean lines and blocking out areas you wish to remain unpainted (like metal brackets).

Exterior Clear Coat or Varnish: An optional clear protective shield to guard high-wear table surfaces against cup ring marks and sun bleaching.

Top Tip: The Irish Wood Moisture Test.
Never apply primers or paint coatings to wood that has been sitting unprotected in Irish rain. Moisture trapped inside the timber grain will quickly turn to vapour in summer warmth, causing your new paint layer to bubble and peel. Keep your furniture dry under cover for at least 48 to 72 hours before starting, ensuring it feels completely dry to the touch.
Top Tip: Work Wet-on-Wet for Joints.
When assembling structural slats with waterproof exterior wood glue, clean off any squeeze-out immediately with a damp rag. Cured glue blocks paint and primer penetration, leaving noticeable patch marks in your final finish.

Step-by-Step DIY Installation Guide

STEP

01

Inspect & Disassemble
Set Up Your Zone:
Spread your heavy-duty drop sheet or polythene tarp on flat ground. Lay your furniture out with space to move around.
Remove Hardware:
Use your screwdriver set to take off any metal locks, decorative hinges, or sliding brackets. Put them in a jar so they do not go missing.

STEP

02

Strip and Repair
Scrape Loose Paint:
Use a paint scraper or heat gun to remove old, peeling paint coats. Work carefully along the timber wood grain line.
Repair Faults:
Clean out any rot or damp wood fibers. Fill splits and holes with a high-performance exterior wood filler, packing it slightly proud of the surface to allow for minor shrinkage. Apply exterior wood glue to any loose slats and clamp them securely until dry.

STEP

03

Sand the Surface
Coarse Sanding:
Use your orbital sander with 80-grit paper to level filled areas and sand down rough patches.
Medium Sanding:
Switch to 120-grit sandpaper over the whole surface to create a flat, smooth canvas.
Fine Sanding:
Hand-sand corners and legs with 240-grit paper. Key any remaining sound paint coats to create a rough grip pattern.

STEP

04

Clean and Degrease
Clear the Dust:
Vacuum the furniture thoroughly or brush off all loose sanding dust.
Degrease:
Dampen a clean, lint-free rag with methylated spirits or white spirit. Wipe down all surfaces to remove grease, natural wood oils, and fine dust. Allow 10 minutes to dry completely.

STEP

05

Apply the Primer Coat
Protect Wood:
Apply a smooth coat of exterior timber primer. If you are painting raw softwoods (like pine or cedar) or open-grained hardwoods, use a stain-blocking primer to prevent dark knots or natural tannins from bleeding through.
Let Dry:
Follow the manufacturer's directions (usually 4 to 6 hours). Once dry, run fine-grade steel wool or an abrasive pad lightly over the primer to flatten down raised wood fibers.

STEP

06

Paint the Base and Finish Coats
First Coat:
Stir your exterior furniture paint thoroughly. Use your synthetic brush to paint hard-to-reach slats first, then use your small foam roller on flat table-tops and seat panels.
De-Nib Between Coats:
Let the coat dry overnight. Run fine steel wool lightly over the dried paint, then wipe clean with a tack rag. This ensures a clean finish for the final coat.
Second Coat:
Apply your second and final paint layer. For maximum durability under wet Irish winter weather, apply an optional third coat to exposed horizontal surfaces like table-tops.

STEP

07

Clear Protective Coat (Optional) & Reassembly
Seal Flat Surfaces:
To prevent scratches and grease marks on high-wear tables, apply a coat of exterior clear varnish.
Reassemble:
Once completely cured, screw back all metal hinges and structural brackets. Move your furniture back into position and enjoy your outdoor space!
How to Upcycle and Paint Your Garden Furniture: Irish DIY Guide

Garden Furniture Paint & Material Calculator

1. Define Garden Furniture Items
Item Description Label
Item Type / Size
Quantity
2. Paint Options & Waste Buffer
Sanding & Painting Visual Preview

Estimated Basket Materials Required

Total Surface Area To Paint: 0.00 m²
Exterior Wood Paint Required: 0.00 Litres
Exterior Primer Required: 0.00 Litres
Clear Coat / Varnish Required: 0.00 Litres
Assorted Sandpaper Packs: 0 Packs
Exterior Wood Filler Tubs: 1 Tub (250g)
Steel Wool Packs (Abrasive): 1 Pack
Basket Yield Estimations:
Paint & Primer Yield: Standard high-performance exterior wood paints and primers cover roughly 12m² per Litre per single coat.
Sanding Buffers: 1 pack of assorted sandpaper covers roughly 4m² of prep area. Heavy wood grain or old blistering layers can double your paper usage.


Get the Weekly Top Tip

Practical advice from real Topline store teams, straight to your inbox.

Locally

Owned,

Genuinely

Irish

Contact Us
Amalgamated Hardware PLC
Trading as: Topline
Naas Industrial Estate,
Naas
Co. Kildare
W91P228

Email: info@topline.ie
Follow Us
© 2026 Amalgamated Hardware PLC. All rights reserved