How to Build a Concrete Blockwork Garden Wall

The Step-by-Step DIY Guide

The DIY Checklist:
What You’ll Need

A brick or concrete block wall is a durable, structured addition to any Irish garden. It can serve as a boundary marker, a raised planter support, or a windbreak. Due to Ireland's wet, frost-prone winters, building a strong, long-lasting block wall requires proper preparation, a solid poured concrete foundation, reliable damp protection, and a cohesive material basket.
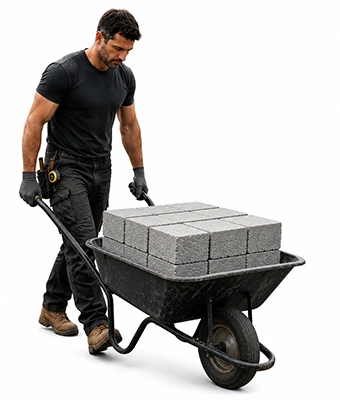
Man pushing a wheel barrow

1.

SAFETY
GEAR
(PPE)

Heavy-Duty Safety Gloves: Protects hands from abrasive concrete blocks and prevents chemical mortar burns caused by wet cement.

Safety Glasses / Eye Protection: Essential when cutting blocks with an angle grinder or mixing dry cement dust.

Ear Defenders: Protects hearing when operating high-volume masonry cutting power tools.

Dust Mask (P2 or FFP2): Crucial to prevent inhaling hazardous silica dust when cutting blocks or mixing dry mortar.

2.

TOOLS &
EQUIPMENT

Brick Trowel: A high-grade pointed trowel to scoop, throw, and spread wet mortar neatly along block paths.

Jointing & Pointing Tools: For smoothing and polishing wet mortar joints into a neat, weather-tight finish.

Screed Board & Spirit Levels: A long, straight timber edge and spirit level (both horizontal and vertical) to ensure the foundation and blocks run completely flat and plumb.

Strong Brick Line & Pins: Runs tightly between timber corner profiles to keep every block course dead straight and perfectly level.

Angle Grinder & Diamond Masonry Blade: For making clean, precise custom cuts on heavy concrete blocks.

Mortar Boards & Mixing Buckets: Keeps wet mortar handy near the wall line and allows clean batch mixing.

Shovel: For manual aggregate shovelling and concrete foundation trench preparation.

Tape Measure & Pencil: For marking run lines, block cutting targets, and leveling datums.

3.

Materials, Fixings & Accessories

Concrete / Decorative Blocks: Standard Irish concrete building blocks (typically measuring 440mm x 215mm x 100mm) or alternative decorative blocks.

Cement, Sand & Mortar Mix: Master-grade general-purpose cement paired with soft building sand (usually mixed at a 4:1 sand-to-cement ratio) to bond the blocks.

Mortar Plasticiser & Slump Adjuster: An additive mixed into water to make the wet mortar workable, pliable, and resistant to freeze-thaw cracking.

Damp-Proof Course (DPC): A thick, embossed plastic barrier strip to prevent ground dampness from wicking upward into the finished blockwork.

Wall Ties: Metal ties to safely tie a double-skin wall together, or to securely bond your new wall to an existing building structure.

Top Tip: Foundation is Everything.
A masonry wall is only as stable as its base. Never build directly onto soft soil or loose garden paving. You must pour a concrete strip foundation that is at least twice the width of your wall (typically 450mm wide and 300mm deep) and let it cure fully for at least 48 hours before laying your first block.
Top Tip: Mind the DPC Height!
In damp, rainy Irish conditions, horizontal damp-proof courses (DPC) must sit at least 150mm above the finished surrounding ground level. This prevents heavy, splashing rainwater or pooling ground moisture from soaking past the barrier, keeping your wall dry and frost-proof.

Step-by-Step DIY Installation Guide

STEP

01

Excavation & Base Preparation
Mark the Line:
Use pegs and a builder's string line to map out the exact position and footprint of your wall.
Dig the Trench:
Dig down roughly 350mm deep and 450mm wide. Ensure the bottom of the trench is completely flat, firm, and level.
Pour the Concrete Foundation:
Mix cement, gravel, and sand (or use pre-mixed concrete) and fill the trench to a depth of 300mm. Smooth the top surface with a screed board, using a spirit level to verify it is flat. Allow it to cure for 48 hours.

STEP

02

Lay Out and Dry Fit
Dry Run:
Lay out your first row (course) of concrete blocks on the cured concrete foundation without any mortar. Leave a uniform 10mm gap between the blocks to simulate mortar joints. This helps you plan any necessary cuts at the ends.
Mark Block Ends:
Use your tape measure and pencil to mark blocks that need to be halved or cut to size to fit your wall length.

STEP

03

Cut Blocks & Mix Mortar
Make the Cuts:
Put on your safety glasses, dust mask, and ear defenders. Use your angle grinder fitted with a diamond masonry blade to cut the marked blocks cleanly.
Mix the Mortar:
Combine 4 parts soft building sand with 1 part general-purpose cement in a mixing bucket or board. Add water mixed with your liquid plasticiser gradually, mixing until you reach a smooth, buttery consistency that clings to the trowel without sliding off.

STEP

04

Lay the First Block Course
The Bedding Layer:
Spread a thick 15mm layer of mortar along your dry foundation base. Lay your first block and tap it down gently with your trowel handle until it sits level.
Butter the Joints:
Apply mortar to the vertical end (the perpends) of the next block before pressing it firmly against the first block. Maintain a neat 10mm vertical joint space. Use your spirit level across the tops and faces of the blocks constantly.

STEP

05

Apply the Damp-Proof Course (DPC)
Position the Barrier:
Once your wall reaches roughly 150mm above the finished ground level, apply a thin layer of mortar across the top of the course.
Lay the DPC Strip:
Press your plastic DPC roll strip firmly into the mortar bed. Ensure it covers the full width of the wall. Spread another thin mortar layer directly on top of the plastic before continuing with your next block course.

STEP

06

Build Staggered Courses
Stagger the Joints:
Start your second course with a half-block. This staggers the vertical joints, which is crucial for structural strength. Run a tight brick line from end to end to keep your courses straight.
Install Wall Ties:
If building a double-skin wall, place metal wall ties across the cavity space every 450mm vertically and 900mm horizontally, bedding them securely in the wet mortar joints.

STEP

07

Jointing and Finishing
Strike the Joints:
As the mortar begins to set (firm but still moldable to thumb pressure), run your jointing or pointing tool along the joints to compress and shape them. This seals the mortar against rain penetration.
Clean the Face:
Use a soft, dry brush to sweep away any loose mortar crumbs before they cure on the block faces.
How to Build a Concrete Blockwork Garden Wall: Irish DIY Guide

Concrete Blockwork Wall Calculator

1. Define Wall Dimensions
Wall Location Label
Length (m)
Height (m)
2. Configuration Options
Blockwork Wall Assembly Preview

Estimated Basket Materials Required

Total Wall Face Area: 0.00 m²
Total Concrete Blocks Needed: 0 Blocks
Cement Bags Required (25kg): 0 Bags
Soft Building Sand (25kg Bags): 0 Bags
DPC Barrier Strip Roll (m): 0.00 m
Wall Ties (Pack size 50pcs): 0 Packs
Mortar Plasticiser (1L Bottle): 1 Bottle
Standard Retail Basket Yield Rules:
Block Coverage: Standard nominal dimensions (including a 10mm mortar joint) yield roughly 10 blocks per square metre of single-skin wall face area.
Mortar Yield: A standard mix requires roughly 1 bag of 25kg cement and 4 bags of 25kg soft building sand to lay 50 standard concrete blocks.


Get the Weekly Top Tip

Practical advice from real Topline store teams, straight to your inbox.

Locally

Owned,

Genuinely

Irish

Contact Us
Amalgamated Hardware PLC
Trading as: Topline
Naas Industrial Estate,
Naas
Co. Kildare
W91P228

Email: info@topline.ie
Follow Us
© 2026 Amalgamated Hardware PLC. All rights reserved