How to Assemble and Paint a Garden Shed

The Step-by-Step DIY Guide

The DIY Checklist:
What You’ll Need

A timber garden shed is a classic addition to Irish gardens, offering vital dry storage for tools, lawnmowers, and outdoor furniture. However, with the damp and windy Irish climate, proper base preparation, robust waterproofing, and weather protection are essential. Preparing a complete basket of timber treatments, base materials, fixings, and insulation is key to ensuring your shed lasts for decades.
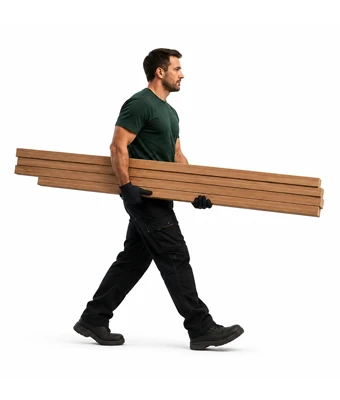
Man carrying wood

1.

SAFETY
GEAR
(PPE)

Steel-Toe Work Boots: Highly recommended to protect your feet when lifting heavy structural timber panels and concrete slabs.

Heavy-Duty Work Gloves: Essential for avoiding splinters from raw timber panels and chemical irritation from wood treatments.

Safety Glasses / Eye Protection: Crucial when drilling overhead, cutting roof felt, or using high-pressure spray treatments.

Dust Mask (P2 or FFP2): Important when cutting timber or sanding down rough wooden edges.

2.

TOOLS &
EQUIPMENT

Cordless Drill / Driver: High-torque brushless drill with various driver bits to assemble timber framing quickly.

Step Ladder: A secure, stable platform for lifting roof panels and applying roof felt.

Paintbrushes, Rollers & Trays: Wide block brushes for timber preservative, and medium pile rollers for external paint coats.

Spirit Level: A 1200mm level to verify your paving slab base and shed panels are perfectly vertical and square.

Tape Measure & Pencil: For marking cut lines, alignment points, and measuring layout guides.

Hammer: For securing roof felt with clout nails and fixing panel frame joins.

Utility Knife: Sharp blade for cleanly cutting roof felt rolls and trimming base membrane layers.

Caulking Gun: To seal joints with silicone or exterior adhesive sealant.

3.

Materials, Fixings & Accessories

Shed Kit / Panels: Standard flat-pack timber garden shed panels (commonly in dimensions like 2.4m x 1.8m or 3.0m x 2.4m).

Concrete / Paving Slab Base: Heavy-duty paving slabs, sharp sand, and dry cement to lay a perfectly flat, solid footing.

Exterior Primer & Paint: High-build, flexible exterior timber paint or opaque wood stain to seal the outer cladding against driving rain.

Timber Preservative: Deep-penetrating fungicidal wood preservative to protect bearer timbers from fungal rot and woodworm.

Roof Felt & Felt Nails / Adhesive: Heavy-duty bitumen roofing felt roll, galvanized clout nails, and cold-applied felt adhesive.

Exterior-Grade Screws: Corrosion-resistant deck screws (typically 50mm and 75mm lengths) to secure frames.

Insulation Panels: Foil-faced rigid PIR foam panels (typically 50mm thickness) to line walls and prevent interior condensation.

Base Membrane / Damp-Proof Course (DPC): Heavy-duty polythene damp-proof membrane (DPM) to block rising moisture from the ground.

Top Tip: Treat Underneath Before You Build.
Once your shed is fully assembled, the timber bearers resting on the base will be completely inaccessible. Before you screw anything together, paint at least two thick coats of deep-penetrating fungicidal timber preservative onto the underside of the floor joists and floor boards. This prevents rising damp from rotting your floor from the inside out.
Top Tip: Never Build on Grass or Bare Earth.
In wet Irish weather, bare soil turns soft and shifts, causing your shed to warp, pop its door frame, and crack windows. Always construct a solid, level sub-base of compacted stone and heavy-duty paving slabs or a concrete pad wrapped in a damp-proof membrane (DPM) to keep the timber dry.

Step-by-Step DIY Installation Guide

STEP

01

Setting up the Slab Base and DPC
Excavate the Footprint:
Mark out an area 100mm larger than your shed size on all sides. Dig out grass and topsoil to a depth of 100mm.
Lay the Base:
Pack down a 50mm layer of MOT Type 1 or Clause 804 hardcore. Blind this with a thin layer of sand, place your heavy-duty damp-proof membrane (DPM) directly over the sand, and lay your paving slabs level across the entire site.

STEP

02

Treat the Floor Bearers
Apply Preservative:
Flip your floor panels over. Saturate all underside bearers and edges with timber preservative using a wide block brush. Let dry completely before turning them right-side up onto the slab base.

STEP

03

Assembling the Walls
Erect the Back Panel:
Secure your back panel first, keeping it held stable. Position the first side panel at a 90-degree angle.
Screw the Corners:
Drill pilot holes and use 75mm exterior-grade screws to secure the wall frames together at the corners. Proceed around, attaching the remaining side panels and front door panel. Keep checking for vertical alignment with your spirit level.

STEP

04

Installing Roof Panels and Waterproof Felt
Mount Roof Supports:
Secure the main roof truss or ridge bar across the top of the wall frames, then slide and screw down your roof panels.
Lay the Felt:
Roll out your roofing felt. Drape it over the roof with a 50mm overhang at the eaves. Working from the lower edge upward to ensure water flows over joins, secure the felt down using galvanized clout nails spaced every 100mm. Apply cold-applied felt adhesive along all overlap joints.

STEP

05

External Paint and Sealant Finishing
Priming:
Wipe away any wood dust from outer timber panels and apply a flexible exterior timber primer.
Paint the Cladding:
Apply at least two coats of premium exterior paint or weatherproofing timber stain. Seal gaps around windows, trim, and doors using a caulking gun loaded with exterior silicone.

STEP

06

Interior Insulation Liners (Optional)
Fit the Insulation:
Push your foil-faced rigid PIR foam insulation panels into the recesses between the interior framing studwork. Tape all joins with aluminium foil tape to form a vapour-tight barrier that stops moisture from settling on tools.
How to Assemble and Paint a Garden Shed: Irish DIY Guide

Garden Shed Materials Calculator

1. Define Shed Footprint Size
Shed Label
Length (m)
Width (m)
2. Shed Specifications
Timber Shed Assembly Visualiser

Estimated Base Basket Materials

Footprint Floor Area: 0.00 m²
Paving Slabs Needed: 0 Slabs
Sand & Cement Dry-Mix (25kg Bags): 0 Bags
Damp-Proof Membrane (DPM Roll): 1 Roll
Roofing Felt Required (m): 0.00 m
Timber Preservative (5L Tins): 0 Tin(s)
Exterior Paint (5L Tins): 0 Tin(s)
PIR Insulation Boards: 0 Sheets
Corrosion-Resistant Screws (50mm / 75mm): 2 Box(es)
Standard Structural Basket Yield Rules:
Slab Base Coverage: Base area divided by chosen slab footprint plus 10% spacing buffer.
Exterior Paint Coverage: Flexible exterior timber paint is calculated based on standard 10 square metres coverage per litre per coat (assumes two full coats of paint).
PIR Insulation Sheets: Calculated based on standard 2400mm x 1200mm rigid insulation panels covering total wall area.


Get the Weekly Top Tip

Practical advice from real Topline store teams, straight to your inbox.

Locally

Owned,

Genuinely

Irish

Contact Us
Amalgamated Hardware PLC
Trading as: Topline
Naas Industrial Estate,
Naas
Co. Kildare
W91P228

Email: info@topline.ie
Follow Us
© 2026 Amalgamated Hardware PLC. All rights reserved