How to Draught-Proof Your Windows and External Doors

The Step-by-Step DIY Guide

The DIY Checklist:
What You’ll Need

Draughty windows and doors can account for up to 15% of heat loss in a typical Irish home. With the damp, windy Irish winter climate, sealing these gaps is one of the most cost-effective ways to cut heating bills and eliminate cold draughts. This comprehensive guide walks you through prepping, sealing, and installing custom draught-proofing profiles along timber, uPVC, and composite frames.
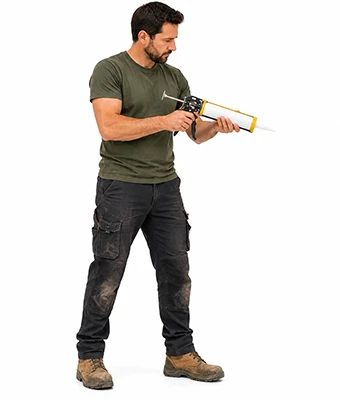
Man holding a caulking gun

1.

SAFETY
GEAR
(PPE)

Safety Glasses: Protects your eyes from flying debris while trimming metal brush strips, sanding down old wood, or scraping old sealants.

Work Gloves: Thin, high-grip gloves protect your hands when operating utility knives, chisels, or applying sticky weather seals.

2.

TOOLS &
EQUIPMENT

Silicone & Acrylic Sealant Gun: Essential for controlled, clean application of external weatherproof sealants and interior decorators caulk.

Utility Knife & Sharp Scissors: For clean cuts on compression seals, self-adhesive foam, and rubber strips.

Sanding Aids (Medium-Grit Sandpaper/Block): For prepping frame surfaces and smoothing old wood filler repairs.

Tape Measure & Pencil: Essential to guarantee highly accurate cut lengths and neat alignments.

Junior Hacksaw: Required to cleanly cut aluminium-backed brush strips, threshold seals, and heavy plastic profiles.

Cordless Drill or Screwdriver: For driving small fixing screws or tacks when securing heavy-duty door-bottom strips.

3.

Materials, Fixings & Accessories

Door / Draught Seals & Brush Strips: Compression rubber strips (E-profile, P-profile, or V-profile) for frame edges, and heavy-duty brush strips for door bottoms.

Window Draught Seals: Self-adhesive foam or silicone weather strips designed to seal window sashes tightly.

Weatherproof Sealants: High-performance external frame silicone (designed to handle external brick-to-frame thermal movement).

Sugar Soap or Degreaser: Crucial to remove dirt, oils, and grease from surfaces so self-adhesive seals can grip permanently.

Wood Filler or Caulk: Used to repair split timber frames and fill deep exterior cracks prior to final draught-proofing.

Fixing Screws / Tacks: Small, weather-resistant fasteners to lock heavy threshold brush plates or wooden bead carriers in place.

Top Tip: The Cleanliness Rule.
New self-adhesive seals will peel away within weeks if applied onto dusty or greasy frames. Always scrub your windows and door frames with a strong sugar soap solution first. Rinse clean with fresh water and allow the substrate to dry completely before applying any adhesive backing.
Top Tip: Don't Jam the Sash!
It's tempting to use the thickest seal possible to block out the Irish wind, but this can make your doors and windows incredibly difficult to lock or close securely, stressing your hinges. Measure the gap sizes by pressing a small piece of blue-tack or modeling clay into the frame gap, closing the frame, and checking the squashed thickness to select the perfect seal profile (e.g. 2-5mm or 5-7mm).

Step-by-Step DIY Installation Guide

STEP

01

Inspect, Clean & Prep
Test for Gaps:
On a windy day, feel around frame margins or hold a lit match/smoke stick near the seals to locate active leaks. Note down locations.
Wash Down Frames:
Scrub the frames with warm water and sugar soap to strip grease and soot. Wipe dry with a clean microfiber cloth.
Remove Old Seals:
Strip off crumbling foam tape or peeling silicone lines with your utility knife or scraper. Sand old adhesive residue flat.

STEP

02

Repair Timber Defects
Patch Fractures:
Use wood filler to patch decayed timber recesses or split grain sections along old frames. Sand the repair flat once cured.
Caulk Inner Margins:
Fill stationary interior frame joints with decorators caulk using your caulking gun to eliminate background structural drafts.

STEP

03

Install Window Draught Seals
Measure and Trim:
Use your tape measure to find the exact dimensions of the window sash tracks. Cut self-adhesive compression seals to length using scissors.
Apply the Seal:
Peel back 100mm of the protective backing paper. Press the seal firmly into the rebate or inner frame margin. Work your way along, peeling and smoothing the seal down as you go. Do not stretch the rubber profile during application, as it will snap back and leave gaps over time.

STEP

04

Mount Door Bottom Brush Strips
Measure the Width:
Measure the inside width of your closed external door.
Hacksaw to Length:
Slide the brush out of the aluminium carrier track. Cut the metal strip with a junior hacksaw, and trim the plastic brush with scissors. Slide the brush back into the metal track and pinch the ends to lock it in.
Screw or Tack in Place:
Hold the brush strip against the bottom of the closed door so the brush tips barely touch the floor. Secure it using your cordless drill or screwdriver and the supplied screws.

STEP

05

Apply Outer Weatherproof Frame Sealant
Cut the Gland:
Trim the plastic tip of your weatherproof exterior silicone nozzle at a 45-degree angle to match your gap width. Load the cartridge into your caulking gun.
Apply a Smooth Bead:
Lay a continuous line of silicone along the external structural seam where your window/door frame joins the brickwork. Smooth the bead with a silicone profiling tool or a wet finger.
How to Draught-Proof Your Windows and External Doors: Irish DIY Guide

Draught-Proofing Project Calculator

1. Map Out Doors & Windows
Opening Name / Ref
Type
Width (m)
Height (m)
2. Configuration Settings
Draught-Proofing Frame Sealing Preview

Estimated Basket Materials Required

Total Frame Seals Needed: 0.00 m
Door Bottom Brush Strips: 0.00 m
Weatherproof Sealant Cartridges: 0 Tubes
Wood Filler / Caulk: 0 Units
Fixing Screws / Tacks: 0 Pcs
Sugar Soap Concentrated Mix: 1 Bottle
Safety & Application Rules:
Sealant Coverage: A standard 310ml cartridge of exterior frame silicone yields roughly 10-12m of continuous 5mm x 5mm sealant bead.
Avoid Seal Crushing: Do not use seals that are too thick for the frame gap; they can permanently strain lock and latch mechanisms.


Get the Weekly Top Tip

Practical advice from real Topline store teams, straight to your inbox.

Locally

Owned,

Genuinely

Irish

Contact Us
Amalgamated Hardware PLC
Trading as: Topline
Naas Industrial Estate,
Naas
Co. Kildare
W91P228

Email: info@topline.ie
Follow Us
© 2026 Amalgamated Hardware PLC. All rights reserved