How to Dry-Line and Insulate Your Internal Walls

The Step-by-Step DIY Guide

The DIY Checklist:
What You’ll Need

Dry-lining with insulated plasterboards (often referred to as 'dot and dab' or direct bonding) is a highly effective way to upgrade the heat retention of cold, single-skin brick or solid concrete block walls. This method adds a rigid layer of high-performance insulation and a paint-ready plasterboard surface in one step, saving space and energy in Irish homes. Laying down a proper, code-compliant insulation barrier requires a complete basket of boards, adhesive, specialist mechanical anchors, and the right tools.
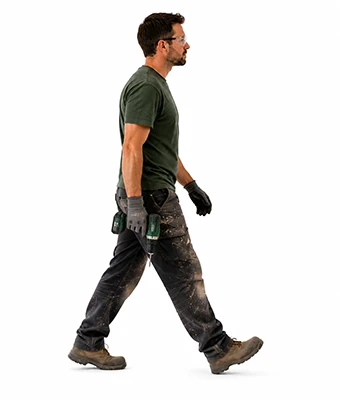
Man holding a drill

1.

SAFETY
GEAR
(PPE)

FFP3 Dust Mask: Highly critical to filter out fine gypsum plaster dust, insulation fibres, and masonry dust during drilling and cutting.

Safety Glasses: Protects eyes from flying brick fragments when drilling masonry and falling debris when working near ceilings.

Protective Gloves: Heavy-duty grip gloves protect your hands from abrasive blockwork and adhesive chemicals.

2.

TOOLS &
EQUIPMENT

Heavy-Duty Combi Drill or SDS Drill: Essential for drilling deep pilot holes through insulation boards and into dense concrete blocks or masonry.

Masonry Drill Bits (Long): Extra-long 8mm masonry drill bits sized to clear the combined thickness of the board, adhesive gap, and anchor depth.

Plasterboard Saw (Pad Saw) & Utility Knife: For making clean cuts, cutting outlet openings, and scoring plasterboard skins easily.

Plasterer's Trowel & Hawk: For mixing, scooping, and applying joint filler compounds cleanly across seams.

Spirit Level (Long, 1200mm+): Absolutely vital to check both vertical plumb and horizontal flatness across the wall face as the boards are set.

Sanding Aids (Sanding Block & Fine Mesh): For smoothing out cured joint filler to a seamless, paint-ready finish.

Mixing Bucket & Paddle Mixer: Fitted to your drill for preparing smooth, lump-free plasterboard adhesive and joint filler mixes.

3.

Materials, Fixings & Accessories

Insulated Plasterboard: High-performance composite sheets featuring rigid insulation pre-bonded to plasterboard, typically sized at 2400mm x 1200mm.

Plasterboard Fixing Adhesive: Heavy-duty drywall adhesive compound (usually supplied in 25kg bags) to bond the boards directly to the masonry.

Mechanical Inso-Fixings / Fire-Rated Fasteners: Metal or specialized fire-resistant expansion anchors designed to prevent plasterboard collapse in a fire event.

Expanding Foam (Low-Expansion): Used to seal perimeters, floor joints, and board gaps to eliminate draughts.

Scrim Joint Tape & Joint Filler: Fibreglass mesh tape and finishing compound to reinforce and hide board joints.

Top Tip: The Mandatory Fire Safety Fixings.
While adhesive plasterboard compound does most of the heavy lifting, you must never rely on adhesive alone. Building regulations require at least 9 mechanical, fire-rated metal anchors (Inso-Fixings) per standard 2400mm x 1200mm board. This ensures that in the event of a fire, the boards are held mechanically to the blockwork and do not collapse prematurely on occupants or emergency services.
Top Tip: Keep the Vapour Barrier Intact.
Insulated plasterboards are fitted with a vapour barrier to prevent warm, moist room air from hitting the cold external wall and causing hidden structural condensation. If you cut the boards to fit around windows, doors, or electrical sockets, make sure to seal all cut edges, joints, and perimeter boundaries with a continuous bead of low-expansion foam or specialist vapour-sealing tape.

Step-by-Step DIY Installation Guide

STEP

01

Inspect & Prep the Wall
Clear the Wall:
Remove old wallpaper, peeling paint, skirting boards, and coving. The masonry substrate must be clean, dry, and structurally sound.
Check for Plumb:
Use your long 1200mm spirit level to find high and low spots on the bare wall. This tells you where you will need more or less adhesive to get a flat finished surface.

STEP

02

Measure & Cut the Boards
Measure Heights:
Measure from floor to ceiling. Deduct 15mm from this measurement to allow for expansion gaps at the floor (10mm) and ceiling (5mm).
Cut the Boards:
Lay the board plasterboard-side up on a flat surface. Score the board using your utility knife along a straight edge, snap it back, and cut through the insulation layer from the rear with your plasterboard pad saw.

STEP

03

Mix and Apply Adhesive
Mix the Adhesive:
Pour clean water into your mixing bucket, add the drywall adhesive powder, and mix with your drill paddle until it reaches a thick, creamy, paste-like consistency.
Apply the Dabs:
Apply a continuous band of adhesive around the perimeter of the wall section and any openings (like windows and sockets) to prevent draughts. Then, apply vertical rows of adhesive dabs (roughly 50mm to 75mm wide and 250mm long) spaced about 300mm apart across the rest of the wall area.

STEP

04

Position and Align the Board
Use Floor Spacers:
Place 10mm plasterboard packing wedges on the floor at the base of the wall.
Lift and Level:
Lift the board onto the packers and press it firmly against the adhesive dabs. Gently tap the board with a straight-edge timber batten and rubber mallet, checking constantly with your long spirit level until it is perfectly plumb and flush.

STEP

05

Install Fire-Rated Mechanical Fixings
Allow to Set:
Let the adhesive cure for at least 3 to 4 hours so the board is firmly locked in place.
Drill and Hammer:
Put on your FFP3 dust mask and safety glasses. Using your SDS or combi drill and a long 8mm masonry drill bit, drill straight through the board and into the brickwork behind. Insert your metal Inso-Fixings/fire-rated fasteners and hammer them flush, ensuring you install at least 9 fixings per full sheet.

STEP

06

Fill Seams and Seal Perimeters
Seal Perimeters:
Fill the 10mm gap at the floor and the 5mm gap at the ceiling with low-expansion foam. Once cured, trim it flush with your utility knife.
Tape the Joints:
Apply self-adhesive fibreglass joint tape (scrim) over all vertical and horizontal board joins.
Apply Filler:
Mix your joint filler and apply a thin layer over the tape with your plasterer's trowel. Feather the edges outwards so it blends seamlessly. Once dry, sand the joint with fine sanding mesh until completely flat and ready for paint.
How to Dry-Line and Insulate Your Internal Walls: Irish DIY Guide

Dry-Lining & Insulation Calculator

1. Define Internal Wall Sections
Wall Reference Label
Length (m)
Height (m)
2. Configuration Options
Dry-Lining Wall Assembly Preview

Estimated Basket Materials Required

Total Wall Surface Area: 0.00 m²
Insulated Plasterboards: 0 Sheets
Plasterboard Adhesive (25kg): 0 Bags
Fire-Rated Inso-Fixings: 0 Anchors
Scrim Joint Tape Needed: 0 Rolls (90m size)
Joint Filler Compound: 0 Bag(s) (5kg)
Low-Expansion Foam Cans: 0 Cans
Standard Material Estimation Rules:
Adhesive Coverage: One 25kg bag of plasterboard adhesive compound yields roughly 3 m² of coverage when applying standard dot-and-dab layers.
Mechanical Fixings: Calculated at a safety rate of 9 fire-rated metal anchors per standard 2400mm x 1200mm panel to comply with building regulations.


Get the Weekly Top Tip

Practical advice from real Topline store teams, straight to your inbox.

Locally

Owned,

Genuinely

Irish

Contact Us
Amalgamated Hardware PLC
Trading as: Topline
Naas Industrial Estate,
Naas
Co. Kildare
W91P228

Email: info@topline.ie
Follow Us
© 2026 Amalgamated Hardware PLC. All rights reserved