How to Lag Your Pipes to Prevent Frost Damage

The Step-by-Step DIY Guide

The DIY Checklist:
What You’ll Need

When freezing temperatures hit Ireland, water inside unprotected pipes can quickly freeze, expand, and split the pipework. This leads to catastrophic water damage and expensive emergency callout fees once the ice thaws. Insulating (or lagging) your hot and cold water pipes in unheated spaces—such as attics, crawl spaces, outbuildings, and garage walls—is one of the easiest and most cost-effective winter home defense projects. Completing this successfully requires a simple yet targeted basket of materials, cutting guides, and personal protective equipment.
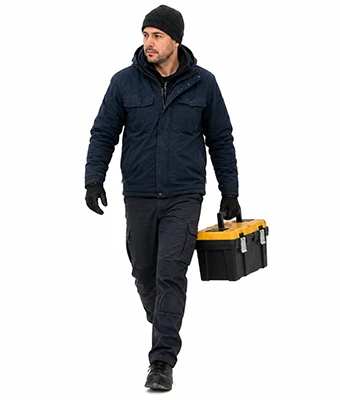
Man carrying a toolbox

1.

SAFETY
GEAR
(PPE)

Dust Mask (P2 or FFP2): Absolutely vital when working in crawl spaces or attics where old fiberglass or mineral wool loft insulation fibers are easily disturbed.

Safety Glasses: Protects your eyes from falling attic dust, cobwebs, and sharp pipe edges while looking upward.

Work Gloves: Thin, high-grip gloves protect your hands from scrapes and help you smoothly apply adhesive insulation tape.

2.

TOOLS &
EQUIPMENT

Mitre Box / Cutting Guide: The secret tool for clean, matching 45-degree cuts. This ensures your lagging pieces fit together seamlessly around bends and T-junctions with zero gaps.

Utility Knife or Scissors: A sharp blade is essential to slice through tough foam insulation cleanly without tearing it.

Tape Measure & Pencil: For taking accurate measurements of exposed pipe runs before cutting.

Headlamp or Work Light: Attics, utility cupboards, and under-sink zones are notoriously dark. A headlamp keeps your hands free to work.

3.

Materials, Fixings & Accessories

Pipe Insulation Tubes (Lagging): Polyethylene foam tubes (usually 1m or 2m long) with a split seam down one side. Make sure to purchase the correct matching size for your pipes (most Irish homes use standard 15mm, 22mm, or 28mm copper or plastic barrier pipes).

Insulation / Vapour Barrier Tape: Heavy-duty self-adhesive foam or duct tape to completely wrap and seal all butt joints, mitered corners, and slit seams.

Cable Ties: Heavy-duty nylon zip ties spaced every 300mm to clamp the foam tubes tightly around the pipes and prevent the slits from popping open over time.

Trace Heating Cable (Optional): An electric, self-regulating heating cable wrapped along highly vulnerable external pipes (like outdoor tap feeds or pump houses) before lagging is applied.

Cloth / Degreaser: To thoroughly wipe away dampness, dust, and spiderwebs from the pipes so your tape and adhesive can bond permanently.

Top Tip: Clean First or Tape Fails!
Attic pipes are almost always coated in a fine layer of grey dust, soot, and cobwebs. If you try to wrap adhesive tape directly over this, it will peel off within days, leaving gaps for cold air to attack. Always take a cloth and degreaser or soapy water to wipe down the pipes, and let them dry completely before slipping the foam insulation over them.
Top Tip: Pay Attention to the Joins.
Cold air behaves like water; it will find the smallest gap in your defense. Even if 99% of a pipe is perfectly covered, an unsealed butt joint or a loose corner bend will let freezing air reach the pipe wall and cause a localized freeze. Use a mitre box to cut precise 45-degree angle joints on elbows, and wrap every single join securely with heavy-duty insulation tape.

Step-by-Step DIY Installation Guide

STEP

01

Locate and Clean Vulnerable Pipes
Identify High-Risk Zones:
Focus on cold water pipes running through unheated spaces, including the attic floor, basement crawl spaces, outdoor tap feeds, and behind uninsulated cabinet walls.
Prep the Surface:
Wipe down the outer surface of all selected pipes with your cloth and degreaser to remove dust, cobwebs, and condensation. Allow them to dry completely.

STEP

02

Measure the Pipe Run and Diameter
Verify Pipe Sizes:
Measure across the outside of your pipes to identify their size. Irish domestic systems generally use 15mm (for branches and basin feeds) and 22mm (for mains and heating headers).
Measure Total Lengths:
Measure the straight lengths of each run and write them down, noting where T-junctions, valves, or 90-degree bends occur.

STEP

03

DrilCut the Foam Tubes with a Mitre Box
Straight Cuts:
Cut the foam tubes to length using a sharp utility knife or scissors.
Mitered Corner Joints:
To negotiate a 90-degree corner, place your insulation tube in your mitre box. Cut a clean 45-degree angle. When you join two opposite 45-degree cuts together, they will form a perfect, gap-free right angle around the pipe bend.

STEP

04

Install Trace Heating Cable (Optional)
For Exterior Pipes:
If you are protecting a highly exposed external run, lay or spiral your self-regulating trace heating cable along the pipe first. Secure it in place using cable ties or heat-resistant tape before applying insulation.

STEP

05

Fit and Secure the Lagging
Slide Over the Pipe:
Pry open the pre-split seam of your cut foam tube and pop it over the pipe. Ensure the entire pipe is enclosed.
Seal the Seams:
Peel and press the self-adhesive closure strip (if your lagging has one), or wrap a continuous run of insulation tape over the long slit seam.
Apply Cable Ties:
Secure nylon cable ties around the insulated pipe spaced roughly every 300mm to 400mm. Pull them snug but not so tight that they crush the foam core completely.

STEP

06

Tape and Seal All Joints
Bridge the Gaps:
Bring butt joints tightly together. Wrap your waterproof insulation tape directly around every seam where two tube ends meet. Wrap corner joins at least twice to form a complete, wind-tight, vapor-sealed envelope.
How to Lag Your Pipes to Prevent Frost Damage: Irish DIY Guide

Pipe Lagging Calculator

1. Define Pipe Runs to Lag
Run / Area Label
Pipe Diameter
Length (m)
2. Configuration Options
Pipe Insulation Assembly Preview

Estimated Basket Materials Required

Total Pipe Run Length: 0.00 m
Pipe Insulation Tubes: 0 Tubes (1m lengths)
Insulation Tape Needed: 0 Roll(s) (50m size)
Nylon Cable Ties (Pack of 100): 0 Pack(s)
Cloth / Degreaser: 1 Unit
Trace Heating Cable: 0.00 m (Optional)
Standard Material Estimation Rules:
Insulation Tubes: Foam lagging is typically sold in standard 1m lengths. Always match internal diameter to your specific pipe size.
Cable Ties: Estimated at 4 ties per linear metre of pipework to ensure permanent closure.
Joint Tape: One standard 50m roll of insulation tape can seal up to 40 individual butt joints and seams.


Get the Weekly Top Tip

Practical advice from real Topline store teams, straight to your inbox.

Locally

Owned,

Genuinely

Irish

Contact Us
Amalgamated Hardware PLC
Trading as: Topline
Naas Industrial Estate,
Naas
Co. Kildare
W91P228

Email: info@topline.ie
Follow Us
© 2026 Amalgamated Hardware PLC. All rights reserved