How to Safely Fit a Chimney Cowl

The Step-by-Step DIY Guide

The DIY Checklist:
What You’ll Need

Fitting a cowl is a highly effective home improvement project for Irish properties. A cowl prevents nesting jackdaws from blocking your flue, stops driving Irish rain from causing damp chimney breasts, and prevents cold downdraughts from blowing smoke back into your living space. Working at roof height presents safety hazards, so selecting the correct safety rigging, tools, and fitting accessories is critical before beginning.
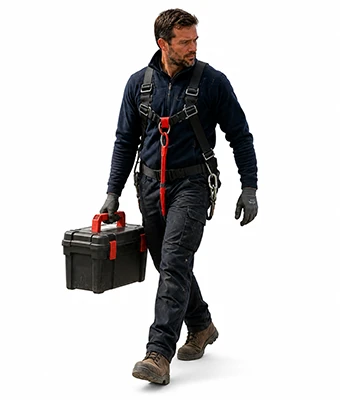
Man carrying a toolbox

1.

SAFETY
GEAR
(PPE)

Safety Harness & Lanyard: Absolutely mandatory gear to anchor yourself securely to a structural roof point while working near the chimney stack.

Dust Mask (FFP3): Highly critical to protect your lungs from breathing in toxic soot particles, bird droppings, and loose masonry dust when clearing the chimney pot.

Safety Glasses: Protects your eyes from loose mortar fragments, windblown ash, and chemical sealants.

Heavy Work Gloves: Robust, cut-resistant gloves to protect your hands from sharp stainless steel cowl straps and abrasive masonry.

2.

TOOLS &
EQUIPMENT

Roof Ladder & Roof Ridge Hook: A specialized ladder with a curved ridge hook designed to sit securely over the apex of your roof, distributing your weight safely across the slates or tiles.

Heavy-Duty SDS Drill & Core Drill Bit: Needed if running a mechanical vent pipe extension down through the chimney stack.

Cordless Drill & Masonry Drill Bits: For drilling anchor holes into concrete chimney crowns or brick pots for security fixings.

Screwdrivers & Nut Drivers: For tightening stainless steel jubilee clips and cowl clamp screws.

Hacksaw or Utility Knife: Used to trim structural metal bands, vent pipe extensions, and flashing tape profiles.

Tape Measure: For measuring the exact inner and outer diameters of your chimney pots before purchasing.

3.

Materials, Fixings & Accessories

Stainless Steel Cowl: A high-quality, corrosion-resistant mesh cowl (featuring a rain cap, bird guard, or anti-downdraught dome) sized to fit your chimney pot diameter.

High-Temperature Weatherproof Sealant & Flashing Tape: Specially formulated silicone or polymer mastic designed to withstand flue gases, heat, and extreme weather, paired with a self-adhesive flashing tape to seal joints.

Vent Pipe Extension Kit: Rigid or semi-rigid stainless steel pipe liners if extending a gas or stove flue through an oversized chimney pot.

Expanding Foam (Low-Expansion): Used internally to seal around flue entry and exit gaps where pipes pass through walls, preventing internal drafts.

Interior Acrylic Caulk: For neat finish seals around fireplace hearths or internal register plate joints.

Masonry Fixings / Concrete Screws: Robust, weather-resistant screws to anchor strap-secured cowls to the external masonry.

Top Tip: Safety First, Always!
Working on a roof is highly dangerous. Never attempt this project on a wet, windy, or icy day—even a light Irish drizzle makes slates incredibly slippery. Always use a proper roof ladder fitted with a secure ridge hook, and never work alone. Have a helper on the ground to steady the base ladder and keep an eye on you at all times.
Top Tip: Choose the Correct Cowl Style.
Make sure you purchase a cowl that matches your fuel type. Standard rain and bird-guard mesh cowls work well for multi-fuel and solid wood-burning fires, while gas-fired flues require specialized gas terminals to meet safety regulations. Check your pot size: Irish chimney pots are commonly 200mm (8 inches) or 225mm (9 inches) in diameter.

Step-by-Step DIY Installation Guide

STEP

01

Inspect, Measure, and Plan
Inspect the Pot:
Check the structural integrity of your chimney pot from the ground using binoculars. If the pot is cracked, loose, or the concrete mortar crown (the flaunching) is crumbling, it must be repaired before you install a cowl.
Measure the Diameter:
Use your tape measure to find the outer and inner diameter of the chimney pot, as well as the thickness of the pot wall. This ensures your cowl's clamp fittings or insertion legs will fit snug.

STEP

02

Set Up Safe Roof Access
Position the Base Ladder:
Erect your access ladder on firm, level ground. Secure the top to your gutters using ladder ties.
Install the Roof Ladder:
Slide your roof ladder up the roof slates face-down on its rollers. Once the ridge hook clears the roof apex, flip the ladder over so the hook sits securely over the opposite side of the roof ridge. Test to ensure it is locked in place.
Anchor Your Harness:
Put on your safety harness and clip your lanyard to a structural anchor point to prevent a fall.

STEP

03

Clean and Prep the Chimney Pot
Protect Your Lungs:
Put on your FFP3 dust mask, safety glasses, and heavy work gloves before reaching the chimney stack.
Clear Debris:
Brush away loose moss, soot, or old mortar from the top rim of the chimney pot. A clean surface is critical for flashing tape and high-temperature sealants to bond properly.

STEP

04

Install Vent Pipe Extensions (If Required)
Slide in the Liner:
If you are extending a stove or gas fireplace liner, slide the stainless steel vent pipe kit down through the chimney pot.
Seal Internal Gaps:
Use low-expansion expanding foam and high-temperature sealants around the exit ports to prevent cold drafts and soot from escaping. Finish internal plaster line joints with decorators acrylic caulk.

STEP

05

Mount and Clamp the Cowl
Set the Cowl in Place:
For hook-bolt or sleeve cowls, slide the insertion legs or sleeve inside the chimney pot. For strap-secured cowls, wrap the stainless steel bands down around the external face of the pot.
Tighten the Fixings:
Use your screwdriver or nut driver to evenly tighten the stainless steel jubilee clips or straps. Do not over-tighten, as you could crack older clay chimney pots. If using strap-on cowls, use your cordless drill and masonry bits to secure concrete screws through the metal strap loops directly into the pot wall.

STEP

06

Weatherproof the Joints
Apply Heat-Resistant Sealant:
Run a thick, continuous bead of high-temperature external weatherproof sealant around the seam where the cowl base meets the clay pot. This blocks windblown Irish rain from seeping under the cowl.
Apply Flashing Tape:
Wrap self-adhesive flashing tape around complex joint profiles for a durable, weather-tight barrier against rain, snow, and wind.
How to Safely Fit a Chimney Cowl: Irish DIY Guide

Chimney Cowl Calculator

1. Define Chimney Pots to Seal
Flue / Pot Label
Diameter (mm)
Cowl Style
2. Configuration Options
Chimney Cowl & Safety Assembly Preview

Estimated Basket Materials Required

Stainless Steel Cowls: 0 Units
Flashing Tape Required: 0.00 m
High-Temp Weatherproof Sealant: 0 Tube(s)
Vent Pipe Liner Kits (m): 0.00 m
Cowl Fixing Screws & Anchors: 0 Pcs
Expanding Foam Cans: 0 Can(s)
Interior Acrylic Caulk: 0 Tube(s)
Standard Retail Basket Yield Rules:
Sealant Coverage: One 310ml cartridge of outdoor weatherproof high-temp silicone handles approximately 3 standard chimney pot joints.
Fixing Strategy: Stainless steel jubilee bands require 2 or 4 masonry anchors driven directly into the clay pot outer walls for storm resistance.


Get the Weekly Top Tip

Practical advice from real Topline store teams, straight to your inbox.

Locally

Owned,

Genuinely

Irish

Contact Us
Amalgamated Hardware PLC
Trading as: Topline
Naas Industrial Estate,
Naas
Co. Kildare
W91P228

Email: info@topline.ie
Follow Us
© 2026 Amalgamated Hardware PLC. All rights reserved