How to Refresh Your Bathroom with New Taps and Grout

The Step-by-Step DIY Guide

The DIY Checklist:
What You’ll Need

Giving your bathroom a clean, modern facelift doesn't have to require a full, costly renovation. Replacing leaky, tarnished basin taps, scrubbing out mildewed wall joints, and laying fresh, water-resistant grout is a highly effective way to restore that pristine look. Due to Ireland's high-humidity home climates, choosing premium mould-resistant materials and waterproof sealants is vital to make sure your work withstands damp bathroom environments.
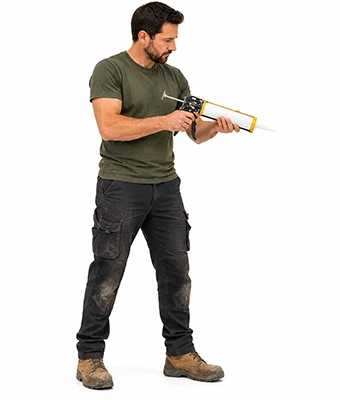
Man holding a caulking gun loaded with a tube of sealant

1.

SAFETY
GEAR
(PPE)

Protective Gloves: Heavy-duty nitrile or rubber gloves protect your skin from alkaline grout compounds, acidic tile cleaners, and raw silicone sealants.

Eye Protection / Safety Glasses: Guard your eyes against flying dried grout fragments when using the grout rake or scraping old seals.

2.

TOOLS &
EQUIPMENT

Grout Float: A rubber-faced trowel used to press wet grout mix deeply and firmly into tile joint spaces.

Basin Spanner / Wrench: A specialized plumbing wrench designed to reach up into the tight, awkward space behind bathroom pedestals to loosen tap backnuts.

Grout Rake / Remover: A steel tool fitted with a tungsten-carbide grit blade to scrape away old, discoloured, or crumbling grout safely.

Utility Knife & Heavy-Duty Scraper: Essential for slicing and peeling away stubborn, mould-damaged silicone sealant runs.

Caulking Gun: For controlled, even dispensing of sanitary waterproof silicone sealant cartridges.

Silicone Smoothing Tool (Spatula): To profile and smooth wet silicone beads into clean, watertight coves.

Sponge & Wash Bucket: For washing away haze residue and shaping grout joints during cleanup.

Tile Cleaner: A high-strength, acid-neutral cleaner to prep the wall tiles before applying fresh grout.

3.

Materials, Fixings & Accessories

Anti-Mould Grout: Water-resistant wall and floor tile grout containing active mould inhibitors, matching your tile colour scheme.

Sanitary Silicone Sealant: High-performance, anti-fungal silicone designed specifically for baths, basins, and showers.

New Taps / Shower Heads: Standard British Standard compliant replacement plumbing fittings, complete with new rubber washers and brass backnuts.

Plumber's PTFE Tape: Thread seal tape used to wrap compression fittings to prevent water leaks.

Grout Adhesive / Additive (Optional): A synthetic latex liquid additive mixed with grout to improve flexibility, water resistance, and bonding strength in wet shower enclosures.

Top Tip: The Dry-Grout Test.
Never apply new grout directly over old, dirty grout. New grout needs a deep, clean channel to grip onto structurally. Always rake out old grout to a depth of at least 2mm to 3mm. Clean the empty joints thoroughly with a vacuum and tile cleaner, then let them dry completely before applying your fresh mixture.
Top Tip: Turn Off the Water Mains!
Before taking a spanner to your basin fittings, locate your hot and cold isolation valves under the sink and turn them off. If your home has older plumbing without local isolation valves, turn off the main water stopcock (typically located under the kitchen sink or out by the front boundary). Always turn the taps on to drain the remaining water out of the pipework before starting your swap.

Step-by-Step DIY Installation Guide

STEP

01

Prep and Isolate the Plumbing
Turn Off Water:
Shut off local isolation valves under the sink basin. If none are fitted, turn off the main stopcock. Turn the tap handles on to bleed dry any remaining pressure.
Place a Basin Bucket:
Place a shallow container or dry towel directly beneath the plumbing connections to catch any residual drips as you loosen the fittings.

STEP

02

Remove the Old Taps
Undo the Connections:
Use your basin spanner or adjustable wrench to loosen the flexible tap connector nuts or copper pipe couplings.
Remove the Backnuts:
Reach up behind the sink with the basin spanner to unscrew the plastic or brass securing backnuts that clamp the tap body to the ceramic basin. Lift the old tap units out of the basin holes and clean any built-up lime scale from the pottery.

STEP

03

Fit the New Taps
Apply Thread Tape:
Wrap plumber's PTFE tape clockwise roughly 5 to 6 times around the threaded tap tails to ensure a watertight compression seal.
Mount and Tighten:
Insert the tap tails through the basin holes, ensuring the rubber sealing washer sits correctly between the tap base and the ceramic. Spin the backnuts on from underneath and tighten them firmly with your basin spanner. Reconnect your hot and cold water lines.

STEP

04

Rake Out Old Grout and Sealant
Scrape the Grout:
Put on your safety glasses and protective gloves. Gently pull your grout rake along the old tile joins, scraping out crumbly, stained grout until you create a clear channel.
Slice Old Silicone:
Use your utility knife to make long, flat cuts along the top and bottom of the old silicone bead behind the basin. Use a scraper to peel the old rubber line clean off the tiles and basin rim. Wipe the surfaces clean with tile cleaner.

STEP

05

Apply and Finish the Fresh Grout
Apply the Grout:
Mix your grout with water (adding grout additive if using). Use your rubber grout float held at a 45-degree angle to sweep the grout across the tiles, pressing it firmly into the empty joint lines.
Clean and Shape:
Let the grout set for roughly 15 to 20 minutes until it turns firm. Wipe the tile faces diagonally using a damp, clean sponge to shape the joints and clean off excess grout. Once a dry haze forms, buff the tiles clean with a microfiber cloth.

STEP

06

Lay a Fresh Sanitary Silicone Bead
Prep the Caulking Gun:
Cut the tip of your sanitary silicone tube at a 45-degree angle to match the joint width, and load it into the gun.
Gun the Bead:
Lay a continuous, steady bead of silicone along the junction where the basin or tub meets the tiled wall. Use your silicone smoothing tool to shape the line into a neat, waterproof cove. Let all grout and silicone dry for 24 hours before wetting.
How to Refresh Your Bathroom with New Taps and Grout: Irish DIY Guide

Bathroom Refresh Calculator

1. Define Bathroom Work Areas
Area Description
Tile Area (m²)
Taps to Replace
2. Product Specifications
Taps and Grout Assembly Preview

Estimated Basket Materials Required

Total Tile Area: 0.00 m²
Taps / Shower Heads Needed: 0 Unit(s)
Wall Tile Grout (kg): 0.00 kg
Sanitary Silicone Tubes: 0 Tube(s)
Plumber's PTFE Tape Rolls: 0 Roll(s)
Grout Rake Blades / Spares: 1 Pack
Standard Retail Basket Yield Rules:
Grout Yield: Standard tiles (150mm x 150mm with a 3mm joint) require roughly 0.5kg of dry grout mix per square metre of tiled area.
Silicone Coverage: One standard 310ml cartridge of sanitary silicone runs approximately 10 metres of a standard 5mm x 5mm cove joint.


Get the Weekly Top Tip

Practical advice from real Topline store teams, straight to your inbox.

Locally

Owned,

Genuinely

Irish

Contact Us
Amalgamated Hardware PLC
Trading as: Topline
Naas Industrial Estate,
Naas
Co. Kildare
W91P228

Email: info@topline.ie
Follow Us
© 2026 Amalgamated Hardware PLC. All rights reserved