How to Build a Garden Bench from Railway Sleepers

The Step-by-Step DIY Guide

The DIY Checklist:
What You’ll Need

Creating robust, heavy-duty garden furniture adds a stunning features pack to any Irish outdoor space. Using treated timber railway sleepers ensures your bench resists the elements and stands solid for years. This project requires a comprehensive basket of structural timber, heavy-duty hex fixings, protective coatings, and essential safety gear.
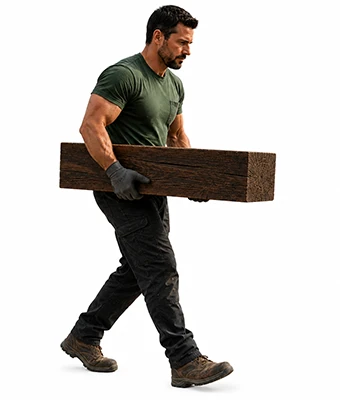
Man holding timber sleeper

1.

SAFETY
GEAR
(PPE)

Heavy-Duty Work Gloves: Vital for handling rough-sawn timber surfaces and avoiding deep splinter injuries.

Dust Mask (P2/FFP2 rating): Essential filtration gear when cutting pressure-treated timber and generating fine sanding dust.

Safety Glasses: Protects eyes from flying sawdust and splinters during high-speed cutting steps.

Ear Defenders: Necessary hearing protection when using circular saws or orbital sanders over extended runs.

2.

TOOLS &
EQUIPMENT

Circular Saw or Heavy Hand Saw: For making straight, square cross-cuts through thick timber faces.

Impact Driver: High-torque power tool required to drive long, heavy-duty structural screws deep into dense timber profiles without stalling.

Socket Set Bit: Fits your impact driver to perfectly grip and sink the hex-head timber screws.

Orbital Sander & Sanding Discs: Used to round sharp edges and smooth down the seat surfaces to make it splinter-free and comfortable.

Tape Measure & Pencil: For precise timber optimization and marking out accurate cut schedules.

Speed Square or Try Square: Guarantees all cut lines are marked at exactly 90 degrees for stable, plumb structural corners.

Long Timber Drill Bit: For boring clean pilot holes, preventing split lines near the edges of the sleepers.

3.

Materials, Fixings & Accessories

Treated Timber Sleepers (100mm x 200mm): Pressure-treated structural timbers, typically supplied in standard lengths of 2400mm. These provide the solid raw framework for both the legs and seat planks.

Heavy-Duty Sleeper Wood Screws (Hex Head): Specially coated exterior structural screws designed to bite deeply and resist corrosion in wet outdoor environments.

End-Grain Preservative: A specialized brush-on chemical liquid treatment to seal raw exposed cuts, protecting the timber core from rot.

Exterior Wood Stain / Sealant: High-grade outdoor coating to shield your finished assembly against harsh rain, damp cycles, and UV discolouration.

Top Tip: Coat All Cuts Instantly!
Pressure treatment only penetrates the outer layers of a railway sleeper. Whenever you make a saw cut exposing the inner raw timber grain, you must brush on a liberal coat of End-Grain Preservative right away. This seals the entry channels against dampness and internal decay in changing Irish weather.
Top Tip: Drill Smart to Prevent Splits.
Heavy-duty timber screws are thick. Even with self-tapping tips, driving them near the end of a 100mm x 200mm sleeper can cause structural splitting. Always use a long timber drill bit to pre-drill pilot paths before driving the hex fixings home.

Step-by-Step DIY Installation Guide

STEP

01

Map Out and Mark Your Cuts
Measure Twice:
Lay out your 2400mm treated timber sleepers on flat, level ground. Plan your cuts carefully to maximize timber usage. A standard robust design uses two 1200mm pieces for the seat top and two 400mm blocks for the base support legs.
Square Your Lines:
Use a speed square or try square and a sharp pencil to draw perfectly crisp, straight guide lines around all four faces of the sleeper at your cut targets.

STEP

02

Cut the Sleepers to Size
Set Up Your Workspace:
Secure the timber safely. Put on your safety glasses, ear defenders, and P2 dust mask.
Make the Cross-Cuts:
If using a circular saw, cut through one face, then carefully roll the sleeper over to cut from the opposite side until the piece separates cleanly. Keep your blade speed steady to avoid burning the wood grain. Alternatively, complete the cut with a sharp, heavy hand saw.

STEP

03

Preserve the Raw Wood Grain
Clean the Surfaces:
Brush away any loose sawdust from your fresh cuts.
Seal the Ends:
Use an old paintbrush to apply a thick layer of end-grain preservative onto all exposed raw ends. Allow it to soak deep into the timber grain for roughly 20 to 30 minutes before moving to assembly steps.

STEP

04

Smooth and Comfort-Sanding
Take Off the Sharp Edges:
Use an orbital sander loaded with coarse sanding discs to heavily sand the top and outer edges of the pieces that will form your seat.
Finish Smooth:
Soften all sharp corners to create a smooth, child-safe radius profile that won't snag clothing or catch skin.

STEP

05

Assemble the Base Legs and Seat
Position the Supports:
Stand your 400mm leg blocks upright on a level workshop floor, spacing them out to match your overall bench width.
Lay the Seat Tracks:
Place your 1200mm seat planks side-by-side on top of the leg supports, aligning the outer corners perfectly flush.
Bore the Pilots:
Use a long timber drill bit to pre-drill two pilot holes through the top of each seat plank, directly down into the underlying leg blocks.

STEP

06

Drive the Hex Structural Screws
Lock the Joints:
Fit your socket set bit into the impact driver. Put a heavy-duty hex head sleeper wood screw into each pilot hole.
Drive Home:
Drive the screws straight down until the hex heads sit slightly counter-sunk below the top surface of your seat wood, locking the framework together tightly.

STEP

07

Apply the Final Weatherproof Protection
Final Clean Down:
Wipe down the completed bench assembly to remove any remaining dust or surface grease.
Stain or Seal:
Apply a uniform coating of premium exterior wood stain or sealant across all faces, working it deep into all joint lines. Let it dry completely for 24 hours to ensure your bench is fully weatherized.
How to Build a Garden Bench from Railway Sleepers: Irish DIY Guide

Sleeper Bench Material Calculator

1. Define Bench Project Scope
Bench Area Label
Bench Length (mm)
Quantity Required
2. Configuration Preferences
Sleeper Bench Component Assembly View

Estimated Basket Materials Required

Total Timber Length Needed: 0 mm
Treated Timber Sleepers (2400mm): 0 Pack(s)
Heavy-Duty Hex Screws Needed: 0 Pcs
End-Grain Preservative (1L): 0 Can(s)
Exterior Wood Stain / Sealant: 0 Can(s)
Orbital Sanding Discs Pack: 1 Pack
Standard Hardware Basket Yield Rules:
Sleeper Breakdown: Standard design uses two planks for the seat bed and two block cut lengths (400mm) for support legs.
Fixing Frequency: 8 heavy-duty hex timber screws allocated per bench layout to lock seat planks firmly into support pedestals.


Get the Weekly Top Tip

Practical advice from real Topline store teams, straight to your inbox.

Locally

Owned,

Genuinely

Irish

Contact Us
Amalgamated Hardware PLC
Trading as: Topline
Naas Industrial Estate,
Naas
Co. Kildare
W91P228

Email: info@topline.ie
Follow Us
© 2026 Amalgamated Hardware PLC. All rights reserved