How to Hang Outdoor Christmas Lights Safely

The Step-by-Step DIY Guide

The DIY Checklist:
What You’ll Need

Brightening up your home for the festive season is an Irish holiday tradition. However, hanging outdoor Christmas lights in wet, windy winter weather requires durable materials, secure fixing systems, and safety-focused electrical items to ensure your display survives the elements and remains completely safe.
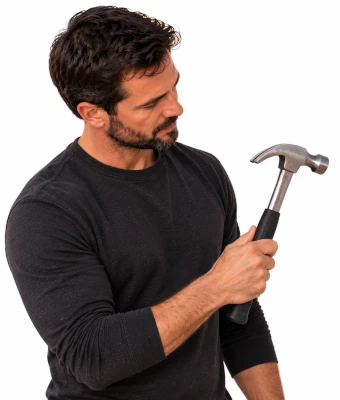
Man holding hammer to assist in hanging outdoor christmas lights

1.

SAFETY
GEAR
(PPE)

Safety Glasses: Protects eyes from brick fragments, mortar dust, or plastic shards when drilling or hammering.

Sturdy, Non-Slip Footwear: Essential for safe grip on ladder rungs and solid footing on cold, damp lawns or driveways.

High-Dexterity Grip Gloves: Keeps hands warm and dry while preserving precision control when handling thin cable ties, clips, and light strands.

2.

TOOLS &
EQUIPMENT

Step Ladder or Extension Ladder: Reaches high roofline gutters, fascia boards, or upper-storey windows safely.

Ladder Stand-off / Stay: Holds the top of the ladder away from the wall to prevent crushing your gutters and significantly improves stability.

RCD (Residual Current Device) Adapter: A critical electrical safety switch that instantly cuts off power if it detects an electrical fault or moisture intrusion.

Hammer: For securing masonry clips along brick joints or wooden fascia lines.

Cable Cutters: For trimming heavy-duty plastic cable ties quickly and cleanly without damaging the light cables.

Measuring Tape: Used to measure the total distance of your rooflines, walls, or garden runs to ensure you have enough light strands.

3.

Materials, Fixings & Accessories

Outdoor-Rated Extension Leads: Weatherproof cords designed specifically to handle winter temperatures without splitting or degrading.

IP56 Weather-Resistant Junction Boxes: Water-tight enclosure cases that seal extension plug connections against driving Irish rain.

Outdoor Gutter Hooks: Quick-fitting plastic hooks that clip directly onto the edge of your plastic gutters without requiring drilling.

Masonry Cable Clips: Heavy-duty plastic clips with hardened steel nails to secure power cables neatly along exterior concrete, brick, or mortar joints.

Heavy-Duty Cable Ties: Tough, UV-stabilised nylon ties to secure cables to railings, posts, or heavy branches.

Plug-In Outdoor Digital Timer Switches: Automatically controls when your lights turn on and off, saving energy and avoiding cold trips outside at night.

Insulation Tape (Electrical Tape): Helps colour-code leads, bundle excess cabling, and add secondary physical protection to dry sections of your setup.

Top Tip: Use the Gutter Clip Advantage.
Avoid drilling holes or driving nails into your home's timber fascia boards or PVC gutters if possible. Quality plastic gutter hooks or s-clips slip directly onto the front lip of standard half-round gutters without tools. They hold the light strands securely and make seasonal removal exceptionally fast and damage-free.
Top Tip: The Weatherproof Connection Rule.
Even if your extension cables and Christmas lights are rated for outdoor use, the physical plug connections themselves are vulnerable. Never leave a plug connection exposed to the open air. Always enclose all plug-to-lead connections inside an IP56-rated rubber-sealed outdoor junction box, keeping it elevated off the wet ground.

Step-by-Step DIY Installation Guide

STEP

01

Test & Prepare Your Lights
The Ground Test:
Fully unravel your light sets on a dry floor indoors. Plug them in to ensure every bulb, LED strand, and transformer is working correctly before you climb any ladders.
Measure Your Runs:
Use your measuring tape to calculate the total length of your gutters, windows, or paths. Verify that your light strands are long enough to cover the target zones.

STEP

02

Position Your Ladder Safely
Set Up the Base:
Place your ladder on a firm, flat, and dry surface. Keep to the 4-to-1 safety rule (for every 4 metres of height, the base of the ladder should be 1 metre away from the wall).
Fit the Stand-off:
Secure your ladder stand-off stay to the top of the ladder. Rest the stand-off securely against the brickwork of your home to keep the ladder weight off fragile PVC gutters.

STEP

03

Secure the Power Base
Plug in the RCD:
Plug your RCD safety adapter directly into your indoor socket, outdoor socket, or garage feed before connecting any extension cables.
Enclose Connections:
Route your outdoor-rated extension lead to the display area. Place the connection between the extension lead and the light strand's plug inside an IP56 weather-resistant junction box. Close the latches firmly to create a watertight seal.

STEP

04

Clip Your Gutter Runs
Hang the Hooks:
Climb your ladder carefully, ensuring you maintain three points of contact. Attach your plastic gutter hooks along the front edge of the gutter, spacing them roughly 300mm to 450mm apart to prevent sag.
Route the Strands:
Lay the main Christmas light cable into the hooks. Keep the tension even, ensuring the bulbs hang neatly without tugging on the connection points.

STEP

05

Secure Brickwork and Post Runs
Hammer Masonry Clips:
For vertical runs down walls to reach your power source, position masonry cable clips over the light cable. Carefully hammer the hardened pins into mortar joints (avoid hammering directly into bricks to prevent splitting).
Apply Cable Ties:
Use heavy-duty cable ties to secure light strands firmly around porch pillars, metal railings, or tree branches. Snip off any long excess plastic tails with your cable cutters for a clean look.

STEP

06

Set the Timer & Inspect
Configure the Digital Timer:
Plug your digital timer switch into the RCD-protected outlet, and program your preferred holiday hours (e.g., 4:30 PM to 11:30 PM). Connect your main power lead to it.
Final Safety Walk:
Ensure no cables are trailing across active pedestrian paths or driveways where they present a trip hazard or could be run over by a car. Keep all junction boxes elevated slightly off soil or lawn areas using timber blocks or bricks.
How to Hang Outdoor Christmas Lights Safely: Irish DIY Guide

Outdoor Christmas Lights Calculator

1. Define House Profile & Run Dimensions
Run Description (e.g., Gutter, Railing)
Length (m)
2. Configuration Options
Outdoor Christmas Lights Setup Preview

Estimated Basket Materials Required

Total Run Distance: 0.00 m
Total Hanging Clips Needed: 0 Units
Outdoor-Rated Extension Leads: 1 Lead
IP56 Weatherproof Junction Boxes: 1 Box
Heavy-Duty Cable Ties (Pack of 100): 1 Pack
Plug-In Digital Timer Switch: 1 Unit
Insulation Tape Roll: 1 Roll
Standard Basket Yield Rules:
Clip Frequency: Calculated using your selected spacing. Closer spacing (300mm) is highly recommended for exposed Irish coastal or elevated areas prone to winter storms.
Weatherproof Protection: A minimum of 1 IP56 enclosure box and 1 RCD adapter is required per outdoor plug circuit.


Get the Weekly Top Tip

Practical advice from real Topline store teams, straight to your inbox.

Locally

Owned,

Genuinely

Irish.

Contact Us
Amalgamated Hardware PLC
Trading as: Topline
Naas Industrial Estate,
Naas
Co. Kildare
W91P228

Email: info@topline.ie
Follow Us
© 2026 Amalgamated Hardware PLC. All rights reserved