How to Install Acoustic Slat Wall Panels

The Step-by-Step DIY Guide

The DIY Checklist:
What You’ll Need

Before kicking off your interior upgrade, make sure you collect all your materials, essential installation tools, and required health and safety gear. You can source all of these items together at your local builders merchant or hardware store outlet.
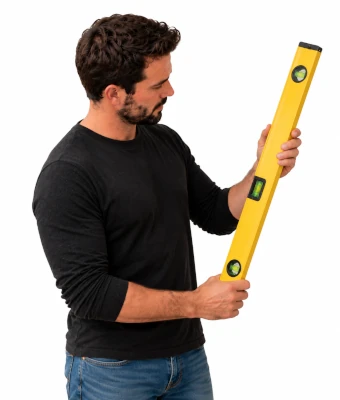
Man holding a level to assist in installing acoustic slat wall panels

1.

SAFETY
GEAR
(PPE)

Dust Mask / Respirator (FFP2 or FFP3 Rated): Highly recommended when cutting MDF panel backs or handling fibrous insulation materials.

Safety Goggles: Vital protection for your eyes when utilizing power saws or drilling into masonry.

Heavy Work Gloves: For handling framing timber and protecting against rough materials.

Disposable Boiler Suit: Keeps dust off your clothing during insulation cutting and wall drilling.

2.

TOOLS &
EQUIPMENT

Fine-Toothed Handsaw or Circular Saw / Mitre Saw: Used to cleanly trim the timber slats and backing panels to your custom room heights.

Cordless Drill Driver & Bit Set: For fast and efficient screw installation through panels and framing structure.

Hammer Drill & Masonry Drill Bit: Needed to drill fixing anchor holes if you are attaching elements to block or solid masonry walls.

Heavy-Duty Utility Knife: Perfect for scoring, slicing, and trimming the thick sound-dampening felt backing material.

Sliding Combination Square: To mark perfectly square 90-degree lines across panels and frames.

Tape Measure: For accurate wall planning, clearance checks, and length marks.

Pencil: To draw visible guide pathways directly on walls and panel components.

Bread Knife or Insulation Saw: For cleanly slicing mineral wool batts to size without causing material tearing.

3.

Materials, Fixings & Accessories

Pre-fabricated felt-backed acoustic timber slat panels: Your main visible surface aesthetic layer. Typical standard modular sizes are 2400mm x 600mm.

25x50mm planed regularized timber framing battens: Used to construct a rigid structural sub-frame grid on the wall if opting for optimal sound dampening.

Rigid sound-dampening mineral wool insulation (Optional): Fitted securely inside your framing spaces to maximize echo reduction and acoustic sound insulation profiles.

Premium high-grab panel adhesive: Essential for fast, direct-to-wall gluing configurations if skipping timber framing work.

Specialized black-phosphate drywall screws: Used to fasten the panels directly through the black felt backing material so the fixings blend away entirely out of sight.

Heavy-duty masonry wall plugs: To securely anchor sub-frame wood timbers deep into underlying brickwork or block structures.

Black Felt-Tip Marker / Black Spray Paint: A smart touch-up tool to camouflage any exposed cut batten ends or screw points along joints.

DIY Pro Tip:
If your room features existing timber skirting boards, you can choose to remove them and run your panels completely down to floor level, or sit your new timber paneling framework neatly flush along the top edge of your existing skirting profiles.
DIY Pro Tip:
Use your black felt-tip marker or black spray paint to touch up any raw, freshly cut wood edges on the ends of your slats. This ensures they match the premium dark background aesthetic look completely.

Step-by-Step DIY Installation Guide

STEP

01

Wall Inspection & Prep Works
Clean Your Canvas:
Ensure the target wall space is structural, flat, dry, and clean. Strip away old wallpaper patterns, loose paints, or protruding nails.
Locate Services:
Run an electronic pipe and live wire detector across the installation wall face before starting any drill work or driving long screws.

STEP

02

Choosing Your Installation Strategy
Acoustic panels can be successfully mounted using two different strategies based on your lifestyle requirements:
Method A: Direct-to-Wall Adhesive Glue (Fastest & Simplest Visual Face-lift)
Best if your wall is perfectly flat drywall or plaster, and you simply want to enjoy the aesthetic timber update with standard base acoustic improvements.
Method B: Structural Timber Sub-Frame Grid (Maximum Sound Absorption Profile)
Essential if your walls are uneven, or if you plan to install sound insulation batts directly behind the panels to maximize full sound-dampening capabilities in a modern media room.

STEP

03

Creating the Sub-Frame & Insulation (For Method B)
Set Out Your Battens:
Using your tape measure and level, mark out positions for your 25x50mm timber battens horizontally along the wall surface spaced exactly 600mm apart from center to center.
Anchor the Frame:
Drill through the wood framing into your brick or block wall using your hammer drill. Insert your heavy-duty masonry wall plugs, and anchor the horizontal frame members firmly using long fixing screws.
Insert Sound Insulation:
Pop your dust mask on and slice your sound-dampening mineral wool insulation panels down using your insulation saw. Pack the insulation batts tightly into the spaces created between your horizontal timber framework pieces.

STEP

04

Cutting Panels and Felt Backing
Measure Twice
Double check your floor-to-ceiling heights at three different points across the wall layout space to catch any uneven room variations.
Cut the Wood Slats:
Mark a straight cut line across your panel face. Use a fine-toothed handsaw or circular saw to slice directly through the decorative wood slats. Go slow to ensure you do not chip or splinter the beautiful timber finish faces.
Trim the Felt Backing:
Use a heavy-duty utility knife to quickly slice down the thick black felt fabric backing sheet cleanly at your target lines.

STEP

05

Securing Panels to the Framework
Position the First Panel:
Always begin from one side of the room and work outward. Place your first panel section up, checking it with a long level to ensure the vertical lines sit completely straight.
Drive the Black Screws:
Fasten the panel into your underlying wooden frame using specialized black-phosphate drywall screws. Drive the screws directly through the black felt gap between the decorative wood slats. Space your fixings roughly every 300mm vertically. The black screw heads will visually disappear straight into the dark background backing fabric.
Interlocking Sequence:
Slide your next panel piece snugly against the previous section. The overlapping edge of the felt backing will hide the seam point perfectly. Repeat across the wall space until complete.
How to Install Acoustic Slat Wall Panels: DIY Guide & Calculator

Interactive Slat Wall Project Calculator

1. Key Wall Measurements
2. Installation Specifications
Wall Blueprint Concept Layout

Estimated Project Basket Total

Total Structural Wall Area: 0.00 m²
Acoustic Panels Needed (2400x600mm): 0 pcs
25x50mm Framing Battens (2.4m lengths): 0 lengths
Mineral Wool Sound Insulation (m²): 0.00 m²
Black-Phosphate Fixing Screws (Box of 200): 0 Boxes
Premium High-Grab Adhesive Tubes: 0 Tubes
Heavy-duty Wall Plugs (Box of 100): 0 Boxes
Standard Irish Residential Framing Matrix:
Panel Base Profile: Calculations are centered around standardized professional modular panel layouts sizing out at 2400mm x 600mm face parameters.
Sub-Frame Matrix: Structural framework patterns run at 600mm matching horizontal grids using premium 25x50mm planed timber stocks. Adhesive outputs expect roughly 1 full tube spread footprint coverage across every 1.5 square metres of smooth wall plaster surface.


Get the Weekly Top Tip

Practical advice from real Topline store teams, straight to your inbox.

Locally

Owned,

Genuinely

Irish.

Contact Us
Amalgamated Hardware PLC
Trading as: Topline
Naas Industrial Estate,
Naas
Co. Kildare
W91P228

Email: info@topline.ie
Follow Us
© 2026 Amalgamated Hardware PLC. All rights reserved