How to Upgrade Your Wardrobe with Internal Organisers

The Step-by-Step DIY Guide

The DIY Checklist:
What You’ll Need

Maximising storage inside standard custom or standalone built-in wardrobes is an easy way to organise your home. This guide will walk you through cutting and custom-fitting high-density shelving panels, installing sturdy hanging rails, and sealing exposed edges cleanly for a sleek, premium look that handles heavy storage loads.
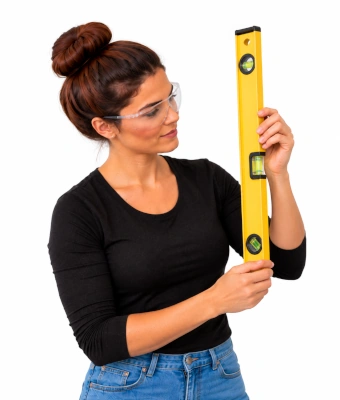
Woman holding a level to help with upgrading your wardrobe with internal organisers

1.

SAFETY
GEAR
(PPE)

Dust Mask (FFP2): Vital protection to stop fine melamine micro-particles and timber shavings entering your airways when sawing boards.

Safety Glasses: Protects eyes from flying wood splinters or metallic swarf generated while cutting down the steel hanging rails.

2.

TOOLS &
EQUIPMENT

Cordless Drill & Wood Drill Bits (3mm or 5mm): Used to bore accurate pilot paths for cabinet screws and clean, level insertion holes for shelf studs.

Drill Depth Stop (or Masking Tape): Ensures you do not drill completely through your upright structural wardrobe partitions.

Hacksaw: For slicing through the steel chrome wardrobe rails cleanly at your designated dimensions.

Household Iron & Utility Knife / Edge Trimmer: To heat-activate the iron-on edging tape adhesive, followed by clean trimming against raw board lines.

Spirit Level: Guarantees that tracking shelf paths are completely flat and rail alignments avoid unlevel clothing slopes.

Tape Measure & Pencil: For critical interior measurement configurations across high and low storage boundaries.

Screwdriver: Hand tools or drill driver bits to fix hardware securely.

3.

Materials, Fixings & Accessories

Melamine-Faced Shelving Boards: Smooth, scratch-resistant laminated timber structure sheets. Typically sourced in pre-cut widths like 2440mm x 400mm or 2440mm x 500mm profiles.

Chrome Wardrobe Rails: Heavy-gauge cylindrical clothing tubes designed to handle continuous load distributions.

End Sockets: Mounting brackets configured to clamp your clothing rail tubes firmly onto outer vertical partitions.

Shelf Support Studs: Metal or high-strength plastic small cylinder pegs inserted into vertical side walls to carry shelf boards.

Iron-on Melamine Edging Tape: Laminated roll backing used to mask freshly sawn, exposed raw chipboard sections cleanly.

Wood Screws: Premium thread cabinet screws to lock sockets and components solid without splitting timber substrates.

Top Tip: Mask Your Cut Line to Prevent Melamine Chipping.
Melamine-faced shelving is notorious for chipping along the edges when sawn. Wrap a tight layer of low-tack masking tape around your measured cutting perimeter, then mark your cut line on top of the tape. Use a fine-toothed hand saw held at a shallow angle to achieve a smooth, professional end finish.
Top Tip: Keep Depth Stops Tight.
When drilling interior pin placement holes for your shelf support studs, always wrap a piece of masking tape or lock a mechanical collar onto your drill bit at a depth of exactly 10mm. Wardrobe side panels are typically only 15mm to 18mm thick, and plunging too deep will puncture right through to the exterior living space!

Step-by-Step DIY Installation Guide

STEP

01

Audit and Measure Internal Layouts
Map Out Storage Strategy:
Calculate where short-hung clothing layouts require space (typically 1000mm vertical clear drops) versus long dresses (up to 1600mm clear drops) and calculate remaining overhead shelf grid space.
Take Internal Clear Sizing:
Measure your internal wardrobe width at three separate height spots. Plasterboard linings and older cabinet shells frequently bow inward or out; always use the absolute narrowest point measurement for cutting components.

STEP

02

Size and Cut Melamine Shelving
Mark and Prep:
Transfer internal clear width dimensions onto your melamine board faces, accounting for a 2mm functional clearance buffer so shelves slide in without scratching internal paint finishes. Apply protective masking tape over lines.
Saw the Profiles:
Keep steady downward pressure using a fine-toothed hand saw to glide through the board core smoothly. Wear your FFP2 dust mask during this step.

STEP

03

Apply Iron-On Melamine Edging Tape
Heat Activate the Layer:
Position your melamine matching tape strip flush over raw wood sawn lines. Press down with a warm household iron set to medium heat (no steam), moving at a uniform steady rate of roughly 50mm per second to liquefy the hot-melt backing adhesive.
Trim the Overlap Flush:
Rub the hot edge immediately with a smooth block of scrap wood to bed the seal down. Once cooled for 2 minutes, use your edge trimmer or utility knife tilted at a slight angle to slice off excess tape flash lines smoothly. Run fine sand paper lightly along edges to complete the finish.

STEP

04

Map and Bore Support Stud Tracks
Mark Level Peg Paths:
Use your spirit level and tape measure to translate exact corresponding heights across left and right inside panels. Mark a front and back hole point per shelf level.
Bore Clean Holes:
Mount your wood drill bit paired with a depth stop locked strictly at 10mm. Put on your safety glasses and drill your pin holes. Push your shelf support studs firmly into the raw bored pockets.

STEP

05

Cut and Secure Clothing Rails
Sizing Down the Rail:
Subtract the combined thickness of your two end socket brackets from your internal clear width measurement. Mark this on your chrome wardrobe rail track.
Cut via Hacksaw:
Clamp your rail securely and cut along your marked line using a hacksaw. File down any sharp metal burrs left on the cut end.
Fix End Brackets:
Position your first end socket bracket roughly 250mm to 300mm away from the back wardrobe wall panel to give adequate depth for clothes hangers. Screw brackets into place using premium wood screws, then slide your cut rail home.

STEP

06

Final Shelf Fitting Assembly
Bed Shelves:
Tilt your finished, edged shelving panels gently down onto the installed support studs. Push firmly to test stability and load capacity. Ensure all connections stay locked squarely before loading heavy home storage items.
How to Upgrade Your Wardrobe with Internal Organisers: Irish DIY Guide

Wardrobe Organiser Material Calculator

1. Define New Storage Elements
2. Material Settings & Waste Profiling
Wardrobe Blueprint Assembly Layout

Estimated Basket Materials Required

Melamine Shelving Boards Needed: 0 Lengths
Chrome Hanging Rail Tube Needed: 0.00 mm
End Socket Bracket Fasteners: 0 Pcs
Metal Shelf Support Stud Pegs: 0 Pcs
Cabinet Assembly Wood Screws: 0 Pcs
Iron-On Melamine Edging Tape: 0.00 mm
Standard Fitting Basket Basket Yield Specs:
Stud Multipliers: Standard layout configuration dictates exactly 4 metallic shelf support pins required per calculated horizontal shelf unit.
Hardware Fasteners: Every end socket assembly utilizes 3 individual premium timber casing screws to handle clothes weight safely.


Get the Weekly Top Tip

Practical advice from real Topline store teams, straight to your inbox.

Locally

Owned,

Genuinely

Irish.

Contact Us
Amalgamated Hardware PLC
Trading as: Topline
Naas Industrial Estate,
Naas
Co. Kildare
W91P228

Email: info@topline.ie
Follow Us
© 2026 Amalgamated Hardware PLC. All rights reserved