How to Update Your Stair Balustrades & Spindles

The Step-by-Step DIY Guide

The DIY Checklist:
What You’ll Need

A stair renovation requires absolute accuracy and the right combination of fixing hardware, timber elements, and structural components. Gathering everything in one project basket ensures zero mid-job disruptions.
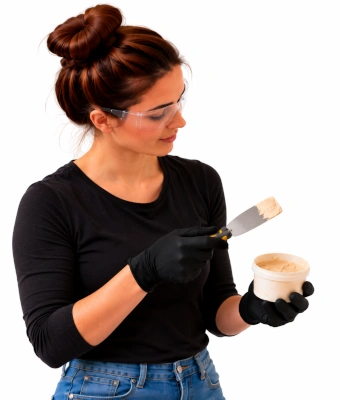
Lady holding a putty knife and tub of putty to update stair balustrades and spindles

1.

SAFETY
GEAR
(PPE)

Dust Mask / Respirator (FFP2 Rated): Crucial for protecting your lungs when cutting timber and sanding down old finishes or wood fillers.

Safety Glasses: Essential eye protection against flying wood chips and splinters during mitre cuts.

2.

TOOLS &
EQUIPMENT

Mitre saw: Indispensable for creating crisp, clean matching angle cuts on both the spindles and rails.

Cordless drill & wood drill bits: For drilling precise pilot holes and driving internal rail connectors.

Digital angle finder: Takes the guesswork out of calculating the exact pitch angle of your specific staircase layout.

Chisels: For cleaning out internal corners of baserail grooves or modifying stubborn timber junctions.

Tape measure: Essential for mapping out highly specific space measurements between individual spindles.

Spirit level: Used constantly to ensure your new handrail stays true and every spindle sits perfectly vertical.

3.

Materials, Fixings & Accessories

Timber spindles: The upright vertical pillars that provide core safety and aesthetic structure.

Baserail: Pre-grooved structural profile floor track that receives the bottoms of the spindles.

Handrail parts: The matching top grip rail section configured to enclose the upper tips of the spindles.

Handrail-to-Post Fixings (Universal Handrail Connectors): Concealed mechanical structural joints used to bind the handrail securely to the heavy structural newel posts.

Lost Head Nails or Panel Pins (38mm - 50mm): Used to firmly secure the timber spacer infill strips between each spindle inside the grooves.

Heavy-duty wood screws: For structural mechanical anchoring of base tracking elements directly into structural floor timbers.

High-performance wood glue: Provides a lasting structural bond at every joint interface to eliminate future squeaks and rattles.

Premium wood filler: Used to perfectly blend nail holes and hairline timber seams before final decoration.

Sandpaper & Sanding Block: High-grade abrasive papers to prepare the timber surfaces for smooth paint or varnish application.

Knotting Solution or Shellac Primer: Crucial to apply over real pine or timber wood knots to block natural sap and resin from bleeding through your final top coat finish.

DIY Pro Tip:
Always double check your angle reading at three different points on the staircase to verify the structure has not settled unevenly over time.

Step-by-Step DIY Installation Guide

STEP

01

Calculate the Stair Pitch Angle
Check Existing Setup:
Carefully remove a small section of your old balustrade or use your digital angle finder directly on the pitch of the stairs. Sit a straight piece of timber across the nose edges of your steps and measure the angle relative to flat level.
Establish the Magic Angle:
Most domestic staircases sit tightly between 38 degrees and 42 degrees. Lock this tracked angle value into your digital angle finder; it will act as your master cut angle template on your mitre saw.

STEP

02

Remove the Old Balustrade System
Isolate and Dismantle:
Cut the center out of old spindles to easily snap them away from their top and bottom seats. Be cautious not to twist or apply sudden heavy impacts to the main newel posts at the top and bottom of your staircase, as these are fixed securely into the floor structure.
Prep the Faces:
Clean off old residual glue, protruding fasteners, and protruding panels using your chisels and sanding block until the faces of your newel posts are smooth and clear.

STEP

03

Cut and Install the Baserail and Handrail
Measure Twice:
Calculate the exact line distance between your upper and lower newel posts. Transfer this size accurately to your baserail and handrail lengths.
Perform the Mitre Cuts:
Set your mitre saw base angle matching your stair pitch. Slice the ends of the rails so they sit perfectly flush against the inner faces of the newel posts.
Anchor the Tracks:
Apply a clean bead of wood glue to the underside of the baserail. Screw it securely to the structural timber stringer string line. For the handrail, install universal handrail connectors onto the post faces, slide the cut handrail into position, and tighten the mechanical bolts until the joint closes completely seamless.

STEP

04

Spacing Calculations (The 100mm Safety Rule)
Building safety parameters dictate a strict structural requirement: a 100mm sphere must not be able to pass through any gap in the balustrade structure at any point.
Calculate Your Spindle Count:
Measure the horizontal gap length. Spindles are typically spaced such that the open distance between two vertical spindles never exceeds 99mm. Most standard installations average two individual spindles positioned per step tread.

STEP

05

Cut and Secure the Spindles & Infill Strips
Batch Cutting Spindles:
Set a physical depth stop block on your mitre saw. Cut the top and bottom ends of your new timber spindles matching your exact stair angle. Check the vertical fit frequently with your spirit level.
Assemble the Layout Matrix:
Cut down the timber infill spacer strips that come with your pre-grooved rails to the exact spacer length calculated in Step 4. Glue and slide your first spindle into the groove against the newel post face.
Lock the System Down:
Insert a cut timber infill strip into the track channel beside it, pressing it tightly against the spindle end. Use your high-performance wood glue on all contact points, and secure the infill strips using 38mm lost head nails or panel pins driven cleanly using your hammer. Repeat row-by-row up the steps.

STEP

06

Finishing and Pre-Paint Details
Fill the Seams:
Fill all small panel pin entry points, screw holes, and hairline wood seams with premium wood filler. Let it dry completely.
Abrasive Sanding:
Sand all filled spots completely flat and smooth with your fine sanding block.
Apply Knotting Treatment:
If using natural pine or softwood components, paint every exposed wood knot with a clean coat of knotting solution. This stops active timber sap from ruining your final paintwork. Dust away all fine debris thoroughly before applying your final finish.
How to Update Your Stair Balustrades & Spindles: The Ultimate Irish DIY Guide

Custom Stair Balustrade Material Calculator

Input your staircase dimension values below to instantly establish your required material quantities, hardware elements, and exact installation spacing targets.

1. Staircase Structural Dimensions
Balustrade System Structural Preview
💡 Live schematic preview showing calculated pitch incline angle, spindle distributions, and fixing layouts.

Estimated Materials Basket Required

Handrail Length Needed: 0.00 m
Baserail Length Needed: 0.00 m
Timber Spindles Needed (incl. buffer): 0 pcs
Infill Spacer Cutting Target Length: 0 mm
Handrail-to-Post Fixings: 2 Sets
Panel Pins / Lost Head Nails: 1 Pack (Box of 100)
High Performance Wood Glue: 1 Bottle
Knotting Solution / Primer: 1 Can
Standard Structural Balustrade Matrix Rules:
• Safety Compliance Code: Spindle distribution spacing calculations are dynamically adjusted so open gaps stay below the 99mm limit.
• Rail Parts Allocation: Handrail and baserails are rounded upward to the nearest standard retail length options (e.g., 2400mm, 3600mm, or 4200mm).


Get the Weekly Top Tip

Practical advice from real Topline store teams, straight to your inbox.

Locally

Owned,

Genuinely

Irish.

Contact Us
Amalgamated Hardware PLC
Trading as: Topline
Naas Industrial Estate,
Naas
Co. Kildare
W91P228

Email: info@topline.ie
Follow Us
Topline are proud to be affiliated with:
© 2026 Amalgamated Hardware PLC. All rights reserved