
How to Create a Frozen-Inspired Mountain Mural & Snowflake Stencil Feature Wall with Dulux Easycare Disney Paint

The Step-by-Step DIY Guide
Create a Frozen-inspired bedroom using the Disney | Dulux Easycare colour palette Frosted Teal and Ice Braid. Inspired by Frozen, this project combines two popular decorative painting techniques: creating a mountain silhouette mural and applying snowflake stencils to create an eye-catching feature wall.

The project demonstrates how just two carefully coordinated colours can completely transform a child's bedroom while teaching practical decorating skills that can be used throughout the home.

The DIY Checklist:
What You’ll Need
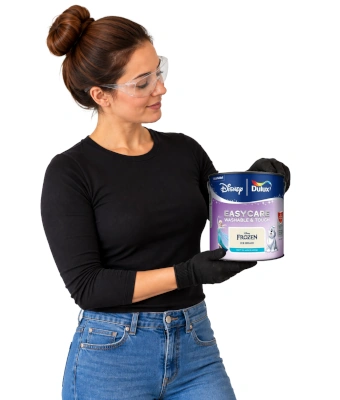
Transform a child's bedroom with a Frozen-inspired feature wall using Dulux Easycare Disney Frosted Teal and Ice Braid. By combining a mountain mural with snowflake stencil details, this easy DIY project creates a striking winter-inspired feature wall using simple decorating techniques and just two coordinated colours.
Lady holding a can of  paint to create a frozen inspired mountaing mural with dulux eascare disney paint

1.

SAFETY
GEAR
(PPE)

Dust Mask (FFP2/P2 Standard): Vital protection for your lungs when sanding filled areas and preparing walls, helping to reduce exposure to fine dust particles.

Safety Glasses: Protects your eyes from sanding dust, paint splashes, and airborne debris during preparation and decorating.

Protective Decorating Gloves: Helps keep hands clean while providing protection from paint, cleaning products, fillers, and general decorating tasks.

2.

TOOLS &
EQUIPMENT

230mm Roller Frame & Medium Pile Roller Sleeves: Ideal for covering large wall areas quickly and evenly, providing smooth, consistent coverage across both base and feature colours.

Paint Tray & Liners: Durable trays that make loading rollers quick and efficient, while liners allow for easy colour changes and faster clean-up.

50mm Synthetic Angled Paint Brush: Angled bristles are perfect for cutting in around ceilings, corners and woodwork, helping to create clean, professional edges.

Mini Roller: Ideal for painting smaller sections, detailed areas and feature wall designs where greater control is required.

Telescopic Extension Pole: Extends your reach when painting higher wall sections, improving comfort and reducing the need to frequently reposition your ladder.

Filling Knife: Flexible steel knife used to apply filler smoothly over cracks, holes and minor wall imperfections before painting.

Fine Abrasive Sandpaper (120-180 Grit): Perfect for smoothing filled repairs and lightly preparing surfaces to ensure an even paint finish.

Sugar Soap: Effective cleaning solution used to remove dirt, grease and household residue before decorating.

Decorator's Sponge: Ideal for washing walls during preparation and removing any remaining dust before painting begins.

Spirit Level: Essential for marking out straight, level guidelines and ensuring painted design elements are aligned accurately.

Tape Measure: Provides precise measurements for planning layouts, positioning design features and maintaining balanced proportions.

Pencil: Used for lightly sketching guidelines, measuring points and design outlines directly onto the wall surface.

Stencil Brush or Small Foam Roller: Designed to apply paint evenly through stencils, helping create crisp patterns and clean decorative details.

Step Ladder: Provides safe access to higher wall sections and hard-to-reach areas during preparation, painting and finishing work.

3.

Materials, Fixings & Accessories

Dulux Easycare Disney Frosted Teal (2.5L) Feature colour used for the mountain mural.

Dulux Easycare Disney Ice Braid (2.5L) Background colour used across the full wall.

Snowflake Wall Stencils Available in a variety of sizes to create depth and interest.

Polycell Multi Purpose Polyfilla Ready Mixed For repairing holes, dents and surface imperfections.

Polycell Polyfilla Decorators Caulk For sealing gaps between walls, skirting boards and architraves.

Precision Edge Painter's Masking Tape Essential for creating sharp mountain peaks and clean mural lines.

Heavy-Duty Dust Sheets To protect furniture, flooring and bedding.

Start with the Base Colour
Apply two full coats of Ice Braid across the entire wall before beginning the mural. Allow the paint to cure for at least 24 hours before applying masking tape to ensure maximum adhesion and minimise the risk of lifting the painted surface.
Seal Tape Edges for Sharper Lines
Once the mountain design has been masked, apply a light coat of Ice Braid along the tape edges before painting with Frosted Teal. This professional decorating technique seals the tape line and helps prevent paint bleed, resulting in crisp, clean mountain peaks when the tape is removed.
Remove Tape at the Right Time
For the sharpest finish, remove masking tape while the final coat is still slightly tacky rather than fully dry. Pull the tape away slowly at a 45-degree angle to achieve clean, professional-looking edges.
Position the Darker Colour Strategically
Where possible, place the darker Frosted Teal section on the wall that receives the least natural light. This helps maintain a bright, open feel while enhancing the contrast and impact of the mural design.
Less Paint Creates Better Stencils:
When applying stencil patterns, remove excess paint from your brush or roller before touching the wall. A nearly dry application produces significantly sharper snowflakes than a heavily loaded brush.

Step-by-Step DIY Installation Guide

STEP

01

Room Clear-Out & Surface Preparation
Clear the Space
Move furniture away from the working area and cover remaining items with dust sheets.
Protect flooring thoroughly before beginning any decorating work.
Clean the Walls
Wash the wall with sugar soap and clean water to remove dirt, dust, fingerprints and everyday marks.
Allow to dry completely.
Repair Wall Imperfections
Fill any cracks, dents or fixing holes using Polycell Multi Purpose Polyfilla Ready Mixed.
Allow repairs to dry fully before sanding smooth.

STEP

02

Sanding, Caulking & Masking
Smooth All Repairs
Sand filled areas using 120 to 180-grit sandpaper until flush with the surrounding wall.
Remove dust using a damp cloth.
Seal Gaps
Apply Polycell Polyfilla Decorators Caulk along skirting boards, door frames and trim as required.
Allow to skin over before painting.
Protect Room Features
Apply painter's tape to skirting boards, sockets, switches, door frames and window surrounds.

STEP

03

Paint the Ice Braid Base Coat
Cut In
Using a 50mm angled brush, paint around edges, corners and trim using Ice Braid.
Roll the Wall
Apply Ice Braid across the entire wall surface using a roller.
Work in overlapping "W" patterns and finish with light downward strokes for a professional result.
Apply a Second Coat
Allow the first coat to dry according to the manufacturer's recommendations before applying a second coat.
Once complete, allow the wall to cure for a minimum of 24 hours before progressing.

STEP

04

Design the Mountain Mural
Plan Your Mountain Range
Using a pencil, tape measure and spirit level, lightly sketch a series of mountain peaks across the wall.
Position the tallest peaks behind the bed to create the strongest visual impact.
Vary the height and spacing of each peak to create a more natural landscape.
Keep the Design Simple
The most effective mountain murals use clean, recognisable shapes rather than excessive detail.
Think bold silhouette rather than artwork.

STEP

05

Mask and Paint the Mountains
Apply Masking Tape
Follow your mountain outline with Precision Edge Painter's Tape.
Press firmly along the entire edge.
Seal the Tape Edge
Using a brush, apply a thin coat of Ice Braid along all tape edges.
Allow to dry.
Paint with Frosted Teal
Using a mini roller, apply Frosted Teal below the mountain line.
Apply two coats if necessary.
Remove the Tape
Carefully peel away the tape while the final coat remains slightly tacky.
Pull slowly at a 45-degree angle.
This will reveal sharp mountain peaks with professional-looking lines.

STEP

06

Position the Snowflake Stencils
Create a Natural Layout
Arrange larger snowflakes near the upper section of the wall.
Use smaller snowflakes to fill spaces naturally across the design.
Avoid placing snowflakes in straight rows.
Test First
Practice on cardboard or paper before working directly on the wall.
This helps you determine the correct paint loading and application technique.

STEP

07

Apply the Snowflake Stencils
Secure the Stencil
Hold the stencil firmly against the wall using low-tack masking tape.
Use Frosted Teal
Apply Frosted Teal using a stencil brush or small foam roller.
Use a gentle dabbing motion rather than brushing.
Build Colour Gradually
Several light applications will create a cleaner result than one heavy coat.
Remove the stencil carefully and repeat across the wall.

STEP

08

Final Touches
Inspect the mural and stencilled areas for consistency.
Touch up any minor imperfections using a fine brush.
Allow the wall to fully dry before returning furniture to position.
Looking for More Inspiration?
Love this look? Explore the full Dulux Easycare Disney Paint Collection in your local Topline store. With paint colours inspired by Disney, Disney and Pixar, and Marvel stories and characters, you'll find plenty of ideas for feature walls, murals and creative bedroom makeovers. Visit Topline to discover the full range and start planning your next decorating project.
Dulux Disney Frozen Mural & Stencil Feature Wall Calculator

Frozen Mural & Stencil Paint & Materials Calculator

1. Define Wall Zones Measurements in metres
Wall Label
Width (m)
Height (m)
2. Mural & Decorating Options
Mural Layout Preview 4.00m × 2.40m Wall
Ice Braid (Base)
Frosted Teal (Mural)
❄Snowflake Stencils

Estimated Materials Required

Total Feature Wall Area: 0.00 m²
Mural Mountain Zone: 0.00 m²
Dulux Ice Braid (Full Wall Base):0.00 Litres
0 Tin(s) [2.5L]
Dulux Frosted Teal (Mural & Stencils):0.00 Litres
0 Tin(s) [2.5L]
Precision Edge Painter's Tape (50m): 0 Roll(s)
Snowflake Wall Stencil Packs: 0 Pack(s)
Polycell Multi Purpose Polyfilla: 0 Tub(s) [1kg]
Polycell Decorators Caulk (310ml): 0 Tube(s)
Sugar Soap Concentrate (500ml): 1 Bottle(s)
Fine Sandpaper Pack (120–180 Grit): 1 Pack(s)
Heavy-Duty Polythene Dust Sheets: 1 Sheet(s)
Standard Material Yield Specs (UK & Ireland):
  • Dulux Easycare Disney Paint: Covers approx. 13 m² per litre per coat on sealed interior walls. Calculated for a complete 2-coat Ice Braid base plus a 2-coat Frosted Teal feature silhouette. Sold in standard 2.5L tins.
  • Precision Painter's Tape: Estimated using mountain perimeter runs, base skirting, ceiling cut-in and stencilling tack (50m trade rolls).
  • Snowflake Stencils: Multi-pack reusable stencils recommended per feature wall (small, medium & large snowflake variations).
  • Polycell Fillers & Prep: Multi Purpose Ready Mixed Polyfilla and Decorators Caulk are calculated for standard expansion joints and bedroom wall repairs.

Project Tool & PPE Checklist

1. Personal Safety (PPE)

  • FFP2 / P2 Dust Mask
  • Safety Goggles / Eye Protection
  • Protective Decorating Gloves

2. Application Equipment

  • 230mm Roller Frame & Medium Pile Sleeves
  • Paint Tray & Disposable Liners
  • 50mm Synthetic Angled Paint Brush
  • Mini Roller: For mural and stencil details.
  • Stencil Brush or Foam Dabbing Roller
  • Telescopic Extension Pole

3. Layout & Surface Preparation

  • Flexible Filling Knife
  • Decorator's Sponge & Clean Bucket
  • Spirit Level & Retractable Tape Measure
  • Carpenter's Pencil
  • Step Ladder

Top Tips for a Sharp Finish

Top Tip: Cure Time. Allow the Ice Braid base coat to cure for 24 hours before applying precision tape.
Top Tip: Tape Edge Sealing. Brush a feather coat of Ice Braid along the tape edges to seal against bleed before applying Frosted Teal.
Top Tip: Tape Removal. Peel the tape away at a 45° angle while the final coat is still slightly tacky.
Dulux® and Easycare® are registered trademarks. Formulations & specifications adapted for UK & Irish DIY and trade projects.

Get the Weekly Top Tip

Practical advice from real Topline store teams, straight to your inbox.

Locally

Owned,

Genuinely

Irish.

Contact Us
Amalgamated Hardware PLC
Trading as: Topline
Naas Industrial Estate,
Naas
Co. Kildare
W91P228

Email: info@topline.ie
Follow Us
Topline are proud to be affiliated with:
© 2026 Amalgamated Hardware PLC. All rights reserved

