Build Your Own Floor-to-Ceiling Wardrobes

The Step-by-Step DIY Guide

The DIY Checklist:
What You’ll Need

Before cutting your first board, gather all your materials, tools, and safety gear. A well-prepared workspace is the secret to a professional-looking built-in wardrobe.
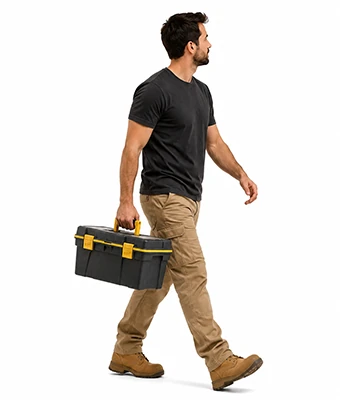
Man holding a toolbox

1.

SAFETY
GEAR
(PPE)

Dust Mask/Respirator: (Rated FFP2 or FFP3) Essential when cutting or routing MDF to protect your lungs from fine dust.

Ear Defenders: Protect your hearing when operating loud power tools like the circular saw and orbital sander.

Safety Glasses: Keeps flying sawdust and debris out of your eyes during cutting and assembly.

2.

TOOLS &
EQUIPMENT

Circular saw with a dedicated track guide rail: For making perfectly straight, splinter-free cuts on large sheet materials.

Pocket hole jig: For creating incredibly strong, hidden joints in your wardrobe carcasses.

Cordless drill driver: For drilling pilot holes, driving screws, and general assembly.

Laser level & combination square: Essential for keeping your frames perfectly vertical and square.

Tape measure: For taking exact room dimensions and marking board cuts.

Cabinet hinge hole cutter/jig: A specialized bit and guide to drill perfectly sized recesses for concealed hinges.

Brad nailer or pin hammer: For swiftly attaching the 12mm MDF backing boards.

Orbital sander & multi-grit sandpaper sheets: For smoothing rough edges and prepping panels for paint.

Caulking gun: Used to apply wood glue neatly and run lines of decorators caulk.

High-density foam mini-roller paint kit & microfibre cloth: For achieving a smooth, spray-like painted finish on your MDF doors and frames.

3.

Materials, Fixings & Accessories

18mm furniture-grade or moisture-resistant MDF sheets: The core structural material for the sides, tops, bottoms, shelves, and doors. Sold in standard 2440mm x 1220mm sheets.

12mm MDF sheets: Used exclusively for the back panels to keep the wardrobe rigid and square.

50x50mm structural timber framing studs: Used to construct the floor plinth/base unit.

Heavy-duty soft-close concealed cabinet hinges: Gives your doors a modern, quiet, premium feel.

Modern premium cabinet handles or T-bars: The finishing touch to match your room's decor.

Chrome wardrobe rails and heavy-duty end sockets: For hanging your clothes securely without the rail bowing.

Fixings: Pocket hole screws for assembly, plus rawlplugs and long screws for anchoring the wardrobes safely to the wall.

Wood Glue: Used alongside screws for permanent, rock-solid joints.

MDF Primer Sealer: Specifically formulated to seal the porous edges and faces of MDF before painting.

MDF Primer Sealer: Specifically formulated to seal the porous edges and faces of MDF before painting.

Wood Filler & Decorators Caulk: For covering screw holes and filling gaps where the wardrobe meets the walls and ceiling for a built-in look.

DIY Pro Tip:
If your room is fully carpeted, pull the carpet back where the wardrobe will sit. Always build your plinth directly onto the solid subfloor for maximum stability.
DIY Pro Tip:
To find the perfect handle placement without measuring every door individually, create a simple L-shaped cardboard template to mark your drill holes uniformly every single time.

Step-by-Step DIY Installation Guide

STEP

01

Measure & Plan the Space
Check Your Walls:
Walls and ceilings in homes are rarely perfectly straight. Measure the ceiling height at the left, center, and right of your planned wardrobe area. Take the shortest measurement as your maximum height constraint.
Design the Layout:
Sketch your wardrobes. Most internal carcasses are 600mm deep to easily accommodate standard clothes hangers. Plan your sections (e.g., hanging space, drawers, or shelving).
Leave a Shadow Gap:
Don't build the wardrobe tight to the ceiling. Leave a 50mm to 100mm gap at the top to allow you to stand the unit up and manoeuvre it. You will cover this gap later with a filler piece (scribing panel) and caulk.

STEP

02

Build the Timber Plinth (Base)
Cut the Framing:
Using your 50x50mm timber studs, cut a front and back rail the total width of your wardrobe run. Cut shorter cross-pieces to connect them every 400mm to 600mm to provide support under the vertical MDF panels.
Level It Up:
Place the plinth frame on the floor. Use your laser level and small plastic packers (shims) to ensure the frame is perfectly level. This is crucial—if your base isn't level, your doors will never align properly.
Secure It:
Screw the levelled timber plinth directly into the floor (check for pipes or cables first!).

STEP

03

Cut the MDF Panels
Set Up Your Track Saw:
Put on your dust mask, safety glasses, and ear defenders. Set your sheet of 18mm MDF on top of a sacrificial piece of rigid foam insulation so you can cut through the board fully without hitting the floor.
Cut the Carcass Pieces:
Cut your side panels, top, bottom, and internal shelves. Remember, standard depth is 600mm.
Sand the Edges:
Run your orbital sander quickly over the freshly cut edges to remove any sharpness or minor splintering.

STEP

04

Assemble the Carcasses
Drill Pocket Holes:
Drill pocket holes into the top and bottom panels (and any fixed shelves) using your pocket hole jig.
Glue and Screw:
Lay one side panel flat on the ground. Apply wood glue to the edges of your top and bottom pieces, align them squarely, and drive the pocket hole screws in. Attach the second side panel to complete the box frame.
Attach the Backing:
Flip the carcass face down. Apply a bead of wood glue around the rear edge, lay your 12mm MDF backing board flush, and secure it using your brad nailer (or small panel pins). This prevents the box from racking.

STEP

05

Position and Fix to the Wall
Lift into Place:
Stand the carcass upright and lift it onto your perfectly level timber plinth.
Anchor to the Wall:
Push it tight against the wall. Check that it is plumb (vertically straight) with your spirit level. Drill through the upper back panel straight into the wall, insert rawlplugs, and secure it with heavy-duty screws. Never skip this step—freestanding tall furniture is a tipping hazard.
Connect Multiple Units:
If building a run of wardrobes, clamp adjacent carcasses flush together and screw them to one another from the inside to create one solid, unified structure.

STEP

06

Doors, Rails & Hardware
Drill for Hinges:
Cut your doors from 18mm MDF. Use your cabinet hinge hole cutter/jig to drill the 35mm circular recesses on the inside of the door. Use at least 4 hinges for tall floor-to-ceiling doors to prevent bowing.
Mount the Doors:
Clip the hinges to their mounting plates on the carcass interior. Use the adjustment screws on the hinges to ensure the gaps between doors are perfectly even.
Install Internals:
Measure and fit the chrome wardrobe rails and heavy-duty end sockets. Standard hanging height is around 1700mm for long dresses, or split the space in half (approx 1000mm intervals) for double hanging.

STEP

07

The Built-In Finish (Scribing, Caulking & Painting)
Fill the Gaps:
Cut strips of MDF to fill the gaps between your wardrobe sides/top and the room's walls/ceiling. Scribe these to the shape of the wall and secure them into place.
Prep the Surface:
Fill any visible screw holes or imperfections with wood filler. Sand flat once dry. Run a bead of decorators caulk along all internal corners and where the filler panels meet the walls/ceiling. Smooth it out with a damp finger.
Prime and Paint:
Apply a high-quality MDF primer sealer to all surfaces—pay special attention to the exposed edges which soak up paint quickly. Once dry, lightly sand, wipe down with a microfibre cloth, and apply two coats of your chosen topcoat using the high-density foam mini-roller for a flawless, modern finish. Finally, attach your handles or T-bars.
How to Build Floor-to-Ceiling Wardrobes: DIY Guide & Calculator

Custom Drag & Drop Wardrobe Calculator

1. Design Your Wardrobe Layout
Label
Width (m)
Height (m)
Position X
2. Material Specifications
Front Elevation Preview
💡 Drag units left or right to reorder your wardrobe run.

Estimated Materials Required

Total Run Width: 0.00 m
18mm MDF Sheets (2440x1220mm): 0 Sheets
12mm MDF Sheets (2440x1220mm): 0 Sheets
50x50mm Plinth Timber: 0 Metres
Soft-Close Hinges: 0 pcs
Wardrobe Rail: 0 Metres
Handles required: 0 pcs
DIY Calculation Matrix:
18mm MDF: Calculates surface area for 2x sides, top, bottom, and front doors per carcass, divided by 2.97m² sheet capacity.
12mm MDF: Calculates total back panel area.
Hinges: Assumes 4 hinges per door for floor-to-ceiling stability.

Get the Weekly Top Tip

Practical advice from real Topline store teams, straight to your inbox.

Locally

Owned,

Genuinely

Irish

Contact Us
Amalgamated Hardware PLC
Trading as: Topline
Naas Industrial Estate,
Naas
Co. Kildare
W91P228

Email: info@topline.ie
Follow Us
© 2026 Amalgamated Hardware PLC. All rights reserved