How to Assemble, Repaint, or Upgrade a Garden Shed

The Step-by-Step DIY Guide

The DIY Checklist:
What You’ll Need

A garden shed is a cornerstone of any Irish garden, protecting tools and outdoor equipment from the elements. Whether you are assembling a new kit, sealing and repainting an existing timber structure, or upgrading it with weather-sealed insulation, buying all your materials together ensures a trouble-free project.
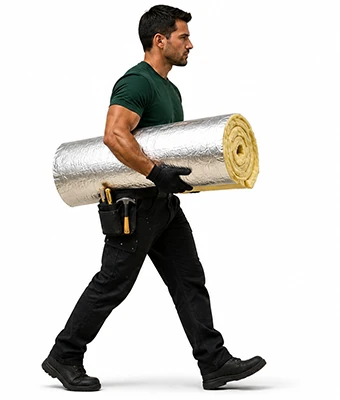
Man carrying a roll of insulation material

1.

SAFETY
GEAR
(PPE)

Gloves: Heavy-duty work gloves to prevent timber splinters, cuts, and safe handling of paints or chemical preservatives.

Eye Protection: Safety glasses are essential to guard your eyes from sawdust, flying fasteners, and chemical splashes.

Steel Toe Boots: Highly recommended to protect your feet when lifting heavy timber wall panels, framing, or paving base slabs.

2.

TOOLS &
EQUIPMENT

Cordless Drill/Driver: For quickly sinking structural wood screws, framing clips, and attaching hardware securely.

Step Ladder: Crucial for reaching upper wall panels, roof frames, and laying down roof felt safely.

Paintbrushes, Rollers, & Trays: For fast, uniform application of timber preservatives, primers, and exterior-grade topcoats.

Spirit Level: To verify that the sub-base is 100% level and that the framing stands plumb.

Tape Measure & Pencil: For precise measuring of insulation sheets, roofing felt, and frame placements.

Hammer: Required for driving felt nails and tapping structural parts into alignment.

Utility Knife: Essential for slicing thick mineral roofing felt, flashing tape, or trimming insulation panels to size.

Caulking Gun: To apply exterior adhesive or weatherproofing sealants along roof caps, seams, and trim.

3.

Materials, Fixings & Accessories

Shed Kit / Panels: Your chosen timber, plastic, or metal garden shed flatpack panel package.

Concrete/Paving Slab Base Bundle: Solid concrete paving slabs, sharp sand, and dry cement to construct a flat, moisture-proof foundation.

Base Membrane / Damp-Proof Course (DPC): Heavy-duty plastic membrane sheet to sit beneath the base frames, blocking rising soil moisture.

Exterior Primer & Paint: High-performance weatherproofing wood primer and durable exterior timber topcoat paint.

Timber Preservative: Deep-penetrating solvent or water-based preservative fluid to shield bare timber from wet rot and wood-boring insects.

Roof Felt, Felt Nails, & Felt Adhesive: High-durability mineral roof felt, broad-head clout nails, and cold-pour liquid bitumen adhesive for complete windproof roof sealing.

Exterior-Grade Screws: Corrosion-resistant, rust-proof timber deck or exterior wood screws (typically 50mm and 75mm sizes) to join panels securely.

Insulation Panels: Rigid foil-faced insulation sheets (typically 50mm thickness) to retrofit inside the framing for thermal comfort and condensation control.

Top Tip: The Base is Everything!
Never build a garden shed directly on soil or grass. Irish damp ground will rot wood floors within a single season. Always lay a completely flat, level paving slab or concrete base, and always place a heavy-duty Damp-Proof Course (DPC) membrane directly between the base and the bottom timber frame to block rising moisture.
Top Tip: Treat Every Cut Timber Edge.
Flatpack shed panels are treated at the factory, but anytime you trim a board, drill a structural hole, or make a cut, you break that protective seal. Keep a tin of timber preservative handy and brush it heavily onto all exposed end-grains or fresh cuts before final assembly.

Step-by-Step DIY Installation Guide

STEP

01

Ground Preparation & Base Laying
Clear the Spot:
Dig out your chosen garden area to a depth of roughly 100mm. Lay down a weed-blocking fabric and fill it with a compacted sub-base of aggregate.
Set the Paving Base:
Place down concrete paving slabs bedded on sharp sand. Check with your long spirit level in multiple directions; the base must be completely flat to prevent the shed panels from warping out of square during assembly. Lay down your damp-proof membrane over the base.

STEP

02

Sub-floor & Frame Layout
Position Floor Joists:
Lay down the pressure-treated floor bearers on top of your damp-proof membrane.
Secure the Floor Panel:
Position the pre-assembled floor panel on top of the bearers, check that it is level, and screw it firmly into the support timbers beneath.

STEP

03

Wall Assembly
Fix the Back and First Side:
Position the back wall panel and one side panel. Align the corners perfectly. Using your cordless drill, drive exterior-grade screws through the internal framing to join the panels tightly.
Complete the Wall Ring:
Bring in the remaining side panel and the front door panel. Ensure all corners are plumb using your spirit level, then secure them to each other and down into the floor panel frame.

STEP

04

Roof Installation & Felt Seal
Place Roof Trusses:
Fit the apex support beams or roof trusses securely across the top wall frames. Screws should sink deeply into structural studs.
Mount the Roof Boards:
Position the solid roof panels flat over the trusses and screw them down tightly.
Apply Roofing Felt:
Roll out your mineral roofing felt starting from the lower roof edge, leaving a 50mm overhang. Use cold-pour felt adhesive along the overlaps and secure the edges down with a hammer and broad-head felt clout nails spaced every 100mm.

STEP

05

Paint & Preservative Treatment
Apply Preservative:
Brush a generous coat of penetrating timber preservative over all exterior surfaces, paying close attention to end-grains, joints, and bottom edge trims. Allow to dry.
Prime and Paint:
Apply an exterior-grade wood primer to block knots. Finish with two coats of durable exterior wood paint using your rollers and brushes to give the shed a vibrant, weather-sealed aesthetic.

STEP

06

Interior Insulation Upgrade (Optional)
Fit Insulation Panels:
Measure the cavities between the internal timber wall studs. Cut your foil-faced insulation panels to size with a utility knife and push-fit them tightly into the voids.
Seal the Vapour Barrier:
Cover the insulated studs with plastic sheeting or run foil tape over all joints to prevent warm air from hitting the cold timber cladding.
How to Assemble, Repaint, or Upgrade a Garden Shed: Irish DIY Guide

Garden Shed Project Calculator

1. Define Shed Floor Footprint
Shed Section
Length (m)
Width (m)
2. Scope of Works & Upgrades
Shed Project Layout Preview

Estimated Basket Materials Required

Total Floor Footprint Area: 0.00 m²
Concrete Paving Base Slabs: 0 Pcs
Sharp Sand (25kg bags): 0 Bags
Roofing Felt (10m x 1m rolls): 0 Roll(s)
Felt Adhesive (5L tins): 0 Tin(s)
Exterior Paint & Primer (5L tins): 0 Tin(s)
Timber Preservative (5L tins): 0 Tin(s)
Rigid Insulation (2400x1200mm): 0 Sheet(s)
Standard Retail Basket Estimating Rules:
Roofing Felt: Calculated dynamically by adding a 20% surface multiplier for roof pitch, overhang, and overlaps.
Paints/Treatments: Estimated at 1 tin of treatment and 1 tin of paint/primer per 15 m² of wall surface area profile.
Insulation Panels: Each 2400mm x 1200mm rigid sheet yields 2.88 m² of insulation area coverage.

Get the Weekly Top Tip

Practical advice from real Topline store teams, straight to your inbox.

Locally

Owned,

Genuinely

Irish

Contact Us
Amalgamated Hardware PLC
Trading as: Topline
Naas Industrial Estate,
Naas
Co. Kildare
W91P228

Email: info@topline.ie
Follow Us
© 2026 Amalgamated Hardware PLC. All rights reserved