How to Construct a Custom MDF Radiator Cover

The Step-by-Step DIY Guide

The DIY Checklist:
What You’ll Need

Building a custom radiator cover hides old metalwork and gives you an extra display shelf. Because central heating units require unrestricted airflow to warm Irish rooms effectively, you must size your cabinet carcass properly and include a broad decorative mesh screen. This guide covers a complete package from raw timber panels to pocket screws, paint rollers, and essential home safety equipment.
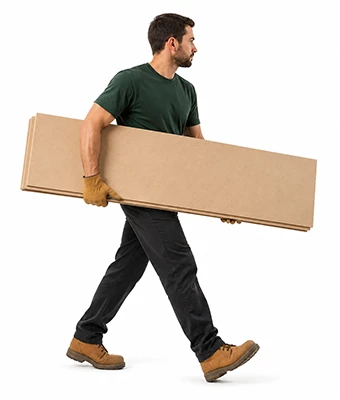
Man carrying mdf sheets

1.

SAFETY
GEAR
(PPE)

Dust Mask (FFP2 or FFP3): Crucial when cutting, routing, or sanding MDF board to prevent breathing in fine timber particles and resin binder dust.

Safety Glasses: Essential eye protection against flying sawdust and loose timber slivers from jigsaw cuts.

2.

TOOLS &
EQUIPMENT

Jigsaw: For cutting smooth internal panel cut-outs, decorative front openings, and skirting board base shapes.

Router (Optional): Used to add smooth decorative chamfers or rounded profiles onto the prominent shelf top edges.

Pocket Hole Jig: Creates strong, hidden interior corner joints for a seamless external cabinet finish.

Sander: For smoothing rough cut panels and squaring up filled edges before painting.

Paint Brush & Mini Foam Gloss Roller: Foam rollers provide a smooth finish on flat MDF surfaces without leaving brush stroke texture lines.

Clamps: Essential for holding joints flat and tight while pocket screws are driven home.

Cordless Drill & Driver Bits: Used to bore pilot holes, run pocket screw joints, and attach grille retainers.

Tape Measure, Pencil & Carpenter's Square: Guarantees 90-degree square markings so the finished project stands plumb.

Heavy-Duty Staple Gun: Fastens decorative wood or metal mesh inserts securely behind the front face frame panels.

3.

Materials, Fixings & Accessories

MDF Sheets (12mm and 18mm): Rigid engineered panels. Use thick 18mm board for the structural top mantel shelf and stable 12mm boards for the main front faces and side panels. Standard panel dimensions in Ireland are typically 2440mm x 1220mm.

Decorative Metal or Wood Grille Sheet: Provides ventilation across the radiator front, maintaining natural warm air convection currents.

Wood Glue: High-bond PVA adhesive to strengthen your timber joint connections.

Pocket Screws: Specialist flat-bottom screws designed to lock pocket-hole frames together tightly without splitting the substrate material.

Magnets for Wall Fixing: Hidden magnetic catches that hold the cover securely against the wall frame while allowing easy pull-away access for cleaning and valve adjustments.

MDF Primer: Water-resistant or specialized oil primings to seal the highly porous porous cut edges of raw panels.

Two-Part Wood Filler or MDF Edge Sealer: For filling over accidental gaps or sealing the raw, fluffy exposed edges of cut timber before primer coats.

Timber Batten (1x1 or 2x1 inch): Planed clean timber lengths fixed directly onto the wall layout, providing solid anchoring hooks for the cabinet housing.

Top Tip: Always Factor in Airflow Gaps!
To keep your home heating efficient, never make the cover too tight around the radiator. Make sure your design leaves at least 50mm of clearance at the top, 25mm at the sides, and 25mm at the bottom. This allows cold air to draw up naturally from floor level and exit out from the top grille slot easily
Top Tip: Seal the Porous MDF Edges First.
Raw cut MDF edges drink paint like a sponge and will fluff up if not sealed properly. Before applying your main color coats, sand all raw cut profiles smooth, fill them with a skim of two-part wood filler or MDF edge sealer, sand again, and use a dedicated MDF primer. This ensures a clean, professional finish.

Step-by-Step DIY Installation Guide

STEP

01

Measure and Plan Your Clearances
Take Radiator Dimensions:
Measure the maximum width (including the end valves), the total height from the floor line, and the depth extending out from the wall surface.
Add Clearance Buffers:
Calculate your interior frame minimums by adding 50mm to the total height, 50mm to the total width (25mm per side), and 25mm to the total outward depth.

STEP

02

Mark Out and Cut Your MDF Panels
Slice Main Elements:
Put on your FFP2 dust mask and safety glasses. Mark out your top mantle shelf on your 18mm MDF board. Mark out your two side cheeks and front face rails on your 12mm sheet.
Cut Profiles and Openings:
Use a straight edge guide along with your jigsaw to cut the panels. On the front face panel, mark out a large central window template for the grille sheet, drill a starter hole inside the lines, and cut it out neatly with the jigsaw.
Trace Skirting Board Profiles:
Position the side cheeks against the wall baseboard, trace the shape of your skirting board onto the bottom rear corners with a pencil scribe, and cut out the profile using your jigsaw so the unit sits completely flush against the wall.

STEP

03

Drill Joint Pockets and Pre-Assemble
Set Up Pocket Holes:
Clamp your pocket hole jig onto the inside faces of your front frame horizontal rails and side boards. Drill clean angled pockets using a specialized stepped drill bit.
Secure the Joints:
Apply a small bead of PVA wood glue to the joints. Clamp the intersections flat to prevent alignment slip, and drive your pocket screws home through the pre-drilled holes to form a rigid front frame box wrapper.

STEP

04

Treat Edges and Prime the Assembly
Seal Edges:
Spread a thin layer of two-part wood filler or MDF edge sealer over all exposed raw cut edges. Once cured, sand it smooth with 120-grit sand paper.
Apply Priming Base:
Use your mini foam gloss roller to apply a uniform coat of MDF primer across all panels. Lightly sand the dried primer coat with a fine 240-grit block to knock down any raised fibers before putting on your final choice of eggshell or satin wood finish paint.

STEP

05

Install the Decorative Grille Sheet
Size the Mesh Panel:
Flip the finished frame face down. Measure out your decorative metal or wood grille sheet so it overlaps the back frame opening border by roughly 20mm on all sides. Trim the sheet to size using your jigsaw or heavy tin snips.
Staple Frame Backing:
Lay the grille centered over the rear opening window track. Use your heavy-duty staple gun to fire staples into the timber at 100mm intervals around the perimeter, securing the grille tight against the face frame.

STEP

06

Fit Wall Battens and Secure the Unit
Mount Fixing Battens:
Position the cover carcass over your radiator wall space. Mark the interior corners with a pencil. Drill, plug, and screw short lengths of 2x1 timber batten directly onto the wall structure just underneath where the top shelf edge rests.
Apply Magnetic Catches:
Screw your hidden wall fixing magnets onto the face of the mounted timber wall battens, and line up matching steel strike plates onto the interior framing of the cover. This holds your custom radiator cabinet firmly against the wall line while still allowing you to pull it away instantly whenever you need to check valves or bleed the heating loop.
How to Construct a Custom MDF Radiator Cover: Irish DIY Guide

Custom MDF Radiator Cover Calculator

1. Define Radiator Core Dimensions
2. Cutting Configuration Settings
Radiator Cabinet Assembly Layout Preview

Estimated Basket Materials Required

Calculated Cover Width: 0mm
Calculated Cover Height: 0mm
MDF Sheet Material Area: 0.00 m²
Approx. MDF Sheets Needed: 0 Sheets
Grille Mesh Area Required: 0.00 m²
Pocket Screws Needed: 16 Pcs
Wall Fixing Magnetic Catches: 2 Sets
Timber Batten Run (2x1): 1.0m Pack
Standard Woodworking Basket Yield Rules:
Standard Airflow Allowances: Front cover calculations include a built-in 50mm top elevation gap clearance buffer, 50mm total width spacing, and 25mm depth room envelope.
MDF Yield Estimates: Material estimations cover both 18mm top shelf construction steps and 12mm panel elements consolidated into standard 2440mm x 1220mm sheets.


Get the Weekly Top Tip

Practical advice from real Topline store teams, straight to your inbox.

Locally

Owned,

Genuinely

Irish

Contact Us
Amalgamated Hardware PLC
Trading as: Topline
Naas Industrial Estate,
Naas
Co. Kildare
W91P228

Email: info@topline.ie
Follow Us
© 2026 Amalgamated Hardware PLC. All rights reserved