How to Construct a Modern Faux Fireplace Surround

The Step-by-Step DIY Guide

The DIY Checklist:
What You’ll Need

Building a modern faux fireplace surround or media wall feature is an excellent way to add a focal point, architectural interest, and cozy ambience to living areas. Since many modern Irish houses utilize electric appliances or lack structural chimney breasts, constructing a timber-framed stud feature housing an electric insert fire is a popular home improvement. Building this safely and level requires a complete basket of timber, plasterboard sheets, specialized fixings, taping materials, finishes, and necessary protection gear.
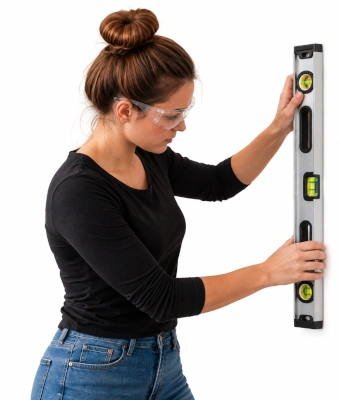
Woman holding a level to construct a modern faux fireplace surround

1.

SAFETY
GEAR
(PPE)

Dust Mask / Respirator (FFP2 Rated): Vital to protect your lungs from breathing in fine gypsum dust while cutting plasterboard and sanding down joint filler.

Safety Glasses: Essential eye protection against flying splinters when cutting framing timber or sparks/dust when driving screws.

2.

TOOLS &
EQUIPMENT

Mitre Saw or Hand Saw: For making clean, square cuts across your structural framing timber lengths.

Cordless Drill Driver: For quick, sturdy assembly of the timber framework and fastening the plasterboard skins.

Laser Level or Spirit Level: To guarantee your framework sits perfectly vertical and square against your structural room partitions.

Stud Finder: Essential for identifying structural timber points or metal tracking behind existing plasterboard partitions to anchor your new surround safely.

Tape Measure & Speed Square: For precision markings and making certain all framing junctions align at clean 90-degree angles.

Utility Knife: Used for scoring and cleanly snapping plasterboard sheets to your required sizes.

Plastering Trowel and Hawk: To apply and smooth joint filler compound neatly across seams and corners.

Filling Knife: For filling screw indentations and tight corner junctions efficiently.

Caulking Gun: To lay down clean beads of decorators caulk along wall transitions before painting.

Paint Roller Kit: For applying the primer mist coat and your chosen decorative emulsion topcoats.

3.

Materials, Fixings & Accessories

Structural Framing Timber Lengths: Kiln-dried framing timber used to construct the internal skeleton. Typically 50mm x 50mm (2x2) or 50mm x 100mm (2x4) structural lengths.

12.5mm Tapered-Edge Plasterboard Sheets: Standard interior building sheets used to skin the framework. Tapered edges allow seamless joint filling and taping.

Heavy-Duty Drywall Screws (32mm and 50mm): Black phosphate screws; 32mm screws are perfect for boarding, while 50mm screws help fasten double thicknesses or deep frames.

Wood-to-Wood Framing Screws: Heavy-duty woodscrews to securely fasten the structural timber lengths together during skeleton build.

Heavy-Duty Wall Anchor Fixings: Specialized wall anchors to tie the back frame securely into your room's structural masonry or stud partitions.

Drywall Scrim Tape (Self-Adhesive): Open-mesh fiberglass tape applied over plasterboard seams to prevent structural micro-cracking at joints.

Metal Corner Beads: Rigid protective corner strips applied to all external 90-degree angles to ensure crisp, impact-resistant edges.

Joint Filler / Ready-Mixed Skim Compound: For bedding tape, anchoring beads, and floating smooth over plasterboard joints for a seamless paint-ready wall.

Plasterboard Primer / Mist Coat: Formulated primer or thinned matte emulsion to seal porous raw plasterboard and filler before topcoating.

Decorators Caulk: Flexible acrylic gap filler to neatly seal transitions where the new surround structure meets existing plasterboard walls.

Top Tip: Account for Appliance Ventilation and Power.
Electric fire inserts generate ambient heat that must escape safely depending on the product type. Always review your chosen appliance manual before framing. Leave the exact manufacturer-recommended cut-out clearance inside the timber skeleton, and run any required double socket wiring runs or media cables inside the framework *before* you screw the plasterboard sheets into position.
Top Tip: Double Up on Internal Support Noggins.
Never rely on raw plasterboard to carry weight. If you plan to mount a heavy television, soundbar, or solid timber mantelpiece floating shelf above your faux fireplace opening, insert extra horizontal timber framing pieces (noggins) directly inside the structural frame at those exact height levels. Take a photo with a tape measure showing their positions so you know exactly where to drive your final mounting screws later.

Step-by-Step DIY Installation Guide

STEP

01

Layout and Mapping
Mark Out the Wall:
Use your tape measure, pencil, and laser level to draw the full outer dimensions of your new surround onto the floor and back wall.
Locate Studs:
Run your stud finder along the existing wall area. Mark any internal stud positions so you know exactly where your primary heavy-duty frame anchor screws can bite securely.

STEP

02

Construct the Structural Back Frame
Cut the Plates:
Cut your framing timber lengths into top plates, bottom sole plates, and vertical studs using your mitre saw or hand saw.
Fix to Structure:
Secure the rear timber frame lengths directly into the wall studs or masonry using your heavy-duty wall anchor fixings. Ensure everything stays plumb and level using your spirit level. Assemble the remaining timber cage out into the room using wood-to-wood framing screws.

STEP

03

Build the Appliance Opening and Noggins
Frame the Fire Opening:
Construct a clear, square internal timber box matching the exact rough opening dimensions required by your electric fire insert.
Install Heavy Support Noggins:
Screw additional horizontal framing timber lengths across the framework at any heights where a TV mount or heavy decorative mantelpiece shelf will eventually sit.

STEP

04

Cut and Fasten Plasterboard Sheets
Score and Snap Plasterboard:
Measure your frame sections and transfer dimensions onto your 12.5mm plasterboard sheets. Use your utility knife along a straight edge to score the face paper deep, snap the board back along the cut line, and slice through the backing paper layer.
Screw to Timber Frame:
Hold the cut plasterboard sheets tight against your timber studs. Put on your safety glasses and dust mask, and use your cordless drill driver to sink 32mm drywall screws into the boards every 150mm. Drive the screws just deep enough to dimple the paper face without tearing through completely.

STEP

05

Corner Beading and Joint Taping
Apply Scrim Tape:
Apply self-adhesive drywall scrim tape directly along all flat vertical and horizontal plasterboard sheet join lines.
Fit Metal Corner Beads:
Cut your rigid metal corner beads to height. Apply a layer of joint filler compound to the external corners of the surround structure using your filling knife, press the metal bead firmly into the wet compound to establish crisp 90-degree lines, and scrape away the excess compound.

STEP

06

Joint Filling and Floating Smooth
First Compound Coat:
Use your plastering trowel and hawk to spread a flat layer of joint filler compound directly over the mesh scrim tape and metal bead flanges, feathering the edges out smooth into the plasterboard sheets. Fill all indented screw dimples. Allow it to dry completely according to manufacturer instructions.
Second Coat & Final Sanding:
Apply a second, slightly wider finishing coat of joint compound to eliminate any remaining hollows or lips. Once fully cured, put on your FFP2 dust mask and safety glasses, and sand down all filled areas using a fine sanding block until completely flush and smooth.

STEP

07

Caulking, Priming, and Decoration
Seal Wall Boundaries:
Load your caulking gun with decorators caulk and run a clean, flexible bead along all junctions where your new faux surround meets the existing home walls and skirting lines. Smooth the bead down with a damp finger.
Apply Priming Mist Coat:
Use your paint roller kit to coat the entire structure with plasterboard primer or a mist coat to seal the highly absorbent raw plasterboard and filler compounds evenly.
Final Paint & Fire Fit:
Apply two coats of your chosen decorative wall emulsion paint. Once dry, slide your electric appliance insert carefully into the framed opening and connect its power supply safely.
How to Construct a Modern Faux Fireplace Surround: Irish DIY Guide

Faux Fireplace Material Calculator

1. Define Feature Surround Dimensions
2. Appliance Cutout Dimensions
Surround Timber Frame Blueprint Preview

Estimated Basket Materials Required

Total Plasterboard Surface Area: 0.00 m²
Plasterboard Sheets (2440x1220mm): 0 Sheets
Framing Timber Lengths (3m packs): 0 Lengths
Drywall Screws (Mixed 200pc box): 1 Box
Metal Corner Beads (2.4m lengths): 0 Lengths
Drywall Scrim Tape (90m standard roll): 1 Roll
Joint Filler / Compound (Ready Mix): 1 Tub (5kg)
Decorators Caulk (Standard Cartridge): 1 Tube
Standard Structural Basket Yield Specs:
• Timber Estimation Ratio: Framework includes floor/ceiling tracks, structural upright studs spaced roughly every 400mm, alongside internal bridging anchors and appliance aperture trimmers.
• Board Calculations: Based on industry-standard 2440mm x 1220mm plasterboard sheet profiles providing 2.97 m² coverage per skin.


Get the Weekly Top Tip

Practical advice from real Topline store teams, straight to your inbox.

Locally

Owned,

Genuinely

Irish.

Contact Us
Amalgamated Hardware PLC
Trading as: Topline
Naas Industrial Estate,
Naas
Co. Kildare
W91P228

Email: info@topline.ie
Follow Us
© 2026 Amalgamated Hardware PLC. All rights reserved