How to Fit a Heavy-Duty Bolt & Lock to Your Driveway Gate

The Step-by-Step DIY Guide

The DIY Checklist:
What You’ll Need

Securing external driveway timber or metal gates is crucial for home security. Exposed to unpredictable Irish weather and high wind loads, gates require rugged, heavy-duty ironmongery and robust structural anchoring to function smoothly year after year.
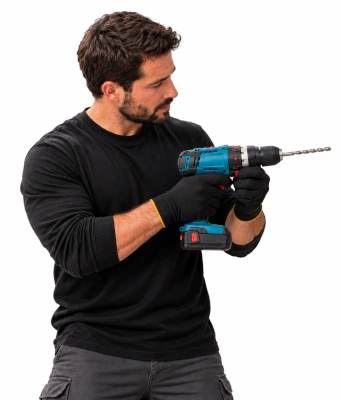
Man holding a drill to fit a heavy-duty bolt and lock to driveway gate.

1.

SAFETY
GEAR
(PPE)

Safety Glasses: Protects eyes from flying timber shavings, metal shards, and masonry chips while drilling frames or ground surfaces.

Work Gloves: Heavy-duty gloves to safeguard hands against rough timber surfaces, sharp metal edges, and heavy drill vibrations.

2.

TOOLS &
EQUIPMENT

Combi Drill: Used to bore pilot holes, clearance screw corridors, and run heavy structural fasteners into position.

Auger Wood Bit or Long HSS Drill Bit: Extra-long bits designed to cleanly bore entirely through thick gate framing timber files for carriage bolt lines.

Hammer Drill & Masonry Bit: High-impact tool to bore deep pockets into concrete, brick pavers, or tarmac driveways to receive ground sockets.

Socket Driver: Attaches to your drill or socket wrench to securely drive heavy coach screws or tighten nuts onto carriage bolt threads.

Tape Measure: Ensures exact alignments for drop distances, latch alignments, and symmetric layouts.

Spirit Level: Keeps long-throw mechanisms and vertical drop bolts perfectly straight to prevent sticky operation.

Pencil & Centre Punch: Used to accurately mark fixing arrays and create a dimple template guide so drill bits do not wander on metal or timber.

3.

Materials, Fixings & Accessories

Heavy-Duty Drop Bolts: Long vertical sliding bolts designed to securely anchor the base of the gate panels directly into the driveway surface.

Drop Bolt Ground Sockets / Receiver Pipes: Solid steel ground inserts embedded directly into the driveway to serve as an unyielding pocket for the drop bolts.

Brenton Bolts: Padlockable horizontal sliding padbolts used to lock gate panels together securely or to tie a panel to a structural side post.

Anti-Tamper Padlocks: Heavy, weather-sealed solid metal padlocks with protected shackles to secure Brenton assemblies against forced entry.

Long-Throw Gate Lock: Premium key-operated security locks with long stainless-steel deadbolts that pass entirely across gate gaps for high-strength protection.

Coach Bolts (with Nuts and Washers): Smooth-headed security fasteners inserted completely through timber gate frames to ensure ironmongery cannot be unscrewed from the outside.

Coach Screws: Heavy-duty, thick-threaded hex screws used to anchor locking brackets directly into solid internal timber structural frames.

Top Tip: Use Carriage Bolts for Security.
External gates must always use coach bolts (carriage bolts) with smooth dome heads on the outside face of the property. If you use standard wood screws, an intruder can easily unscrew the entire lock assembly from the outside with a simple screwdriver or cordless tool.
Top Tip: Account for Irish Weather and Timber Movement.
Irish rainwater causes timber gates to swell significantly during winter months and shrink during summer dry spells. Always leave a 5mm clearance buffer zone within your ground sockets and lock receivers to ensure your bolts slide freely all year round without catching or binding.

Step-by-Step DIY Installation Guide

STEP

01

Check Gate Alignment & Level
Inspect the Frames:
Ensure the gate panels are completely level, plumb, and swinging smoothly on their hinges before installing any locking gear. Adjust hinges to lift sagging corners if needed.
Determine Component Placement:
Mark the height for your long-throw gate lock (typically 1200mm above ground level) and position drop bolts at the bottom corner of the stiles.

STEP

02

Install the Long-Throw Gate Lock
Mark the Lock Body Template:
Hold the main lock body against the inner timber frame stile. Mark the keyhole cylinder entry point with your pencil.
Bore the Cylinder Hole:
Using a high-speed auger bit or flat wood spade bit matching the lock instructions (typically 26mm or 28mm diameter), drill straight through the timber stile. Keep the drill perfectly horizontal.
Bolt the Housing Securely:
Push the cylinder lock housing through the stile from the inside. Mark the mounting holes, drill pilot paths, and drive heavy carriage bolts through the frame to clamp the lock tight. Tighten nuts securely from the inner side.

STEP

03

Secure the Brenton Padbolt
Align Across Gate Join:
Position the horizontal sliding Brenton bolt across the center line gap where two panels meet (or against the post for single gates). Ensure the slider travels completely into the receiver loop.
Drill Fixing Clearances:
Mark the square coach bolt slots, drill holes completely through the gate thickness, and drive coach bolts home from the exterior face. Add washers and tighten nuts on the inside using a socket driver.

STEP

04

Position and Fit Vertical Drop Bolts
Mount the Bolt Body:
Place the heavy-duty drop bolt vertically on the base frame. Use your spirit level to verify it is completely plumb. Secure it using heavy-duty timber coach screws driven deep into the framing wood.
Mark Ground Strike Point:
Push the bolt down until the steel rod tip contacts the driveway floor surface. Trace the exact footprint circle using a pencil or centre punch to prepare for ground drilling.

STEP

05

Bore Ground Sockets Into Driveway
Prepare the Hammer Action:
Lift the drop bolt up out of the way. Fit your safety glasses and dust mask. Equip your heavy hammer drill with a masonry bit matching the diameter of your ground receiver pipe or socket capsule.
Drill Ground Pocket Depth:
Bore straight down into the concrete, tarmac, or brick paving stone. Ensure the pocket depth runs roughly 10mm deeper than the socket length to accommodate any internal dust settlement. Clear dust from the hole.
Set the Socket Capsule:
Tap the ground socket sleeve firmly into the drilled stone void using a hammer until it sits flush with the driveway surface line. Slip the drop bolt down to check that it slides effortlessly in and out of the ground pocket.

STEP

06

Fit Lock Keeps & Striker Plates
Anchor the Latches:
Attach the receiving keeps for the long-throw lock and Brenton padbolt on the adjacent gate panel or timber post. Use matching robust security fasteners.
Lubricate and Test:
Test all key operations, sliding mechanics, and drop clearances. Apply a light squirt of graphite powder or silicone lubricant into lock mechanisms to keep them turning smoothly in wet Irish coastal conditions. Hang your anti-tamper padlocks onto the Brenton slots to finish the job.
How to Fit a Heavy-Duty Bolt & Lock to Your Driveway Gate: Irish DIY Guide

Gate Hardware Basket Calculator

1. Define Gate Setup Configuration
2. Material Hardware Choices
Ironmongery Attachment Grid View

Estimated Basket Items Required

Heavy-Duty Drop Bolts: 0 Pcs
Ground Sockets / Receiver Pipes: 0 Pcs
Padlockable Brenton Bolts: 0 Pcs
Anti-Tamper Shackle Padlocks: 0 Pcs
Premium Long-Throw Gate Lock: 1 Unit
Security Coach Bolts Needed: 0 Pcs
Heavy Timber Coach Screws: 0 Pcs
Standard Security Basket Yield Rules:
• Double Gates: Require 2 individual drop bolts plus 1 Brenton bolt to tie leaf structures together securely.
• Fastener Counts: Long-throw bodies utilize 4 deep coach bolt channels. Brenton plates take 4 coach bolts and drop bolt tracks utilize 6 heavy coach screws into timber lines.


Get the Weekly Top Tip

Practical advice from real Topline store teams, straight to your inbox.

Locally

Owned,

Genuinely

Irish.

Contact Us
Amalgamated Hardware PLC
Trading as: Topline
Naas Industrial Estate,
Naas
Co. Kildare
W91P228

Email: info@topline.ie
Follow Us
Topline are proud to be affiliated with:
© 2026 Amalgamated Hardware PLC. All rights reserved