How to Fit an Outdoor Tap & Frost Protection Jacket

The Step-by-Step DIY Guide

The DIY Checklist:
What You’ll Need

Installing an outdoor garden tap involves modifying your home's internal cold water supply line. Sourcing your entire tool and materials kit in a single basket ensures you can isolate, splice, mount, and seal the run without mid-project store trips.
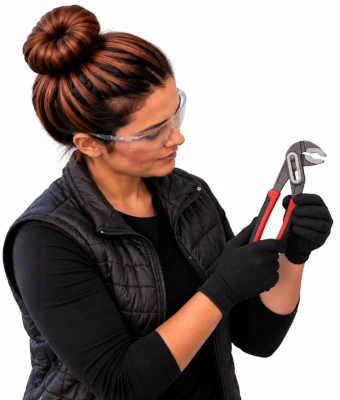
Lady holding a tongue-and-groove (channel-lock style) pliers to fit an outdoor tap & frost protection jacket

1.

SAFETY
GEAR
(PPE)

Safety glasses: Essential protection against copper shards during cutting and masonry fragments during wall drilling.

Dust Mask (FFP2 Rated): Protects your lungs from brick and concrete dust generated when boring through external structural walls.

2.

TOOLS &
EQUIPMENT

Pipe cutters: Handheld wheel slice cutters for achieving perfect, burr-free square cuts on 15mm copper piping.

Adjustable wrenches: Two high-quality adjustable wrenches are required to hold compression fitting bodies steady while tightening up the back nuts.

Masonry drill: Heavy-duty rotary hammer drill to efficiently bore structural concrete blockwork or stone walls.

Core drill bit / Long masonry drill bit: A 16mm diameter extra-long drill bit to bore a clean through-way pathway across standard insulated house walls.

3.

Materials, Fixings & Accessories

Brass outdoor tap kit: Includes a premium brass bib-tap with a standard garden hose connection profile.

15mm copper piping: Standard rigid line stock to bridge the gap from your interior main straight out to the exterior wall face.

Self-tapping wall flange / Wall-plate elbow: A heavy brass anchor base that screws directly onto the exterior wall surface to firmly lock the outdoor tap structure into place.

Compression fittings: High-performance 15mm straight couplers or elbows. These use a brass olive ring mechanism to create watertight seals without soldering.

PTFE tape: Professional thread sealant tape wrapped over threaded joints to stop microscopic water leaks.

An Isolation Valve (Ball Valve): Fitted inside the house to safely shut down water to the outside tap line during freezing weather.

Double Check Valve (Non-Return Valve): A mandatory mechanical valve that blocks outdoor garden water from siphoning backward into your domestic indoor clean drinking lines.

Wall Plugs & Screws: Weather-resistant fixings to secure the external wall flange flat against brickwork.

Pipe Clips / Saddles: Plastic or copper clips spaced evenly to steady the new pipe network against the wall.

Insulated tap jacket: A heavy-duty foam or padded fabric outer enclosure jacket that slots over the external tap to prevent ice blockages and split pipes during harsh Irish winters.

Tee-Piece Fitting: A 15mm compression three-way junction piece to splice into your existing cold water mains line.

The Mandatory Plumbing Rule:
Irish water regulations state that you MUST install a Double Check Valve on any line feeding an outdoor tap. This mechanical safety barrier stops contaminants like lawn fertilizers or muddy puddle water from siphoning back into your family’s clean drinking water lines if mains pressure drops.
DIY Pro Tip:
Always drill from the inside outward, holding the drill at a very subtle downward angle toward the outside. This built-in slope ensures that if any rainwater manages to trace along the outer pipe face, it cannot run backward into your home's wall cavity.
The Winter Golden Rule:
When winter frost advisories hit Ireland, close your indoor isolation valve fully. Go outside and open the external brass tap completely. This allows the water inside the outer pipe section to bleed away safely. If water remains inside a frozen pipe, it expands dynamically and will crack the brass or split the copper line wide open.

Step-by-Step DIY Installation Guide

STEP

01

Locating the Cold Water Supply Face
Pick Your Splicing Point:
The simplest approach is to locate the cold water pipe running beneath your kitchen sink or inside an utility room utility cabinet directly adjacent to an outer garden wall face.
Isolate the Mains:
Turn your home’s main stopcock valve completely off clockwise. Open the kitchen sink cold tap to drain the remaining system residual water down into the plug hole until the flow stops entirely.

STEP

02

Boring the Pipe Hole Through the Wall
Map out the Hole Location:
Mark a drill point on the interior wall face matching where the pipe will exit. Ensure it leaves the tap hanging at a comfortable height outside (typically 500mm to 600mm above ground level).
Bore with a Gradient:
Fit your safety glasses and FFP2 dust mask. Drill cleanly through the wall using a 16mm long masonry drill bit.

STEP

03

Splicing into the Main Line
Cut the Mains Line:
Use your pipe cutters to drop a clean 20mm section out of your existing interior cold water mains copper line. Keep a small bucket underneath to catch trapped water drops.
Assemble the Tee Junction:
Insert your 15mm compression Tee-piece fitting into the newly created gap. Slide the nut and brass olive over the pipe end, push the pipe fully into the fitting socket, and hand-tighten the nut.
Double-Wrench Method:
Use one adjustable wrench to firmly hold the body of the Tee fitting static, while using your second adjustable wrench to tighten up the nut. A three-quarter turn past hand-tight is generally required to crush the olive for a permanent seal. Do not over-tighten, or you risk distorting the brass olive.

STEP

04

Mounting Internal Valves and Running Pipework
Install the Indoor Isolation Valve:
Fit a 15mm compression ball valve directly inline right after the Tee joint. This acts as your winter master isolator. Ensure the handle profile remains accessible inside your cupboard.
Install the Non-Return Check Valve:
Place the double check valve downstream of the isolation valve. Observe the small arrow stamped into the brass body; it must point in the exact direction of the outward water travel line.
Pass the Line Outward:
Push a clean segment of 15mm copper piping straight through the bored masonry hole cavity out to the exterior garden space.

STEP

05

Securing the Exterior Wall Plate and Tap
Position the Wall-Plate Elbow:
Outside, slide the brass wall-plate elbow onto the copper pipe tail end. Hold it level against the brickwork, mark the fixing positions, drill holes using your masonry drill, insert your wall plugs, and screw the plate securely flat to the wall face.
PTFE Thread Wrapping:
Wrap PTFE thread tape tightly clockwise roughly 6 to 8 times around the threaded male base of your new brass bib-tap. Wrapping clockwise ensures the tape layers tighten down instead of unravelling when screwed home.
Screw the Tap In:
Wind the tap thread firmly into the wall-plate elbow until it sits vertically aligned. Connect up the compression fitting nut onto the copper supply line underneath the assembly.

STEP

06

Leak Testing & Frost Protection Enclosure
Pressurize the Lines:
Ensure the outside tap is shut off. Open your indoor isolation valve. Slowly turn your home's main stopcock counter-clockwise to restore water mains pressure.
Inspect the Joints:
Wipe all compression joints completely dry with a tissue. Watch closely for a few minutes for any signs of water dampness. If a weep occurs, apply a slight quarter-turn twist to the compression nut.
Fit Winter Guard:
Slip your insulated tap jacket over the tap body structure immediately, drawing the toggle cords tight against the brick wall plate.
How to Fit an Outdoor Tap & Frost Protection Jacket: Irish DIY Guide

Interactive Outdoor Tap & Materials Calculator

1. Measurement Inputs
2. Extra Configuration Elements
Dynamic Blueprint Loop Simulation

Estimated Project Materials Basket

Total 15mm Copper Pipe Needed: 0.00 metres
Brass Outdoor Tap Kit (Bib-Tap): 1 Unit
15mm Compression Tee Fittings: 1 pc
15mm Compression Elbow Fittings: 0 pcs
15mm Indoor Isolation Valve: 1 Unit
15mm Double Check Non-Return Valve: 1 Unit
Professional PTFE Thread Sealing Tape: 1 Roll
Secure Plastic Pipe Clips & Saddles: 0 pcs
Insulated Thermal Tap Jackets: 1 Unit
Standard Irish Domestic Plumbing Matrix:
Sizing Standards: Calculations are structurally calibrated to align with modern Irish standard residential internal plumbing setups utilizing 15mm diameter copper pipe pathways.
Clip Ratios: Secure line fixing guidelines require anchoring plastic line clips at uniform intervals of 0.5 metres across horizontal and vertical pipe runs.


Get the Weekly Top Tip

Practical advice from real Topline store teams, straight to your inbox.

Locally

Owned,

Genuinely

Irish.

Contact Us
Amalgamated Hardware PLC
Trading as: Topline
Naas Industrial Estate,
Naas
Co. Kildare
W91P228

Email: info@topline.ie
Follow Us
© 2026 Amalgamated Hardware PLC. All rights reserved