How to Fit Modern New Skirting Boards

The Step-by-Step DIY Guide

The DIY Checklist:
What You’ll Need

Installing new skirting boards is an excellent way to clean up the look of any room. In Irish houses, you will regularly deal with either solid masonry block interior walls or hollow plasterboard stud partition walls. To guarantee a professional, long-lasting installation, you must pick the correct fixings and planning strategy to secure your wood straight and flush.
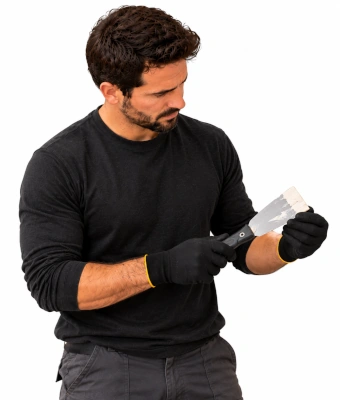
Man holding a putty knife, to fit modern new skirting boards

1.

SAFETY
GEAR
(PPE)

Dust Mask (FFP2 or FFP3 grade): Critical to prevent breathing in harmful particles when cutting MDF profiles or sawing natural pine timber.

Safety Glasses: Essential eye protection against flying splinters when using manual or powered mitre saws, and block grit when hammering masonry anchors.

2.

TOOLS &
EQUIPMENT

Mitre Saw: Used to cut completely clean, precise 45-degree angle profile joins for the external wall corners.

Coping Saw: Essential for profile cutting the internal corner joints (scribed joints) so the profile contours overlay perfectly.

Caulking Gun: To smoothly run beads of high-strength grab adhesive along the board backing and flexible acrylic caulk into the final top wall seam lines.

Hammer & Nail Punch: For driving panel pins or masonry nails entirely below the wood surface profile face without marking the timber trim finish.

Tape Measure & Pencil: For tracking running wall perimeter requirements and marking accurate square template paths.

Crowbar / Pry Bar: Used to easily pop away stubborn old skirting runs without breaking or punching holes in fragile plaster linings.

Wood Chisel or Scraper: To scrape away old residual mortar fragments, old caulking lines, or glue lumps left behind on bare masonry faces.

3.

Materials, Fixings & Accessories

MDF or Pine Skirting Boards: The main wood trim molding profiles, commonly sourced in convenient pre-primed lengths such as 4200mm or 2400mm runs.

High-Strength Grab Adhesive: Premium gap-filling adhesive compound applied in continuous zigzag patterns along the backing board paths for primary hold.

Panel Pins: Small, slim headless wire fasteners driven through the timber face into timber wall studs or backing frameworks.

Masonry Nails or Screws & Wall Plugs: Heavy-duty mechanical anchor elements required specifically to hold boards flush against uneven, hard concrete block interior partitions.

Acrylic Caulk: Flexible paintable decorators filler compound used to bridge the thin horizontal gap where the top edge of the board runs against the wall line.

Flexible Wood Filler or Two-Part Styrene Filler: For patching over inset nail head indentation pockets and hiding mitre corner seam gaps perfectly before paint application.

Top Tip: Scribe Internals, Mitre Externals!
Walls are rarely completely square. If you try to mitre cut both boards at 45 degrees for internal corners, the joint will almost always open up. Instead, cut the first board square into the corner, and use a coping saw to cut the profile contour pattern on the second board so it sits perfectly over the face of the first board. Save your 45-degree mitre cuts exclusively for external corners.
Top Tip: Match Your Fixing Strategy to the Wall.
If you are anchoring into an Irish blockwork wall, glue alone will struggle with surface bows. Use a heavy-duty grab adhesive combined with masonry nails or wall plugs spaced every 600mm to pull the wood tight against the structure. For plasterboard partition tracks, find the underlying vertical timber studs using a stud finder and drive your panel pins directly into them.

Step-by-Step DIY Installation Guide

STEP

01

Strip and Prepare the Wall Lines
Remove Old Skirting:
Insert your wood chisel or scraper carefully behind the top edge of your existing skirting to open a small gap. Slide your pry bar down into the gap, placing a scrap wood block behind the bar to protect the plaster from cracking, and gently pry the old board away from the wall structure.
Clean Up the Base Track:
Knock away any loose plaster or remaining adhesive lumps with your scraper. The bottom 150mm of the wall surface must be clear and flat before you install the new boards.

STEP

02

Measure and Cut the First Runs
Start on the Longest Wall:
Measure the length of your longest flat wall from corner to corner. For a straight run between two walls, cut your first skirting board completely square on both ends.
Check the Dry Fit:
Place the cut board against the wall base to verify that it drops flat between the boundaries without binding.

STEP

03

Handle Internal Corners using Scribed Joints
Cut the Overlay Profile:
For the adjoining internal corner piece, make a 45-degree mitre cut on the end of the board using your mitre saw. This reveals the contour line of the molding profile on the face of the wood.
Cope the Line:
Tilt your coping saw at a slight reverse angle and carefully cut along the revealed molding line to remove the timber backing. When pushed home, this custom contour face will fit neatly over the front profile of your first board.

STEP

04

Cut External Corner Mitres
Set the Mitre Angle:
For external corners, set your mitre saw angle precisely to 45 degrees.
Cut the Matching Pieces:
Cut the left-hand board at a 45-degree angle, then cut the right-hand board at the opposite 45-degree angle. Test fit the two pieces together on the external corner to ensure the vertical seam lines up neatly.

STEP

05

Apply Adhesive and Fix into Position
Gun the Glue:
Load your high-strength grab adhesive tube into the caulking gun. Apply a continuous zigzag bead of glue along the back face of your cut skirting board.
Anchor into the Substrate:

Press the board firmly against the wall base.

  • For Masonry Blocks: Drive masonry nails through the face of the board every 600mm, or drill through the board into the block, insert a wall plug, and drive a screw home flush.
  • For Stud Partitions: Drive panel pins through the wood face into the vertical timber studs. Use your nail punch to sink all nail heads 2mm below the surface of the timber face.

STEP

06

Fill, Caulk, and Finish Seams
Fill Nail Holes:
Pack flexible wood filler or two-part styrene filler over all inset nail head marks and corner joint lines. Once dry, sand the filler down smooth and flush with the wood.
Seal the Top Wall Track:
Run a neat, continuous line of paintable acrylic caulk along the top junction where the skirting meets the wall. Wipe it clean with a damp cloth or a profiling tool for a smooth finish that accommodates natural house movement.
How to Fit Modern New Skirting Boards: Irish DIY Guide

Skirting Board Material Basket Calculator

1. Track Room Perimeter Sections
Wall Run Identifier
Length (Metres)
2. Installation Parameters
Room Base Trim Assembly Preview

Estimated Basket Materials Required

Total Measured Perimeter: 0.00 m
Skirting Board Profile Runs: 0 Boards
High-Strength Grab Adhesive: 0 Tubes
Paintable Acrylic Caulk: 0 Tubes
Mechanical Fixings Basket: 0 Pcs
Surface Flexible Wood Filler: 1 Pack
Standard Hardware Basket Yield Rules:
• Adhesive Coverage: One standard tube of gap-filling grab adhesive yield tracks roughly 6 linear meters of backing application.
• Caulk Yield: One standard tube of decorator's acrylic caulk bridges roughly 10 linear meters of top-edge wall seam lines.


Get the Weekly Top Tip

Practical advice from real Topline store teams, straight to your inbox.

Locally

Owned,

Genuinely

Irish.

Contact Us
Amalgamated Hardware PLC
Trading as: Topline
Naas Industrial Estate,
Naas
Co. Kildare
W91P228

Email: info@topline.ie
Follow Us
Topline are proud to be affiliated with:
© 2026 Amalgamated Hardware PLC. All rights reserved