How to Fit Rigid PIR Insulation Boards to Garage Walls

The Step-by-Step DIY Guide

The DIY Checklist:
What You’ll Need

Converting your garage into a workshop, home gym, or utility room requires a solid moisture and heat barrier. Uninsulated single-skin garage walls are major sources of cold and dampness in typical Irish environments. Upriding this space requires a reliable basket of insulation sheets, adhesives, robust masonry fixings, and necessary protection gear.
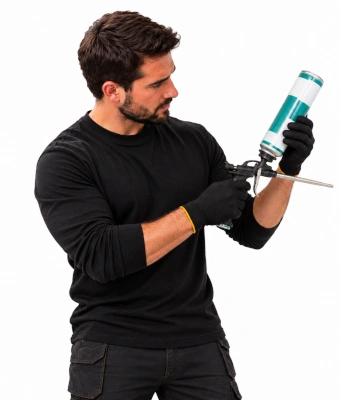
Man holding a foam gun to fit rigid PIR insulation boards to garage walls

1.

SAFETY
GEAR
(PPE)

Dust Mask (P2 or FFP2): Critical for keeping masonry dust from drilling and small insulation particles out of your lungs.

Safety Glasses: Essential eye protection from flying brick fragments, stone debris, and adhesive spray.

2.

TOOLS &
EQUIPMENT

Fine-Tooth Hand Saw: For cutting through rigid insulation boards with straight, neat edges.

Foam Applicator Gun & Foam Gun Cleaner: Provides precise control when laying down structural adhesive foam ribbons and cleaning the tool afterward.

SDS Hammer Drill & Extra-Long Masonry Drill Bit (8mm or 10mm): For hammering deep, straight fixing holes through the insulation board and deep into hard block or concrete walls.

Rubber Mallet: For safely driving mechanical insulation fixings into place without snapping the plastic retention caps.

Utility Knife & Long Straight Edge: For cutting foil skins, trimming board adjustments, and scoring straight lines.

Tape Measure: For accurate sizing across uneven garage wall boundaries.

3.

Materials, Fixings & Accessories

Rigid PIR Insulation Boards (Foil-Faced): High-efficiency rigid foam insulation sheets, typically used in sizes like 2400mm x 1200mm. Common thicknesses for garage interior walls range from 50mm up to 100mm.

Insulation Adhesive Foam: Low-expansion polyurethane foam adhesive canisters designed to firmly bond foil insulation directly onto blockwork.

Mechanical Insulation Fixings: Heavy-duty plastic expansion anchors (often called 'mushrooms' or 'bungs') sized long enough to go through the board thickness and bite at least 50mm into the brickwork.

Foil Joint Tape (Aluminium Tape): Heavy-duty metallic adhesive tape to cover all board seams, creating a continuous airtight vapour barrier.

Top Tip: The Dual-Fix Method.
In the damp Irish climate, relying entirely on foam adhesive is risky. Concrete block walls can sweat or hold ambient dampness, which can degrade adhesive bonds over time. Always combine low-expansion adhesive foam with specialized mechanical insulation fixings (at least 5 anchors per full 2400mm x 1200mm sheet) to make sure your boards stay completely secure.
Top Tip: Leave an Airtight Seal at the Floor.
Garages are prone to pooling threshold leaks and floor wash dampness. Elevate your insulation sheets roughly 10mm off the raw garage concrete floor slab using scrap timber wedges during fitting. Once the adhesive foam dries, pull the wedges out and completely seal that bottom horizontal track gap with a thick, continuous line of low-expansion foam to block rising moisture.

Step-by-Step DIY Installation Guide

STEP

01

Wall Inspection & Prep
Check for Dryness:
Ensure the masonry wall surface is clean, sound, and free of active leaks or crumbling mortar. Deal with any external leaks or cracked exterior render before sealing the interior face.
Mark Out Your Board Lines:
Map out where each full sheet will sit. Plan your cuts so that vertical board seams are staggered, which creates a stronger wall assembly.

STEP

02

Size and Cut Your Insulation Sheets
Measure and Score:
Measure your wall height and transfer the numbers to your first board.
Cut the Boards:
Use your fine-tooth hand saw to cut through the board along your straight edge. Alternatively, score the foil skin deep with a utility knife, snap the board over a sharp edge, and slice through the reverse foil layer. Wrap raw cut edges with foil tape if the core starts crumbling.

STEP

03

Gun the Adhesive Foam
Load the Applicator:
Thread your adhesive foam canister tightly into your applicator gun and shake it vigorously for 30 seconds.
Run the Foam Ribbons:
Apply a continuous perimeter bead of adhesive foam roughly 30mm inside the edge of the board face. Then, run horizontal or vertical parallel ribbons across the center of the board spaced roughly 300mm apart. Let the foam sit for 2 to 3 minutes to turn tacky before mounting.

STEP

04

Press and Align the Boards
Set the Gap:
Put your 10mm timber floor spacer wedges in position along the floor base track.
Bed Onto Wall:
Lift the board into place, push it firmly up against the bare block wall, and hold pressure for 1 to 2 minutes. Use your long straight edge across the face to make sure the board sits flat and plumbs up squarely with adjoining sheets.

STEP

05

Install Mechanical Anchors
Wait for Adhesive to Tack:
Allow the adhesive foam to cure for roughly 1 hour so the boards are locked into position.
Drill through the Boards:
Fit your safety glasses and P2 dust mask. Using your SDS hammer drill and a long masonry bit, drill holes directly through the insulation face and into the block wall behind. Drills should go roughly 10mm deeper than the length of your plastic anchor plug. Space anchors at the four corners and one right in the center of each sheet.
Drive the Anchors Home:
Push the plastic mechanical fixing plug into the hole. Tap it flush against the insulation foil face with your rubber mallet, then drive the center locking pin home to lock the anchor into the masonry.

STEP

06

Seal Seams for an Airtight Vapour Barrier
Foam Open Gaps:
Fill any accidental gaps wider than 5mm between the sheets using a small squirt of your expansion adhesive foam. Once cured, trim it flat with a utility knife.
Apply Foil Joint Tape:
Center your aluminium foil tape over all vertical and horizontal board junctions. Press down firmly with a cloth or plastic scraper to remove air bubbles, making sure the seams are completely airtight. This step is critical to prevent warm room air from hitting the cold block wall and forming structural condensation.
How to Fit Rigid PIR Insulation Boards to Garage Walls: Irish DIY Guide

Garage Wall Insulation Calculator

1. Define Garage Wall Sections
Wall Location Label
Length (m)
Height (m)
2. Product Dimensions & Buffers
Insulated Wall Assembly Preview

Estimated Materials Required

Total Wall Surface Area: 0.00 m²
Rigid PIR Insulation Boards: 0 Sheets
Adhesive Foam Canisters: 0 Cans
Mechanical Insulation Fixings: 0 Anchors
Aluminium Foil Tape Needed: 0 Rolls (50m size)
Foam Gun Cleaner Units: 1 Can
Standard Insulation Yield Specs:
• Adhesive Coverage: One standard canister of heavy-duty low-expansion insulation foam adhesive yields roughly 5 m² of board face application area.
• Fixing Frequency Matrix: Calculated at a robust frequency of 5 individual mechanical expansion anchors per full 2400mm x 1200mm sheet area profile to secure the assembly long-term.


Get the Weekly Top Tip

Practical advice from real Topline store teams, straight to your inbox.

Locally

Owned,

Genuinely

Irish.

Contact Us
Amalgamated Hardware PLC
Trading as: Topline
Naas Industrial Estate,
Naas
Co. Kildare
W91P228

Email: info@topline.ie
Follow Us
Topline are proud to be affiliated with:
© 2026 Amalgamated Hardware PLC. All rights reserved