How to Hide Your Wheelie Bins with a Timber Screen

The Step-by-Step DIY Guide

The DIY Checklist:
What You’ll Need

Wheelie bins are a necessity for every Irish home, but they rarely complement your garden landscaping or kerb appeal. Building a dedicated timber screen elegantly conceals your recycling, waste, and compost bins while allowing functional access. Given Ireland's high rainfall and wind exposure, choosing pressure-treated structural timber, strong ironmongery, and deep ground fixings will ensure your freestanding screen stays secure and upright long-term.
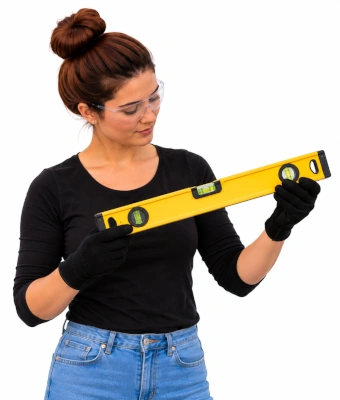
Woman holding a level, how to hide your wheelie bins with a timber screen

1.

SAFETY
GEAR
(PPE)

Dust Mask (FFP2 Rated): Crucial when cutting pressure-treated timber to avoid inhaling chemical wood preservatives or fine sawdust.

Safety Glasses: Essential eye shield to protect from flying wood splinters or debris when drilling and sawing.

Heavy-Duty Gloves: Protects hands from splinters, rough timber edges, and harsh chemical treatments during assembly.

2.

TOOLS &
EQUIPMENT

Miter Saw: Ideal for making clean, perfectly square 90-degree cuts across your posts, rails, and decorative slats.

Cordless Drill & Driver Bits: Used for fast, smooth piloting and driving of weather-resistant structural exterior fasteners.

Tape Measure: For precise planning and marking out bin clearance limits.

Spirit Level: Critical to ensure your structural posts stand dead vertical and your horizontal slats run completely true.

Post-Hole Digger / Shovel: Essential for excavating deep, narrow earth sockets to anchor the frame against strong winds.

Pencil: For transferring calculated layout spacing points and trim lines onto timber faces.

3.

Materials, Fixings & Accessories

Treated Timber Slats (Relish Style): Contemporary timber fencing slats, typically measuring 38mm x 16mm or 44mm x 19mm, used to form the modern horizontal screening camouflage.

2x2 Structural Posts (50mm x 50mm): Pressure-treated square timber posts that act as the primary structural frame anchored into the earth.

Gate Frame Timber: Heavier robust timber square stock (typically 75mm x 50mm) used to build rigid, non-sagging internal door opening subframes.

Exterior Wood Screws: High-grade premium coated carbon steel or stainless steel decking style wood screws designed to resist rust streaks.

Postcrete (Rapid-Set Post Concrete): Fast-curing dry blended concrete bags designed to hold the framing posts permanently level in the ground.

Gate Hinges: Weatherproof heavy-duty tee hinges or strap hinges to handle heavy external usage profiles safely.

Heavy-Duty Ring Latch or Padbolt: Secure outdoor operational latching mechanisms to keep your service doors tightly shut during coastal winter gales.

Screws for the Hinge & Latch: Thick heavy-gauge exterior structural wood fasteners matching the ironmongery assembly openings.

End-Grain Preservative: Specialized brush-on chemical wood sealer applied over all fresh cuts to keep dampness from wicking into raw timber fibers.

Top Tip: Account for Flat Ground Clearance and Wheelie Operations.
Wheelie bins are heavy when fully loaded. Ensure the ground surface inside your screen footprint is hard, flat, and level (ideally concrete paving slabs or tarmac). Avoid loose gravel floors inside the screen structure, as it makes rolling the bins in and out on collection days incredibly frustrating.
Top Tip: Seal All Fresh Cut Ends!
Pressure treatment only penetrates a certain depth into the wood structure. Whenever you use your miter saw to cut a slat or post to length, you expose raw, untreated timber. Always paint a generous coating of liquid End-Grain Preservative onto every raw cut face before screwing it into place to protect against the wet Irish climate.

Step-by-Step DIY Installation Guide

STEP

01

Layout Planning & Post Hole Preparation
Measure Your Bins:
Measure the width, depth, and height of your standard Irish wheelie bins altogether. Leave at least 150mm of breathing space around each side and 100mm of clearance at the top to allow lids to open easily.
Dig Your Post Holes:
Use your spade or post-hole digger to sink holes at your corner markers. Holes should be roughly 300mm wide and at least 600mm deep to ensure the screen stands up safely against high winter wind loads.

STEP

02

Set and Concrete the Support Posts
Position the Posts:
Lower your 50mm x 50mm structural posts down into the open holes. Use your spirit level to verify that they stand perfectly upright (plumb) from both faces.
Pour the Postcrete:
Fill the hole with water to the specified height, then empty the dry rapid-set Postcrete powder around the timber post. Hold the post firmly level for 2 to 3 minutes until the mix grabs hold. Slope the top surface of the concrete wet mix outward to encourage rain runoff away from the wood.

STEP

03

Build the Gate Frame Profiles
Cut the Framing Rails:
Measure the distance between your anchored upright posts and cut your heavier gate frame timber to match your structural layout.
Assemble the Doors:
Construct rigid square or rectangular outer subframes for your functional access doors. For structural durability, always cut and install a diagonal timber brace piece running from the bottom hinge corner upward to the opposite corner to completely stop your gates from sagging down over time.

STEP

04

Cut and Treat Your Slats
Batch Trim Slat Runs:
Measure and cut your horizontal relish-style timber cladding slats with your miter saw to match your design width profile cleanly.
Apply Cut Sealer:
Use a paint brush to heavily douse all raw cut exposed timber ends with liquid end-grain wood preservative, allowing it to dry thoroughly before final fastening.

STEP

05

Fix Horizontal Slats and Spacers
Fix Your Base Row:
Start installing your slats from the top of the frame working downward, or from the bottom up. Ensure your first board is perfectly level using a spirit level. Secure it into the posts using two exterior wood screws at every junction point.
Maintain Even Spacing:
Use small timber offcuts (roughly 10mm to 15mm thick) placed as temporary spacers between the slat lines. This ensures a consistent gap across the screen, allowing air to circulate freely so your bin enclosure doesn't trap unpleasant odours.

STEP

06

Mount Hinges and Latching Ironmongery
Hang the Doors:
Screw your heavy-duty tee hinges tightly onto your assembled gate frames first. Lift the door into position within the screen clearing, use timber wedges beneath it to hold a 20mm clearance gap off the ground surface, and secure the hinge arms directly into the primary structural support posts.
Fix Latching Hardware:
Line up and mount your heavy-duty ring latch or padbolt mechanism across the gate opening seam. Test the swing clearance to ensure the door closes smoothly and locks securely against wind vibration.
How to Hide Your Wheelie Bins with a Timber Screen: Irish DIY Guide

Timber Wheelie Bin Screen Calculator

1. Estimate by Bin Count
2. Screen Layout Configuration
Timber Screen Framework Preview

Estimated Project Materials Required

Calculated Enclosure Footprint Width: 0.00 m
Treated Timber Slats (Based on 1.8m Lengths): 0 Pcs
2x2 Structural Posts (50x50mm x 2.4m): 0 Pcs
Gate Framing Timber (75x50mm x 2.4m): 0 Pcs
Rapid-Set Postcrete Bags (20kg): 0 Bags
Exterior Wood Screws (Box of 200s): 0 Boxes
End-Grain Wood Preservative (1L Can): 1 Can
Hardware Package Selection: N/A
Irish Standard Slat & Structural Yield Specs:
• Post Depth Rule: Every upright structural post must sit at least 600mm deep in a solid Postcrete foundation socket to resist lateral wind leverage.
• Slat Calculation Formula: Based on 44mm relish slats with an intentional 12mm air ventilation spacing gap overlay between consecutive lines.


Get the Weekly Top Tip

Practical advice from real Topline store teams, straight to your inbox.

Locally

Owned,

Genuinely

Irish.

Contact Us
Amalgamated Hardware PLC
Trading as: Topline
Naas Industrial Estate,
Naas
Co. Kildare
W91P228

Email: info@topline.ie
Follow Us
© 2026 Amalgamated Hardware PLC. All rights reserved