How to Install a Floating Engineered Wood Floor

The Step-by-Step DIY Guide

The DIY Checklist:
What You’ll Need

Installing a floating engineered wood floor adds real value and natural warmth to your home. Using a floating installation method means the planks attach to each other rather than being nailed or glued directly to the subfloor. To guarantee a professional finish that counters typical moisture conditions, you will need a complete project basket containing planks, underlay barriers, specialized tools, and safety gear.
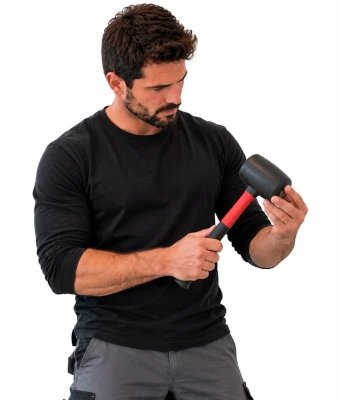
Man holding rubber mallet assist in installing a floating engineered wood floor

1.

SAFETY
GEAR
(PPE)

Knee Pads: Essential knee joint cushion for the hours spent working down on hard subfloors.

Dust Mask (P2/FFP2): Vital protection against fine timber and real-wood veneer dust when cutting planks.

Safety Glasses: Protects eyes from flying splinters and sawdust when operating power saws.

2.

TOOLS &
EQUIPMENT

Chop Saw / Mitre Saw: For making fast, square, and flawless crosscuts at row ends and clean 45-degree angle cuts on scotia moldings.

Floor Installation Kit: Includes a heavy steel pull bar for tight row ends, a plastic tapping block to protect joints, and plastic expansion spacers.

Jigsaw or Coping Saw: Crucial for intricate cutouts around awkward spots like heating pipe entry points and door architraves.

Tape Measure & Pencil: For mapping rows, layout balance, and marking trim cutlines.

Broom and Vacuum: For deep cleaning the subfloor prior to laying your protective underlayment.

3.

Materials, Fixings & Accessories

Engineered Wood Flooring Planks: Real timber veneer structural planks. Must be allowed to acclimate in the workspace before layout.

Damp-Proof Membrane (DPM) Underlay: High-performance underlay with a built-in thick plastic vapour barrier layer, vital for blocking rising dampness over concrete screeds.

Vapour Barrier Tape (Waterproof Tape): Heavy-duty adhesive tape used to securely seam underlay joints to form an airtight moisture block.

PVA Wood Glue D3 Grade: High-strength, water-resistant timber adhesive run inside tongue-and-groove tracks to lock joints permanently.

Scotia Mouldings: Perimeter cover strips that hide the essential 10mm expansion spaces left along standard skirting boards.

Lost Head Nails or Grab Adhesive: For pinning the scotia mouldings directly into existing timber base skirting boards.

Top Tip: The Concrete Moisture Trap.
Ground floor concrete subfloors in Irish homes often carry residual or rising dampness. Never skip using a specialized damp-proof membrane (DPM) underlay. Tape all underlay seams securely with waterproof vapour barrier tape to prevent structural moisture from rising up, which causes expensive hardwood veneers to warp or delaminate.
Top Tip: Acclimatise Your Real Wood.
Engineered wood contains genuine timber layers that dynamically react to temperature and humidity variations. Store the sealed boxes flat in the middle of the room for a minimum of 48 to 72 hours before opening. Fitting cold or damp planks straight out of a delivery vehicle will lead to joint separation later.

Step-by-Step DIY Installation Guide

STEP

01

Prep and Clean the Subfloor
Clear and Check:
Ensure the underlying surface is fully dry and sound. Use a long straight level across the floor; fill deviations deeper than 3mm with appropriate smoothing compounds.
Deep Vacuum:
Run your broom and vacuum across the entire surface. Any small loose stone grit left behind will create crackling sounds underfoot once the floor is walked on.

STEP

02

Roll the DPM Underlay Layer
Lay the Tracks:
Roll out your DPM underlay foam tracks across the floor path, turning the material roughly 20mm up the wall perimeter.
Tape the Seams:
Lay the next row directly alongside the first line. Seal the full length of the overlapping joins tightly with your waterproof vapour barrier tape.

STEP

03

Lay Out the Initial Row
Position Spacers:
Put floor spacers from your kit along the starting walls to establish a uniform 10mm expansion path.
Run the First Line:
Place your first plank in a corner with the tongue side facing the wall. Apply a continuous line of D3-grade PVA wood glue inside the short groove ends, clicking them snugly together across the room length.

STEP

04

Cut Rows with Optimal Stagger
Mark and Trim:
Use your tape measure to calculate the last row board dimension, noting the 10mm expansion block. Chop the wood cleanly using your mitre saw.
Offset the Seams:
Ensure that the starting board cut of the next row is at least 300mm offset from the previous row joint to build a solid, locked flooring pattern.

STEP

05

Lock Tongue and Groove Tracks
Glue the Tracks:
Run a thin, steady line of PVA wood glue along the internal groove edge of your installed boards.
Engage and Tap:
Push the new board tongue line into the glued track at a slight angle and ease it flat. Rest your tapping block against the outer edge and strike it gently with a mallet to close the joint line. Wipe away any excess glue squeezed out onto the face with a damp cloth immediately.

STEP

06

Handle Awkward End Gaps
Use the Pull Bar:
For the last board in each row where hammer access is blocked by walls, slide the hooks of your steel pull bar over the board end and tap the anvil face to pull the timber join tight.

STEP

07

Fit Scotia Mouldings to Complete
Remove Spacers:
Pull out all plastic floor spacers from around the room edges.
Mitre and Fix:
Cut matching scotia mouldings at crisp 45-degree angles using your chop saw. Secure the trim to the skirting boards with lost head nails or grab adhesive. Important: Never fix scotia into the floor planks; the wood floor must be free to expand and float independently beneath the trim.
How to Install a Floating Engineered Wood Floor: Irish DIY Guide

Engineered Wood Flooring Calculator

1. Define Room Dimensions
Area Designation
Length (m)
Width (m)
2. Product Variables & Waste Factor
Floating Floor Assembly Preview

Estimated Basket Materials Required

Total Floor Footprint: 0.00 m²
Engineered Wood Packs: 0 Packs
DPM Foam Underlayment: 0.00 m²
Vapour Barrier Tape Rolls: 0 Rolls
Matching Scotia Trims: 0 Lengths
PVA Wood Glue D3 Grade: 0 Bottles
Lost Head Nails / Adhesive: 1 Pack
Standard Material Basket Calculations:
Underlay & Packs: Estimates include your chosen waste buffer multiplier to prevent shortages from cut trims.
Glue Yield Matrix: One 500ml bottle of D3 grade PVA adhesive safely handles tongue-and-groove tracks for roughly 15 m² of floor joints.


Get the Weekly Top Tip

Practical advice from real Topline store teams, straight to your inbox.

Locally

Owned,

Genuinely

Irish.

Contact Us
Amalgamated Hardware PLC
Trading as: Topline
Naas Industrial Estate,
Naas
Co. Kildare
W91P228

Email: info@topline.ie
Follow Us
© 2026 Amalgamated Hardware PLC. All rights reserved