How to Install Raised Flooring for Attic Storage

The Step-by-Step DIY Guide

The DIY Checklist:
What You’ll Need

Utilising your attic for storage is a brilliant way to declutter your home. However, simply laying timber boards directly onto attic joists can cause major issues. In modern Irish homes, attic floor insulation should ideally be 270mm to 300mm deep to meet heat retention standards. Laying boards directly onto joists compresses this insulation, significantly reducing its thermal efficiency and causing condensation issues. This project guide details how to install raised flooring using strong, protective loft legs, creating a safe structural platform above your high-performance insulation.

1.

SAFETY
GEAR
(PPE)

Dust Mask (P2 or FFP2) & Coveralls: Essential to prevent skin irritation and inhalation of mineral wool insulation fibres when working in tight, dusty ceiling spaces.

Safety Glasses: Protects eyes from drifting dust, loose insulation particles, and falling plasterboard debris while drilling.

Heavy-Duty Safety Gloves: Protects hands from splinters, sharp screws, and rough timber edges.

2.

TOOLS &
EQUIPMENT

Cordless Drill & Driver Bits: High-performance drill/driver with PZ2 screwdriver bits for driving timber screws quickly and securely.

Handsaw or Jigsaw: For cleanly cutting, trimming, and shaping attic storage floor boards around roof braces and truss supports.

Tape Measure & Pencil: For marking accurate cutting lines and measuring spacing gaps between joist centerlines.

Screed Board or Spirit Level: To verify that your newly fitted raised deck runs completely level across all joists.

Work Light or Head Torch: High-intensity lighting is crucial for visibility in poorly lit attic joist environments.

3.

Materials, Fixings & Accessories

Loft Legs: Heavy-duty, ultra-strong recycled plastic structural legs (typically 175mm tall) designed to elevate floor boards above joists and thick insulation blankets.

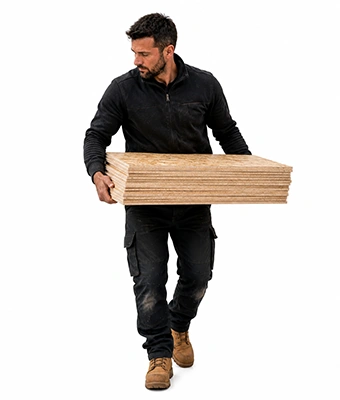
Attic Storage Boards (Loft Boards): Easy-to-handle tongue-and-groove chipboard sheets (standard sizes like 1220mm x 320mm or 2400mm x 600mm) designed to fit easily through small hatch openings.

Screws & Fixings: High-quality multi-purpose wood screws (typically 4.0mm x 30mm for securing boards to plastic legs, and 4.0mm x 40mm for securing legs to joists).

LED Loft Lighting Kit: Battery-powered or plug-in wire-free LED utility light bars to illuminate your finished storage zone.

Insulation Boards or Quilts (Optional): Extra rolls or rigid sheets to top up existing insulation to modern standards before boarding over.

Top Tip: Never Compress Your Insulation.
Squeezing 270mm of mineral wool down into a 100mm joist cavity to fit flat boards directly onto wood destroys its thermal performance. Compressing insulation halves its R-value and traps cold air, leading to mold and damp ceiling spots below. Using 175mm loft legs preserves that vital insulating airspace.
Top Tip: Work Safely Off Joists.
Never step directly onto the plasterboard ceilings between your joists—it will not support your weight! Always place two or three temporary, thick scaffold boards or heavy timber planks across multiple joists to create a safe, stable platform to kneel and work on while installing your raised legs.

Step-by-Step DIY Installation Guide

STEP

01

Check Joist Spacing and Clear the Zone
Measure Joist Centers:
Measure the distance between the center points of your timber ceiling joists. Irish attic spaces are typically constructed with 400mm or 600mm joist spacing. This determines where your loft legs will sit.
Clear the Area:
Clear away any old boxes, loose items, and debris from your targeted layout area. Roll back your existing insulation temporarily to clearly expose the raw wooden joists.

STEP

02

Dry Fit and Space Your Loft Legs
Position the Legs:
Place your plastic loft legs along the top of the exposed timber joists. For 1220mm x 320mm tongue-and-groove boards, legs should be spaced roughly every 610mm along joist runs.
Establish the Grid:
Grid the leg positions out so that every board joint (where the tongue and groove join) sits directly supported on top of a flat plastic leg shoulder.

STEP

03

Secure Legs to the Wooden Joists
Drive the Base Screws:
Use your cordless drill and 4.0mm x 40mm wood screws. Position each leg centered over the joist, and drive one screw through each pre-drilled flange on the leg's base directly into the wooden timber. Do not over-tighten, to avoid cracking the plastic feet.
Top Up Your Insulation:
Once your grid of plastic legs is fully secured, roll your insulation blankets back into position. Gently tuck the insulation around and between the legs to create a continuous thermal barrier up to the top level of the legs.

STEP

04

Lay Your Tongue-and-Groove Boards
Fit the First Board:
Lay your first tongue-and-groove chipboard panel over the flat circular top shoulders of your secured loft legs. Ensure the board is positioned straight and square to the roofline.
Interlock and Push:
Slide the next board into place, slotting the tongue tightly into the matching groove of the previous board. Lightly tap them together for a snug, seamless fit.

STEP

05

Screw Down the Floor Decking
Fix Boards to Legs:
Secure the board by driving 4.0mm x 30mm wood screws straight down through the pre-marked guide holes on the board face and into the plastic screw-receiving sockets on top of each leg. Use at least 4 screws per full board to prevent shifting.
Trim Edge Borders:
When you reach the perimeter walls or roof rafters, measure the remaining gap. Use your handsaw or jigsaw to trim and cut the boards to size before sliding them into their final positions.

STEP

06

Install LED Utility Lighting
Mount the Lights:
Attach your LED loft lighting kit to the rafters or roof timber collar ties overhead. If using battery or USB-rechargeable LED bar kits, stick the magnetic mounting brackets to the roof trusses to easily illuminate your new storage zone.
How to Install Raised Flooring for Attic Storage: Irish DIY Guide

Raised Attic Flooring Calculator

1. Define Attic Boarding Areas
Area Location Label
Length (m)
Width (m)
2. Material Dimensions & Joist Options
Raised Attic Floor Assembly Preview

Estimated Basket Materials Required

Total Floor Area: 0.00 m²
Attic Storage Boards Required: 0 Boards
Structural Loft Legs (Pack of 12): 0 Packs
Multi-Purpose Wood Screws (Box of 200): 0 Boxes
LED Loft Lighting Kit: 0 Kit(s)
Standard Retail Basket Yield Rules:
Leg Frequency Matrix: On 600mm joist spacing, you require roughly 4 to 5 loft legs per square metre of boarded area. On 400mm joist spacing, this increases to roughly 6 to 7 legs per square metre.
Screw Quantities: Each loft leg requires 2 base screws to the joist and 2 top screws to the board (total 4 screws per leg).


Get the Weekly Top Tip

Practical advice from real Topline store teams, straight to your inbox.

Locally

Owned,

Genuinely

Irish

Contact Us
Amalgamated Hardware PLC
Trading as: Topline
Naas Industrial Estate,
Naas
Co. Kildare
W91P228

Email: info@topline.ie
Follow Us
© 2026 Amalgamated Hardware PLC. All rights reserved