How to Install Under-Cabinet LED Strip Lights & Channels

The Step-by-Step DIY Guide

The DIY Checklist:
What You’ll Need

Upgrading your kitchen or utility workspace with task lighting requires a clear plan. Gather all required materials, tools, and safety gear in one trip to your local merchant to keep your project running efficiently.
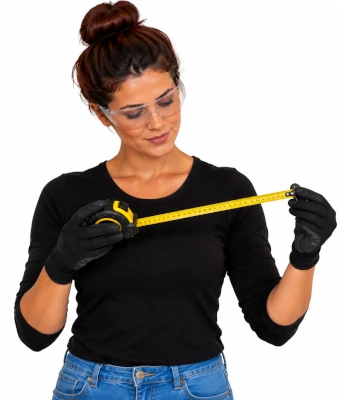
Lady with a measuring tape to assist installing a under-cabinet LED strip lights and channels

1.

SAFETY
GEAR
(PPE)

Safety Glasses: Protects eyes from flying metal shards when sawing profiles and overhead plaster dust.

Dust Mask: Essential when drilling into cabinetry, tiles, or masonry structures.

2.

TOOLS &
EQUIPMENT

Hacksaw: Fitted with a fine-toothed metal cutting blade to trim aluminium profiles accurately.

Mitre Box: Guarantees clean, square 90-degree cuts or perfect 45-degree corner angles for the tracks.

Metal File or Deburring Tool: Smooths rough edges on cut profiles to prevent damaging the LED tape.

Wire Strippers: For safely removing outer insulation shells from low-voltage cables.

Small Screwdriver: For making structural wire linkages inside terminal blocks or channel joints.

Tape Measure: For calculating matching run spans across cabinet undersides.

Clean Cloth: Paired with cleaning solution to strip surface grease for a permanent tape bond.

3.

Materials, Fixings & Accessories

Aluminium LED Profiles & Diffusers: Houses the strips safely, protects against kitchen steam, and disperses bright spots.

LED Strip Kit: Includes the continuous light tape array, standard driver transformer module, and controller infrastructure.

Double-Sided Mounting Tape or Metal Mounting Clips: For securing profiles to cabinet bases.

Small Cable Clips: Manages stray structural wires neatly tucked out of standard sightlines.

Isopropyl Alcohol (Rubbing Alcohol): Clears residual grease, wax, and oils off cabinet surfaces.

Low-Voltage Extension Cable (2-core): Bridges gaps across cooker hoods, windows, or separated cabinet pods.

Heat Shrink Tubing or Wago Connectors: Creates safe, sound, and fully insulated wiring connections.

Top Tip:
Plan to place your aluminium profiles near the front lip of the cabinets, facing straight down. This casts an even pool of working task light across the middle of your countertop rather than catching shadows at the back wall.
Top Tip:
If bridging a gap across a chimney breast or extractor fan hood, cut separate sections of LED tape for each cabinet pod and prepare to run low-voltage extension cable across the open span.

Step-by-Step DIY Installation Guide

STEP

01

Map the Runs & Power Supply Location
Locate Power:
Choose an accessible socket outlet—ideally an existing plug point inside an upper cupboard or above the cabinet line. The plug-in driver transformer will live here.
Measure Cabinet Undersides:
Measure the exact length of each straight under-cabinet section where lighting is required. Mark down the individual dimensions.

STEP

02

Cut the Aluminium Channels to Length
Mark and Secure:
Transfer your measurements onto the aluminium tracks. Place the profile into a secure mitre box to prevent shifting.
Saw Safely:
Using your hacksaw with a fine metal blade, cut the track with smooth, steady strokes. Wear safety glasses to keep stray metal flakes away from your eyes.
File the Edges:
Use a metal file or deburring tool to remove all rough burrs from the cut section. A sharp metal edge can slice straight through your flexible LED tape circuit. Cut the plastic diffuser lenses to match using the same method.

STEP

03

Prepare the Cabinet Surfaces
Degrease Thoroughly:
Kitchen environments leave an invisible film of grease from cooking steam. Dampen a clean cloth with Isopropyl Alcohol and vigorously scrub the channel mounting line under the cabinets.
Let Dry:
Allow the alcohol to evaporate fully. Standard double-sided foam mounting tape or track adhesive backings will fail prematurely if stuck onto grease patterns or household dust.

STEP

04

Mount the Channels in Position
Fixing Option A (Mounting Clips):
Screw the metal mounting clips directly into the timber base using short wood screws that will not pierce the inside floor of your cabinets. Snap the channel into the clips.
Fixing Option B (High-Bond Tape):
Apply high-strength double-sided mounting tape directly along the back face of the clean profile. Press the track firmly up against your cabinet marking lines, holding steady pressure for 30 seconds.

STEP

05

Cut and Tailor the LED Strips
Identify Cut Points:
Lay your LED tape inside the mounted track to mark the desired end. LED strip elements can only be cut at designated copper pad lines (typically spaced every 25mm to 100mm).
Trim the Tape:
Use sharp household scissors to cut exactly down the middle of the copper pads. Cutting anywhere else breaks the circuit chain, permanently killing that segment.

STEP

06

Wire the Links & Connections
Strip Wire Ends:
Use wire strippers to remove 10mm of insulation from your low-voltage 2-core link cables.
Join the Circuit:
Use clip-on LED strip terminal blocks or compact Wago connectors to link your extension wire to the copper pads. Match the polarity signs exactly—positive (+) connects to positive, and negative (-) connects to negative.
Insulate Safely:
Cover any raw exposed wire configurations or solder joints using heat shrink tubing or specialized insulated connectors to protect components against damp ambient air and kitchen condensation.

STEP

07

Stick Tape & Fit Diffuser Lenses
Peel and Press:
Peel the adhesive protective backing paper away from the LED strip. Lay the tape down inside the aluminium profile channel, pressing gently along the track to ensure complete contact.
Pop in Diffusers:
Snap or slide the clear or frosted plastic diffuser cover plates smoothly into the track edges. Tuck your low-voltage link cables cleanly into corners using small cable clips.

STEP

08

Final Power Hookup & Test Run
Connect to Driver:
Wire the low-voltage lead coming out of your first strip into the output terminals of your plug-in power transformer driver.
Fire it Up:
Plug the main driver unit into your nearby socket outlet and flick the power switch. Check the entire length for an even light spread. If a section fails to illuminate, turn off the power instantly and double-check your polarity wiring links.
How to Install Under-Cabinet LED Strip Lights & Channels: Irish DIY Guide

LED Run & Materials Calculator

1. Define Cabinet Run Segments
Run Label
Length (Metres)
2. Hardware Specifications
Visual Layout Preview

Estimated Materials Required

Total Combined LED Length: 0.00 m
Aluminium Profiles Required: 0 Pcs
LED Strip Tape Required (m): 0.00 m
2-Core Interconnect Cable Needed: 0.00 m
Power Driver Minimum Capacity: 0 Watts
Mounting Clips or Tape Packs: 0 Pcs/Rolls
Irish Installation Standards:
Power Draw Matrix: Based on high-output task LED strips requiring 14.4W power allocation per linear metre. Driver capacity includes a safety headroom profile.
Steam Barriers: Rigid aluminium profile structures provide thermal management and block steam penetration into lighting circuits.


Get the Weekly Top Tip

Practical advice from real Topline store teams, straight to your inbox.

Locally

Owned,

Genuinely

Irish.

Contact Us
Amalgamated Hardware PLC
Trading as: Topline
Naas Industrial Estate,
Naas
Co. Kildare
W91P228

Email: info@topline.ie
Follow Us
© 2026 Amalgamated Hardware PLC. All rights reserved