How to Kill and Prevent Stubborn Bathroom Mould

The Step-by-Step DIY Guide

The DIY Checklist:
What You’ll Need

High humidity and poor ventilation make bathroom mould a persistent challenge in Irish households. Wiping away surface mould is only a temporary fix; a complete cure requires killing the roots, treating structural surface damage, and sealing the walls with specialised moisture barriers. This comprehensive guide outlines the entire basket of wash treatments, sealants, tools, and personal protective equipment required to eradicate mould permanently.
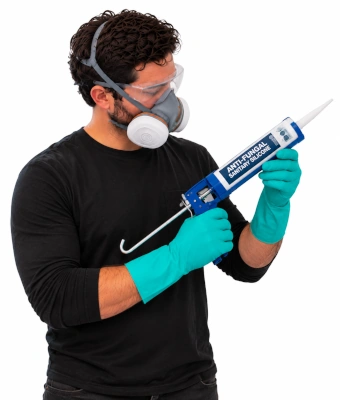
Man with sealant to kill and prevent stubborn bathroom mould

1.

SAFETY
GEAR
(PPE)

Dual-Cartridge Dust Mask or Respirator: Critical to protect your respiratory tract from toxic airborne mould spores and strong chemical wash vapours.

Safety Goggles: Essential wrap-around eye protection against abrasive fluid splashes, chemical wash treatments, and falling paint flakes.

Heavy-Duty Rubber Gloves: Shields hands and skin from chemical biocides and skin-drying bleaching agents.

Safety Suit or Old Clothes: Protects your everyday garments from accidental bleach splashes or paint spills.

2.

TOOLS &
EQUIPMENT

Stiff-Bristled Scrubbing Brush: For driving the biocidal wash deep into the textured valleys of infected plasterwork or grout lines.

Caulking / Filling Knife: For scraping out degraded sealant tracks and applying new interior wall filler smoothly.

Screwdriver Set: To remove bathroom extractor fan covers, decorative light fixtures, or wall plates for deep corner cleaning.

Paint Tray & Mini-Roller Kit: For applying uniform, splatter-free coats of primer and emulsion across ceilings and high wall zones.

2-Inch Synthetic Paint Brush: Ideal for neat cutting-in around bathroom corners, tile borders, and window frames.

Clean Microfibre Cloths or Heavy-Duty Sponges: For washing down walls and wiping away dead surface residues cleanly.

3.

Materials, Fixings & Accessories

Professional-Grade Biocidal Mould Wash: A powerful structural treatment designed to neutralise hidden fungal root systems beneath the plaster layer.

Heavy-Duty Interior Wall Filler: For smoothing deep gouges, plaster holes, or flaky wall sections left behind by moisture damage.

Fine-Grit Sanding Blocks: For leveling out cured filler sections and keying smooth surfaces before applying primers.

Shellac-Based or Specialised Anti-Mould Stain-Blocking Primer: Locks away deep water marks and stops stubborn black mould spots from bleeding back through your final paint layer.

Premium Moisture-Resistant Kitchen & Bathroom Emulsion Paint: Formulated with advanced durable biocides to actively repel steam, humidity, and new fungal spores.

Painter's Masking Tape: For protecting tile junctions, bathroom fixtures, and chrome tap fittings from paint lines.

Decorators Caulk / Sanitary Silicone: High-grade anti-fungal silicone to replace leaky, mould-blackened shower or bathtub joints.

Top Tip: Avoid Direct Scrubbing on Dry Fungi!
Never scrape or scrub dry black mould clusters. Brushing dry mould throws millions of microscopic, toxic fungal spores directly into the bathroom air, contaminating the entire house and creating a major health hazard. Always thoroughly spray or soak the target surface with your biocidal mould wash to dampen the fungi before beginning any physical scrubbing or wiping.
Top Tip: The Golden Rule of Curing Gaps.
Standard moisture-resistant bathroom paints and anti-mould primers require perfectly dry substrates to bond properly. In damp Irish weather conditions, keep a small domestic dehumidifier or space heater running inside the bathroom for at least 4 to 6 hours after your final chemical rinse wash. This ensures all ambient plaster dampness is completely gone before you apply any primers or wall fillers.

Step-by-Step DIY Installation Guide

STEP

01

Room Preparation & Safety Safeguards
Clear the Space:
Remove towels, floor mats, toothbrushes, and wall fixtures. Put on your safety suit, heavy-duty rubber gloves, safety goggles, and your dual-cartridge respirator mask.
Isolate and Remove Fixtures:
Use your screwdriver set to unfasten and drop ventilation grilles, wall brackets, or light shrouds where hidden mould clusters regularly grow. Open any bathroom windows fully to maximise cross-ventilation.

STEP

02

Biocidal Chemical Wash Application
Saturate the Area:
Spray or sponge your professional-grade biocidal mould wash generously over all infected wall sections, plaster junctions, and ceilings. Ensure the liquid extends at least 500mm past the visible mould margins.
Scrub the Roots:
Allow the chemical wash to sink in for the manufacturer's specified contact time (usually 10 to 15 minutes). Use your stiff-bristled scrubbing brush to aggressively work the solution into grout paths and painted plaster pores. Wipe away the dead black residue cleanly with heavy-duty sponges and warm water, then let the room dry completely.

STEP

03

Scraping Leaky Seals & Scraping Flakes
Strip Damaged Sealants:
Use your caulking/filling knife to slide under old, blackened, structural sanitary silicone tracks along the bath or sink line. Pull away the compromised strips cleanly and spray the underlying tracks with biocide.
Clear Flaking Paint:
Rake your filling knife flat across the plaster surface to scrape away any loose, bubbly, or water-damaged paint films created by structural humidity leaks.

STEP

04

Surface Repair & Fine Sanding
Apply Wall Filler:
Press heavy-duty interior wall filler firmly into any holes, hairline cracks, or low craters using your filling knife. Keep the application flush with the surrounding wall plane.
Sand Smooth:
Once cured, take your fine-grit sanding block and sand down the filled patches flat. Lightly scuff-sand the remaining walls to create an open surface key that ensures optimal paint adhesion. Use a damp microfibre cloth to pick up all fine dust residue.

STEP

05

Stain-Blocking Priming Coat
Mask the Area:
Apply painter's masking tape neatly along tile lines, ceiling boundaries, and porcelain edges to protect them.
Prime the Stains:
Pour your shellac-based or specialised stain-blocking primer into your paint tray. Use your 2-inch synthetic paint brush to trim around corners and cut lines, then use the mini-roller to seal the main treated zones. This coat locks down residual grey shadow marks and creates an impermeable defensive seal. Let it dry for 2 to 4 hours.

STEP

06

Premium Anti-Mould Paint Application
First Emulsion Layer:
Stir your moisture-resistant kitchen & bathroom emulsion paint thoroughly. Use your synthetic brush for fine cutting-in, and deploy a clean mini-roller sleeve to lay down a full, rich coat across the wall or ceiling face. Work in steady, overlapping patterns to avoid thin patches.
Second Coat Finish:
Allow the first coat to cure for roughly 4 hours before applying your second final layer. This ensures a thick, chemical-rich barrier layer that easily repels ambient moisture and steam.

STEP

07

Re-Sealing Sanitary Joints
Apply New Silicone:
Cut the nozzle of your new anti-fungal sanitary silicone tube at a 45-degree angle to match your joint width. Load it into your caulking gun and pull a continuous, uniform bead along the dried bathtub or sink interfaces. Smooth the bead immediately using a joint tool or a gloved finger dipped in soapy water. Re-attach your cleaned ventilation covers.
How to Kill and Prevent Stubborn Bathroom Mould: Irish DIY Guide

Bathroom Mould Treatment & Paint Calculator

1. Define Bathroom Wall & Ceiling Sections
Treatment Zone Label
Length (m)
Height / Width (m)
2. Configuration Options & Spillage Buffers
Bathroom Anti-Mould Multi-Layer Protection Preview

Estimated Basket Materials & Quantities

Total Treated Surface Footprint: 0.00 m²
Biocidal Mould Wash (1L Spray): 0 Bottles
Stain-Blocking Primer Required (L): 0.00 L
Moisture-Resistant Bathroom Paint (2.5L): 0 Tins
Sanitary Anti-Fungal Silicone (290ml): 0 Tubes
Interior Wall Filler Paste (1kg): 0 Tubs
Fine-Grit Sanding Blocks & Tape: 1 Pack each
Standard Material Basket Yield Rules:
• Wash Coverage: 1L of ready-to-use biocidal wash coats roughly 10 m² of plaster face safely.
• Dual Coat Paint Matrix: All paint estimates are dynamically pre-calculated for 2 complete, high-build coverage coats to ensure the integrity of the integrated protective biocide.


Get the Weekly Top Tip

Practical advice from real Topline store teams, straight to your inbox.

Locally

Owned,

Genuinely

Irish.

Contact Us
Amalgamated Hardware PLC
Trading as: Topline
Naas Industrial Estate,
Naas
Co. Kildare
W91P228

Email: info@topline.ie
Follow Us
© 2026 Amalgamated Hardware PLC. All rights reserved