How to Lay Waterproof SPC Click Flooring

The Step-by-Step DIY Guide

The DIY Checklist:
What You’ll Need

Before you begin updating your floor, make sure you pick up all your structural materials, layout tools, and vital safety gear to complete the job successfully.
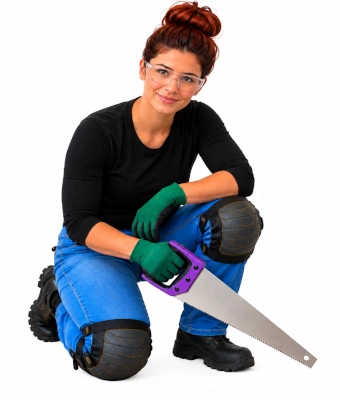
Woman with saw in hand to lay waterproof SPC click flooring

1.

SAFETY
GEAR
(PPE)

Dust Mask (FFP2 Rated): Crucial for respiratory safety when cutting boards and mixing self-levelling compound.

Heavy-Duty Knee Pads: Highly recommended to provide essential leg comfort during extended periods working on the floor.

Safety Goggles: Essential protection for your eyes while trimming planks and profiling profiles.

2.

TOOLS &
EQUIPMENT

Heavy-duty utility knife & Pack of Heavy-Duty Concave or Hooked Utility Blades: The primary cutting asset used to score and cleanly snap SPC panels.

Heavy tapping block: Protects click joints from breaking while driving links tight.

Vacuum Cleaner: To prepare your surface for installation.

Pull bar: Used to easily close up plank joints at the outer room boundaries and wall ends.

Rubber mallet: Provides safe, cushioned impacts to seat individual floor panels tightly without structural fracturing.

Sliding combination square: For establishing straight, accurate 90-degree lines or duplicate matching layout cuts.

Tape measure: For precise dimensional checks across the subfloor space.

Pencil: Marking floor layout measurements onto raw panels.

Hand saw / hacksaw: Used to neatly cut aluminum edge adaptors or trim tricky profiles.

A Mitre Box: Guarantees clean, precise angle cutting for scotia trims or perimeter skirting finishes.

3.

Materials, Fixings & Accessories

Premium SPC flooring packs: Stone Plastic Composite core waterproof planks matching your aesthetic style.

Heavy-duty IXPE high-density underlay foam: Required to isolate acoustic tracking and smooth micro-variations (Only if your chosen SPC flooring doesn't already feature integrated pre-attached foam backing).

Color-matched waterproof PVC scotia or skirting profiles: Conceals perimeter expansion gaps neatly along the base tracking lines.

Low-expansion multi-purpose grab adhesive: Securely fixes perimeter scotia and edge transition strips to underlying structural planes.

Floor spacer blocks: Creates uniform structural expansion parameters against all stationary walls during installation.

Matching aluminum or PVC threshold reducer strips: Provides safe, level transitions through doorways and changing floor environments.

Subfloor Self-Levelling Compound (Conditional): Liquid compound required to smooth out rough, uneven base floors prior to setting.

DIY Pro Tip:
Remove existing skirting boards if possible before starting. This allows your new floor to go underneath for a cleaner finish, completely removing the need to install scotia trim later.
DIY Pro Tip:
Never strike the delicate click tongues or grooves directly with your mallet or hammer. Always place your heavy tapping block against the plank edge to spread out the impact safely.
The Golden Rule:
Always glue your scotia or skirting profiles directly to the wall, never to the newly laid flooring planks. The floor must remain completely free to move underneath the trims as it adjusts to changing temperatures.

Step-by-Step DIY Installation Guide

STEP

01

Room Acclimatisation & Site Preparation
Acclimatise the Planks:
Bring your premium SPC flooring packs into the room where they will be installed. Lay the boxes completely flat on the floor for at least 48 hours. Do not open the packaging. The environment should maintain a normal, consistent household temperature.
Clear and Clean the Subfloor:
Remove all furniture, existing carpets, or old underlayment. Thoroughly sweep and vacuum the area to ensure no grit, stone particles, or debris remain.

STEP

02

Subfloor Assessment & Conditioning
Check for Flatness:
Place your straight combination square or a long straight edge across various sections of the floor. Check for any deep dips or noticeable high points.
Apply Self-Levelling Compound (If Needed):
SPC flooring is highly durable but requires a completely flat surface. If your concrete subfloor has high or low variations greater than 3mm over a 2-metre distance, mix and apply your subfloor self-levelling compound. Allow this to cure completely as per package instructions before proceeding.
Check for Moisture:
Ensure concrete floors are dry. If subfloor dampness is an issue, look into underlayment options that offer a built-in damp proof membrane (DPM).

STEP

03

Laying the Underlayment
Verify Your Flooring Backing:
Look at your SPC boards. If they already feature a pre-attached foam backing layer, do not install a separate underlay. Doing so makes the floor too soft, which can break the click joints under heavy weight.
Roll Out High-Density IXPE Foam:
If your SPC planks do not have pre-attached backing, roll out your heavy-duty IXPE underlay across the room. Run the foam in the same direction you plan to lay the flooring planks.
Join and Seal:
Lay the underlay sheets edge-to-edge without overlapping them. Tape the seams together to prevent the foam sheets from shifting while you work.

STEP

04

Planning the Floor Layout
Determine Direction:
For the best visual look, lay the planks parallel to the longest wall in the room or heading toward the main source of incoming natural light.
Measure and Calculate Widths:
Measure the total width of the room and divide it by the width of one flooring plank. If your calculation shows that your final row of planks will be narrower than 50mm, trim down the width of your very first row of planks to balance out the layout.

STEP

05

Laying the First Row
Set the Expansion Gaps:
Place your floor spacer blocks against the starting wall. SPC flooring expands and contracts slightly with temperature changes, so you must leave a consistent 8mm to 10mm gap around all walls, pipes, and fixed doorways.
Position the First Plank:
Start in a left-hand corner with the tongue side of the plank facing toward the wall.
Connect the First Row Ends:
Line up the end joint of the second plank with the end of the first plank. Lower it down and tap it gently with your rubber mallet and heavy tapping block until the click mechanism locks flat and tight. Repeat this process until you reach the end of the row.
Cut the Final Plank:
Measure the final space remaining at the end of the row (remembering to account for your spacer block gap). Mark the measurement on a plank using your pencil and combination square. Score the top wear layer firmly with your heavy-duty utility knife, then snap the board cleanly down over an edge. Use your pull bar to lock this final piece securely into place.

STEP

06

Installing Subsequent Rows
Stagger the Joints:
To keep the floor strong and visually appealing, always stagger your plank end-joints from row to row by at least 300mm. You can often use the off-cut piece from the end of your first row to start your second row.
Click the Sides Together:
Hold the new plank at a slight angle (around 20 to 30 degrees) and insert its long side tongue into the groove of the completed row. Lower the plank flat while pushing it forward until it clicks together.
Close the Joints:
Use your rubber mallet and heavy tapping block to gently strike the outer edge of the plank. This ensures the click mechanism locks perfectly tight with no visible gaps.

STEP

07

Working Around Tricky Obstacles
Fitting Around Door Frames:
Do not try to cut tricky, curved shapes out of your flooring planks to fit around door frames. Instead, place an inverted loose plank down on your underlay next to the frame, lay your hand saw flat on top of it, and undercut the bottom of the wood door trim. Slide your new flooring plank cleanly underneath for a neat finish.
Cutting Around Pipes:
Measure the position of any radiator pipes. Drill a hole through the plank that is 15mm larger than the pipe diameter to leave an expansion gap. Use your utility knife to cut a wedge out from behind the hole, fit the plank around the pipe, and glue the wedge back into place behind it using grab adhesive.

STEP

08

Installing the Final Row
Measure the Final Width:
You will likely need to cut your final row of planks lengthwise. Measure the distance from the previous row to the wall in several places, remembering to subtract your 8mm to 10mm expansion gap for the spacers.
Lock the Row:
Cut the planks lengthwise using a straight edge and your utility knife. Position the planks and use your pull bar along with your rubber mallet to pull the final joints tight against the previous row.

STEP

09

Adding the Finishing Touches
Remove the Spacers:
Pull out all your floor spacer blocks around the perimeter of the room.
Install Doorway Transitions:
Measure and cut your matching aluminum or PVC threshold reducer strips using a hacksaw. Secure them in place across doorways to bridge any height transitions safely between different rooms.
Fix the Scotia / Skirting Trims:
Measure and cut your color-matched waterproof PVC scotia or skirting trims using your mitre box for clean corner angles. Apply a bead of low-expansion multi-purpose grab adhesive to the back of the trim. Fix it directly to the wall or old skirting board.
How to Lay Waterproof SPC Click Flooring: Irish DIY Guide & Calculator

Custom SPC Flooring Calculator

1. Enter Room Layout Dimensions
Area Name
Width (m)
Length (m)
2. Product Specifications & Material Settings

Estimated Materials Required

Total Floor Footprint Area: 0.00 m²
Total Perimeter Length (Trims): 0.00 m
BASKET ITEMS TO PURCHASE:
Premium SPC Flooring Packs: 0 Packs
High-Density IXPE Underlay Foam: 0.00 m²
Waterproof PVC Scotia Profiles: 0 Lengths
Multi-Purpose Grab Adhesive: 0 Tubes
Floor Spacer Blocks: 1 Pack (Standard)
Threshold Reducer Strips: Based on Doorways
Standard Irish Installation Matrix:
• Flooring Packs: Calculated with your selected wastage buffer to account for end-of-row trim pieces.
• Underlayment: Conditional logic will automatically zero out separate underlay foam requirements if your premium SPC product option has built-in backing.
• Adhesive: Estimates 1 tube of heavy-duty low-expansion adhesive for every 3 lengths of scotia molding.


Get the Weekly Top Tip

Practical advice from real Topline store teams, straight to your inbox.

Locally

Owned,

Genuinely

Irish.

Contact Us
Amalgamated Hardware PLC
Trading as: Topline
Naas Industrial Estate,
Naas
Co. Kildare
W91P228

Email: info@topline.ie
Follow Us
Topline are proud to be affiliated with:
© 2026 Amalgamated Hardware PLC. All rights reserved