How to Paint a Geometric Feature Wall

The Step-by-Step DIY Guide

The DIY Checklist:
What You’ll Need

Before you transform your living room or bedroom, make sure you collect your full basket of tools and raw materials. Sourcing these together makes the project run seamlessly from prep to print.
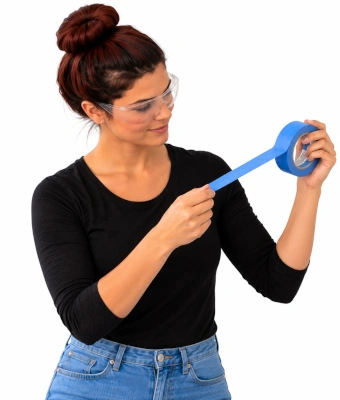
Woman using painters tape, to paint a geometric feature wall

1.

SAFETY
GEAR
(PPE)

Dust Mask (FFP2 Rated): Vital protection for your lungs while sanding down wall filler patches.

Safety Glasses: Protects your eyes from fine plaster dust particles and overhead paint splatters.

2.

TOOLS &
EQUIPMENT

Laser level or a long spirit level: Essential for mapping out straight, level, and crisp geometric lines across the wall face.

4-inch mini roller frame and clean roller sleeves: Ensure you have a separate fresh roller sleeve allocated to each distinct paint color to prevent mixing tones.

2-inch synthetic angle sash paintbrushes: Highly tapered edges designed for cutting cleanly into sharp geometric points and tape borders.

Filling knife: Flexible steel knife used to apply repair compounds flat over old blemish holes.

Tape measure: For precise spacing calculations and ensuring structural shapes sit symmetrically.

Pencil: For lightly charting layout paths and guidelines straight onto the wall plaster.

Paint trays: Durable plastic trays sized perfectly to match your 4-inch mini roller gear.

Damp Microfibre Cloths or Tack Cloths: Used to fully extract fine dust after sanding to allow the tape to bond tightly.

3.

Materials, Fixings & Accessories

Premium edge-blocking painter's tape: Specially treated painter's tape designed to prevent wet emulsion paint from leaking or bleeding underneath borders. Standard sizes are 24mm or 36mm widths.

3 to 4 contrasting colors of interior paint: High-performance interior emulsion paints. A flat Matt or subtle Eggshell finish works beautifully on structural geometric patterns.

Lightweight interior wall filler: Smooth, quick-drying repair compound to restore small wall gouges, scratches, or old anchor holes.

Fine-grit sanding sponges: Flexible sanding blocks (120-grit to 180-grit grades) to smooth out patched regions seamlessly.

Dust sheets: Heavyweight polythene or traditional canvas sheets to protect carpets, flooring boards, and static furniture installations.

DIY Pro Tip:
Your feature wall should already be painted with its primary background base coat (the lightest shade of your new color scheme) before you attempt tape masking. Let this base coat cure fully for 24 hours.
The Clean-Line Secret:
Lightly coat the tape edges with your underlying background wall color first and allow it to dry. This seals any microscopic air gaps under the tape, guaranteeing absolute razor-sharp edges when your accent colors are peeled back.

Step-by-Step DIY Installation Guide

STEP

01

Inspecting, Repairing & Cleaning the Wall
Clear the Workspace:
Move furniture clear of the operating field and line your floor surfaces meticulously with your dust sheets. Pull off wall switch plates (isolating power first).
Fix the Imperfections:
Scan the plaster for deep scuffs or old fixing points. Use your filling knife to spread lightweight interior wall filler cleanly across holes. Let it cure.
Sand and Dust Off:
Wear your FFP2 dust mask and safety glasses. Use your fine-grit sanding sponge to sand patches flush. Wipe down the entire wall surface using a damp microfibre cloth to guarantee a sterile surface.

STEP

02

Plotting Out Your Master Geometric Layout
Draft on Paper:
Sketch a rough miniature visual map of your pattern concept to confirm how your angles intersect.
Project the Lines:
Mount your laser level or hold your long spirit level across the wall surface. Use your tape measure and a light pencil touch to connect dots, drawing out triangles, chevrons, or abstract blocks.

STEP

03

Masking with Premium Edge-Blocking Tape
Apply the Taping Lines:
Stick your premium edge-blocking painter's tape carefully along the outer boundary lines of your pencil sketches. Lay the tape down in single, continuous runs to maintain perfect straightness.
Lock the Edges Down:
Firmly run your thumb, a clean cloth, or the flat side of your filling knife along the adhesion edges of the tape. This pressure-seals the boundary line completely.

STEP

04

Sectional Painting with Accent Colors
Organize Color Fields:
Determine where each accent shade goes. It can help to put a small piece of colored tape or a tiny pencil label inside each section.
Cut In with Brushes:
Use a clean 2-inch synthetic angle sash brush to apply your paint along the inside edge of the taped shapes, working toward the center of the block.
Roll Out the Centers:
Fit a clean sleeve onto your 4-inch mini roller frame. Load paint evenly and roll inside the shapes using smooth, consistent patterns. Do not press too hard, as this can squeeze excess paint under the tape lines.
Coat Count:
Let the first application dry for 2 to 4 hours, then execute a second coat for deep, opaque color saturation.

STEP

05

The Ultimate Tape Peel Reveal
Time the Removal:
Do not wait for your second coat of paint to completely dry and harden, as this can cause the dry film to chip. Peel the tape away while the paint is still slightly tacky.
Pull at 45 Degrees:
Carefully grip the tape ends and pull back smoothly at a steady 45-degree angle away from the new paint lines.
Curing out:
Give the finished wall 24 hours to fully stabilize before moving furniture pieces back or replacing light switch faceplates.
How to Paint a Geometric Feature Wall: DIY Guide & Calculator

Custom Geometric Wall Project Calculator

1. Feature Wall Dimensions
2. Color & Pattern Specifications
Dynamic Blueprint Concept Preview

Estimated Materials Required

Total Feature Wall Footprint: 0.00 m²
Paint Needed (per accent color): 0.00 Litres
Premium Painter's Tape (50m Rolls): 0 Roll(s)
Mini Roller Sleeves Needed: 0 pcs
Synthetic Angle Sash Brushes: 0 pcs
Wall Repair Paste (1kg Tubs): 1 Tub
Heavy Floor Dust Sheets: 1 Pack
Standard Irish Coverage Estimation Metrics:
Paint Yield Profiles: Assumes a double-coat paint structure requiring 1 Litre per 6 square metres of net covered surface area.
Consumables Ratio: Tape calculations scale automatically based on pattern complexity to give you an accurate material buffer.


Get the Weekly Top Tip

Practical advice from real Topline store teams, straight to your inbox.

Locally

Owned,

Genuinely

Irish.

Contact Us
Amalgamated Hardware PLC
Trading as: Topline
Naas Industrial Estate,
Naas
Co. Kildare
W91P228

Email: info@topline.ie
Follow Us
© 2026 Amalgamated Hardware PLC. All rights reserved