How to Paint and Transform Your Kitchen Cabinets

The Step-by-Step DIY Guide

The DIY Checklist:
What You’ll Need

Transforming your kitchen cabinets with high-quality paint is the most cost-effective way to modernise an Irish home. However, kitchens are demanding environments subject to grease, steam, and frequent impacts. To ensure a factory-smooth finish that won't chip or peel, preparation is critical. You will need a complete basket of specialist cleaners, high-adhesion primers, durable cabinet paints, and precise application tools.
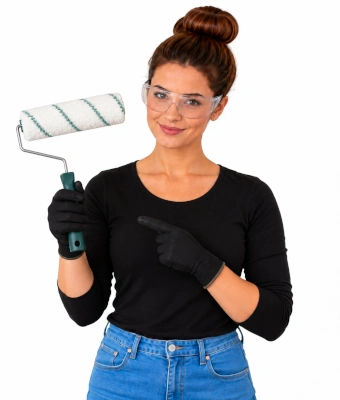
Lady holding a roller paint brush to paint and transform your kitchen cabinets

1.

SAFETY
GEAR
(PPE)

Dual-Cartridge Respirator Mask (Rated A2-P3 for Organic Vapours): Essential for protecting your lungs against strong fumes from shellac-based primers and airborne particles during spraying or sanding.

Safety Glasses: Crucial protection for your eyes from cleaning splashes and fine paint mist.

Nitrile Gloves: Protects hands from heavy-duty degreasers and keeps skin clean during priming and painting.

2.

TOOLS &
EQUIPMENT

High-Density Foam Rollers & Paint Trays: Best for applying ultra-smooth coats across flat cabinet doors without leaving texture.

Synthetic Detail Sash Brushes: Provides clean cut-ins and premium accuracy along panel recesses and detailed trim profiles.

Screwdriver Set: Essential for removing doors, drawer fronts, hinges, and handles smoothly.

Cleaning Rags: For wiping down heavy degreasers and picking up structural runs.

Ziploc Bags & a Marker Pen: Used to systematically store, isolate, and label hinges, screws, and hardware for stress-free reassembly.

3.

Materials, Fixings & Accessories

Specialist Cupboard/Melamine Paint: A highly durable, chip-resistant polyurethane or acrylic-based paint formulated specifically for kitchen environments.

Shellac-Based Primer: The ultimate stain-blocking high-adhesion base layer that permanently bonds to timber, laminate, or melamine surfaces.

Heavy-Duty Degreaser (TSP - Trisodium Phosphate): A powerful chemical cleaner that completely cuts through kitchen grease, cooking oil film, and wax residues.

Fine-Grit Sandpaper: 120-grit and 240-grit sanding sheets used to score surfaces before priming and smooth intermediate layers.

Tack Cloths: Sticky, specialised resin-treated cloths that pick up microscopic dust particles before you paint.

Wood Filler / 2-Part Styrene Filler: For patching structural cracks, deep dents, or filling old hardware screw openings if replacing handles.

Decorators Caulk: A flexible sealant layer used to fill internal joint gaps along static trim sections.

High-Adhesion Painter's Masking Tape: For crisp borders and protecting carcasses, walls, floors, and appliances.

Top Tip: Label Everything Systematically.
Kitchens have dozens of matching screws and hinges that have settled into place over years. When you unscrew them, do not toss them into a single tub. Place the hardware for each individual cabinet into its own labelled Ziploc bag. Write a corresponding hidden number on a piece of masking tape inside the hinge cup of the door itself. This step prevents alignment head scratching when hanging the doors at the end.
Top Tip: The Secret Is in the Shellac Primer.
Kitchen grease and tannin bleed from old timber or laminate doors can effortlessly seep through standard water-based emulsions, ruining your topcoat. Always use a dedicated shellac-based primer after degreasing. It provides a bulletproof barrier that blocks stains and locks onto sleek laminate or melamine surfaces, ensuring your paint stays bonded permanently.

Step-by-Step DIY Installation Guide

STEP

01

Deconstruction & Hardware Labelling
Remove All Doors and Drawers:
Use your screwdriver set to unfasten handles and detach hinges from the cabinet frames. Lay the doors flat on a protected work surface.
Organise Hardware:
Drop screws, plates, and hinges immediately into separate Ziploc bags. Label each bag with its corresponding cabinet position using your marker pen.

STEP

02

Deep Scrub & Degrease
Mix the Degreaser:
Don your nitrile gloves and safety glasses. Dilute your heavy-duty degreaser (TSP) in a bucket according to the label instructions.
Scrub Surfaces Thoroughly:
Wash every cabinet face, drawer front, and structural frame section to eliminate oil buildup, steam residue, and food splatters. Wipe down with clean water to remove chemical residues, and let dry completely.

STEP

03

Sanding and Surface Repair
Fill Defects:
Inspect the doors for damage. Press your 2-part styrene filler or wood filler into scratches, chips, or old handle holes if you are switching hardware styles. Let it cure.
SecurDe-Gloss the Surface:e with Fixings:
Use 120-grit sandpaper to lightly scuff all panels. You do not need to strip the finish to bare wood; you simply want to create a mechanical key for the primer. Smooth the filled areas flat with 240-grit sheets. Wring out a tack cloth and wipe away all sanding dust.

STEP

04

Masking and Priming
Mask the Kitchen:
Apply high-adhesion painter's masking tape along walls, tile backsplashes, floors, and interior shelves to protect against accidental drips.
Apply Shellac Primer:
Put on your dual-cartridge respirator mask. Stir the shellac-based primer thoroughly. Use a high-density foam roller for flat surfaces and a synthetic detail sash brush for recessed moulding. Apply a uniform, thin coat and allow it to dry for roughly 45 to 60 minutes. Clean brushes with methylated spirits.

STEP

05

Intermediate Sanding & First Topcoat
Smooth the Base:
Lightly sand the primed doors using 240-grit sandpaper to remove tiny imperfections or brush textures. Clear the fields with a fresh tack cloth.
Roll Your First Topcoat:
Stir your specialist cupboard/melamine paint. Apply it smoothly, working systematically from panel recesses outward to flat faces. Avoid overloading your roller to prevent runs. Allow this layer to dry and cure overnight.

STEP

06

Final Coat, Caulk, & Reassembly
Apply Second Topcoat:
Apply a light intermediate scuff sand, tack-cloth clean, and roll on your second and final paint layer. Run a neat line of decorators caulk along cabinet trim borders if necessary before painting.
Reassemble Carefully:
Let the doors cure for at least 24 hours until the paint film is firm. Retrieve your labelled Ziploc bags and carefully screw the hinges and handles back into their designated places. Hang your doors and enjoy your stunning new kitchen.
How to Paint and Transform Your Kitchen Cabinets: Irish DIY Guide

Kitchen Cabinet Transformation Calculator

1. Define Kitchen Scope
2. Paint and Waste Safety Allowances
Kitchen Cabinet Paint Assembly Preview

Estimated Project Materials Required

Calculated Face Coating Area: 0.00 m²
Specialist Cupboard Paint (750ml Cans): 0 Can(s)
Shellac-Based Adhesion Primer (1L Cans): 0 Can(s)
Heavy-Duty Degreaser (TSP Packs): 1 Pack
Fine-Grit Sandpaper Assortment Pack: 1 Pack
Microfiber Tack Cloths: 0 Pcs
High-Density Foam Roller Refills (4-inch): 0 Pcs
High-Adhesion Painter's Tape (50m): 1 Roll
Standard Irish Cabinet Material Constants:
Door Area Matrix: Calculated based on a standard nominal surface area metric of 0.5 m² per average kitchen cabinet door face panel.
Paint Yield Coverage: Specialist cupboard coatings typically yield an coverage estimate of 10 m² to 12 m² per litre of paint per layer.


Get the Weekly Top Tip

Practical advice from real Topline store teams, straight to your inbox.

Locally

Owned,

Genuinely

Irish.

Contact Us
Amalgamated Hardware PLC
Trading as: Topline
Naas Industrial Estate,
Naas
Co. Kildare
W91P228

Email: info@topline.ie
Follow Us
© 2026 Amalgamated Hardware PLC. All rights reserved