How to Patch Damaged Roof Tiles and Slates

The Step-by-Step DIY Guide

The DIY Checklist:
What You’ll Need

Fixing individual cracked tiles or loose slates promptly protects your home from internal water damage caused by persistent wind-driven rain. Gathering the complete package of specialized hand tools, rust-resistant fasteners, and high-altitude safety equipment ensures a secure, leak-free finish.
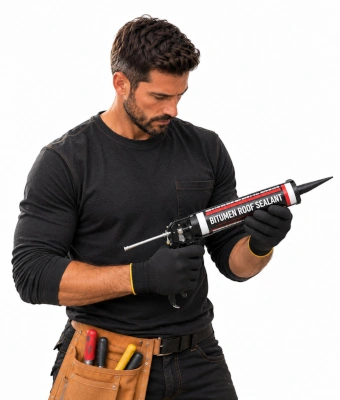
Man with sealant to patch damaged roof tiles and slates

1.

SAFETY
GEAR
(PPE)

Safety Harness & Anchor Point / Safety Rope: Vital height safety equipment to secure yourself securely to a structural point before stepping onto the roof surface.

Safety Glasses: Essential eye shield protection when cutting roof coverings or brushing away crumbling mortar bed fragments.

Heavy-Duty Work Gloves: Thick protective gloves to protect hands against razor-sharp natural slate edges and abrasive concrete tile finishes.

2.

TOOLS &
EQUIPMENT

Slate Ripper: A long, flat specialized metal tool with hooked teeth designed to slide up underneath slates to cut or pull out broken hidden fixing nails.

Sturdy Roof Ladder: Fitted with a secure ridge hook to distribute your weight evenly across the ridge line without damaging the roof surface.

Slate Cutter or Angle Grinder (with Diamond Blade): For trimming replacement units down to size to match dynamic roof configurations exactly.

Caulking Gun: To apply uniform structural lines of weatherproof roof sealant canisters.

Stiff Wire Brush: To clear moss, debris, and loose mortar from exposed timber tile battens or adjoining joints.

Hammer, Tape Measure & Pencil: For classic layout tracking and striking fixing elements home.

3.

Materials, Fixings & Accessories

Replacement Slates / Tiles: Matching units selected to blend seamlessly with your existing roof cover type (standard sizes include 500mm x 250mm or 600mm x 300mm).

Slate Hooks: Professional stainless steel or heavy wire hangers used to clip replacement slates firmly in place when top-nailing isn't possible.

Copper Slate Nails: Corrosion-resistant nails that resist harsh elements without rotting out behind the roofing material.

Lead or Aluminium Soakers: Pre-bent metal sheets slipped between courses at junctions or wall valleys to create a robust, layered weather seal.

Flashing Tape: Heavy-duty self-adhesive bitumen rubber tape used for rapid joint patches and valley sealing over high-risk split points.

Bitumen Roofing Sealant: A high-viscosity waterproof adhesive compound that cures flexibly in damp conditions.

Top Tip: Always Use Copper or Stainless Steel Fixings.
Standard steel or galvanised nails will rust away when exposed to sea air and frequent rain. Copper nails or stainless steel slate hooks are essential to ensure your repairs stay locked in place for decades.
Top Tip: The Slate Hook Trick for Invisible Repairs.
When replacing a missing slate in an established layout, you cannot access the original top batten to hammer down nails without smashing the row above. Slide a stainless steel slate hook up onto the timber batten, slide your new slate into place, and let the bottom curved hook cradle the slate base securely.

Step-by-Step DIY Installation Guide

STEP

01

Setup Safety Equipment
Establish the Ground Base:
Position your extension ladder on firm, level ground. Mount your specialized roof ladder over the top, making sure the curved ridge hook fits securely over the apex ridge tiles.
Anchor Your Harness:
Secure your safety rope to a verified structural anchor point on the opposite side of the building structure before climbing up onto the roof.

STEP

02

Remove the Damaged Unit
Extract Broken Slates:
Slide your slate ripper up underneath the cracked slate. Hook the tool around the original copper nails and strike the handle sharply downward with a hammer to cut or draw out the old nails. Gently slide the broken fragments down and out.
Remove Damaged Interlocking Tiles:
Gently wedge up the two intact tiles directly overlapping the broken unit. Lift the damaged tile up and off its timber support batten.

STEP

03

Clear the Batten & Check the Felt
Clean the Joint:
Use your stiff wire brush to clear away loose grit, dirt, and built-up moss from the timber batten and adjoining surfaces.
Inspect the Underlayment:
Check the exposed breathable roofing felt underneath. If there are minor splits, cut a patch of heavy-duty self-adhesive flashing tape and press it firmly over the puncture to ensure a watertight underlayment seal.

STEP

04

Size and Cut the Replacement Piece
Measure carefully:
Measure the open gap dimensions using your tape measure. Transfer these numbers to the back of your replacement tile or slate.
Trim to Fit:
Wear your safety glasses and cut along the pencil line using a slate cutter or an angle grinder fitted with a diamond masonry blade. Ensure the cut matches the original profile.

STEP

05

Install the New Tile or Slate
For Slates (Slate Hook Method):
Drive a stainless steel slate hook into the center of the timber batten exposed in the vertical joint line. Slide your new slate up into position until its bottom edge nests securely into the hook wrapper loop.
For Interlocking Tiles:
Apply a bead of bitumen roofing sealant to the water channels of the adjoining tiles using your caulking gun. Slide the replacement tile up under the row above, hook its rear lugs over the timber batten, and drop it flush into the interlocking profile.

STEP

06

Secure Junctions with Soakers
Slide in Metal Soakers:
If your repair is near a side wall or roof valley junction, slide a pre-bent lead or aluminium soaker up underneath the new tile course to divert runoff away from hidden joints. Apply a final bead of flexible bitumen sealant along exposed seam edges to complete the repair.
How to Patch Damaged Roof Tiles and Slates: Irish DIY Guide

Roof Repair Material & Basket Calculator

1. Define Repair Scope
2. Product Dimensions & Buffers
Roof Assembly Structural Preview

Estimated Basket Materials Required

Replacement Tiles/Slates Required: 0 Units
Copper Slate Nails: 0 Pcs
Stainless Steel Slate Hooks: 0 Pcs
Weatherproof Bitumen Sealant: 0 Tubes
Lead or Aluminium Metal Soakers: 0 Pcs
Heavy Duty Bitumen Flashing Tape: 0.00 m
Standard Hardware Basket Yield Rules:
• Slate Fixings Matrix: Slates utilize 1 stainless steel hook per replacement piece. Concrete interlocking tiles are bedded with 1 line of bitumen sealant cartridge yield per 3 units.
• Junction Allocation: Selecting valley patching adds 1 metal soaker per designated replacement piece plus 500mm of adhesive flashing tape per unit to seal aged underlayment seams.


Get the Weekly Top Tip

Practical advice from real Topline store teams, straight to your inbox.

Locally

Owned,

Genuinely

Irish.

Contact Us
Amalgamated Hardware PLC
Trading as: Topline
Naas Industrial Estate,
Naas
Co. Kildare
W91P228

Email: info@topline.ie
Follow Us
© 2026 Amalgamated Hardware PLC. All rights reserved