How to Pour Self-Levelling Compound to Flatten Uneven Floors

The Step-by-Step DIY Guide

The DIY Checklist:
What You’ll Need

Achieving a perfectly flat subfloor is vital before installing laminate, vinyl, or tiled floors in Irish homes. Self-levelling compound flows dynamically to fill low zones and smooth rough concrete bases. This project requires a full basket of specialized leveling materials, high-output mixing tools, finishing gear, and complete personal protective equipment.
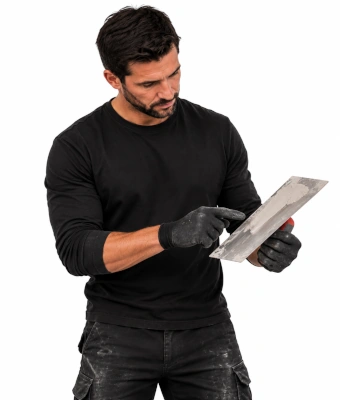
holding a plasterer's finishing trowel to flatten uneven floors when pouring self-levelling compount

1.

SAFETY
GEAR
(PPE)

Dust Mask (P2/FFP2 rating): Critical protection to stop airborne cement dust from getting into your lungs while opening and mixing dry powder bags.

Safety Glasses: Protects eyes completely from wet chemical compound splashes or flying dust particles during high-speed blending.

Spiked Shoes / Cleats: Strapped onto your footwear to allow you to walk directly through the poured wet compound without disrupting the level or leaving deep footprints.

Knee Pads: Provides necessary structural comfort and joint protection while working on raw subfloors for layout prep and spreading.

2.

TOOLS &
EQUIPMENT

Heavy Duty Mixing Paddle Drill: A high-torque electric power drill fitted with a dedicated mixing paddle to blend the dense slurry smoothly without creating lumps.

Large Mixing Bucket: A large, heavy-duty bucket (typically 30 litres or larger) providing enough structural space to mix full bags of compound comfortably.

Measuring Jug: Essential for measuring clean, cold water down to the exact millilitre to prevent weak mixes.

Steel Plastering Trowel: Used to gently guide the wet slurry into deep corners, low edges, and hard-to-reach boundaries.

Spiked Roller: A specialized roller rolling through the freshly poured wet floor to break trapped surface bubbles and ensure an airtight finish.

Soft Broom or Vacuum Cleaner: For clearing away all loose dirt, grit, and structural debris before applying any primer layers.

3.

Materials, Fixings & Accessories

Floor Self-Levelling Compound Powder Bags: Fast-setting cementitious compounds, usually supplied in standard 20kg or 25kg bags, providing the flat structural mass.

Acrylic Floor Primer: A specialized liquid coating that seals porous concrete floors, stopping the subfloor from stealing water from the wet mix.

Expanding Foam or Silicone Sealant: Used to plug deep cracks, pipe holes, or skirting gaps to stop the runny liquid compound from leaking away.

Weatherstripping / Foam Barrier Strips: Temporary foam borders installed around room boundaries to isolate the pour and create clean perimeter joints.

Clean Cold Water: Fresh, cold tap water used to trigger the self-levelling chemical flow matrix.

Top Tip: Follow the Water Limits Exactly!
Self-levelling compound is highly sensitive to water ratios. Adding even a tiny bit too much water makes the compound easy to pour but ruins its strength, leading to cracking, dusting, and a ruined surface. Always read your bag instructions and use a precise measuring jug.
Top Tip: Seal Every Single Leak Hole!
Wet self-levelling slurry has the consistency of thick soup and will find any small crack or gap in your subfloor. Use expanding foam or silicone sealant to seal up the base of walls, doorways, and pipe entries, or you risk the compound draining away out of sight.

Step-by-Step DIY Installation Guide

STEP

01

Deep Subfloor Cleaning
Clear the Deck:
Remove all furniture and old flooring. Use a soft broom or industrial vacuum cleaner to clear away every trace of dust, grit, and loose plaster. The subfloor must be completely clean for the primer to bond properly.

STEP

02

Plug All Leak Gaps
Seal the Perimeter:
Check the entire room base. Use expanding foam or silicone sealant to fill deep cracks or structural pipe entries. Install foam barrier strips across doorways and around walls to trap the runny compound safely inside the room.

STEP

03

Apply the Acrylic Floor Primer
Coat the Base:
Pour your acrylic floor primer into a tray and use a soft broom or roller to apply an even coat across the subfloor. For highly porous concrete floors common in Irish builds, apply a secondary diluted coat after the first dries. Let it dry until it forms a clear, tacky skin.

STEP

04

Mix the Levelling Slurry
Measure Water First:
Put your FFP2 dust mask and safety glasses on. Pour the exact amount of clean, cold water required into your large mixing bucket using your measuring jug.
Blend Smoothly:
Start your heavy duty mixing paddle drill on a low speed and slowly tip the dry self-levelling powder bag into the water. Mix thoroughly for 2 to 3 minutes until you get a smooth, lump-free slurry with a uniform colour. Let it stand for 1 minute to settle, then give it a final 30-second mix.

STEP

05

Pour the Compound Floor
Pour in Strips:
Strap on your spiked shoes. Starting at the furthest corner of the room, pour the mixed bucket out onto the subfloor in steady, parallel strips, working backward toward your exit doorway.

STEP

06

Trowel and Roll the Surface
Guide the Flow:
Use your steel plastering trowel to pull the wet slurry into tight corners and even out deep transitions.
Roll Out Air Bubbles:
Pass your spiked roller slowly through the wet poured layer in crosswise directions. This releases trapped air bubbles, ensuring a smooth, flawless finish.

STEP

07

Curing and Drying Runs
Leave It to Set:
Protect the wet floor from drafts, direct intense sunlight, and heavy footsteps while it cures. Most modern compounds accept light foot traffic after 4 to 6 hours, but wait a full 24 to 48 hours before installing your final floor coverings.
How to Pour Self-Levelling Compound to Flatten Uneven Floors: Irish DIY Guide

Floor Levelling Project Calculator

1. Define Subfloor Footprint Areas
Room / Section Name
Length (m)
Width (m)
2. Target Thickness Parameters
Floor Slurry Distribution View

Estimated Project Materials Required

Total Floor Surface Area: 0.00 m²
Levelling Powder Bags (25kg packs): 0 Bags
Acrylic Floor Primer (5L pack): 0 Can(s)
Foam Strips Perimeter Insulation: 0 Roll(s)
Sealant Gas/Foam Cartridge: 1 Tube
P2 Rated Particulate Masks Required: 1 Pcs
Standard Material Basket Yield Specs:
Powder Coverage Ratio: Calculated based on standard structural rules where roughly 1.7kg of dry powder covers 1 square metre of floor per 1mm of pour thickness.
Primer Penetration Ratio: 1 standard litre of concentrated acrylic primer seals roughly 6 m² to 8 m² of porous masonry subfloor base.


Get the Weekly Top Tip

Practical advice from real Topline store teams, straight to your inbox.

Locally

Owned,

Genuinely

Irish.

Contact Us
Amalgamated Hardware PLC
Trading as: Topline
Naas Industrial Estate,
Naas
Co. Kildare
W91P228

Email: info@topline.ie
Follow Us
© 2026 Amalgamated Hardware PLC. All rights reserved