How to Refresh Your Living Room with a New Coat of Interior Paint

The Step-by-Step DIY Guide

The DIY Checklist:
What You’ll Need

A fresh coat of paint is the quickest, most effective way to transform your living room. In typical Irish homes, dealing with soot from open fireplaces, general dust, or minor settlement cracks is standard. To achieve a professional, streak-free finish that lasts, you need a complete, coordinated basket of preparatory materials, correct application tools, and proper protection gear.
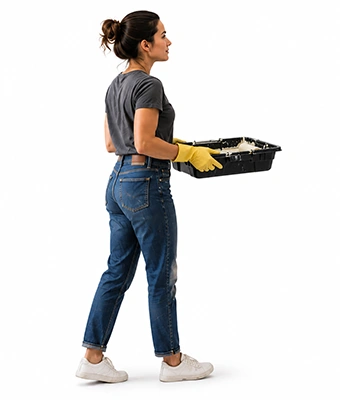
Lady carrying paint tray

1.

SAFETY
GEAR
(PPE)

Protective Eye Goggles: Vital for shielding your eyes from overhead ceiling splatters or dripping paint during roller application.

Lightweight Nitrile Gloves: Keeps drying paint, decorators caulk, and sugar soap solutions off your skin.

Sanding Dust Mask (P2 or FFP2): Highly recommended when dry-sanding old wall filler or smoothing rough patches.

2.

TOOLS &
EQUIPMENT

High-Quality Paint Brushes: A combination of a 50mm synthetic flat brush for general woodwork and a 50mm angled cutting-in brush for clean, sharp wall edges and corners.

Medium Pile Paint Rollers (225mm size): Ideal for smooth to semi-smooth interior drywall or plaster surfaces.

Sturdy Paint Tray & Disposable Liners: Speeds up clean-up and keeps paint clean.

Telescopic Extension Pole: Saves your back and lets you paint high walls and ceilings comfortably with both feet safely on the ground.

Step Ladder: A secure, lightweight platform for safe cutting-in along the ceiling track.

Putty Knife & Scraper: To rake out minor wall cracks and spread repair filler flat.

Standard Caulking Gun: Essential for smoothly dispensing joint-sealing decorators caulk.

Sanding Block & Sandpaper (120-grit and 240-grit): For removing minor wall bumps and smoothing out patch filler.

3.

Materials, Fixings & Accessories

Emulsion Wall Paint: Premium interior wall paint (typically matte or wash-proof flat matt finish) in your chosen shades.

Undercoat / Wall Primer: Crucial for blocking old dark colours, sealing freshly patched plaster, or priming bare timber skirting boards.

Wall Filler / Polyfilla: A ready-mixed or powder interior filler to repair nail holes, scrapes, and structural settlement cracks.

Decorators Caulk: A flexible acrylic gap sealant to fill joints between plaster walls and timber skirtings or door frames before painting.

Low-Tack Masking Tape (Painter's Tape): Protects switches, sockets, light fixtures, and skirting board tops for neat, clean lines.

Heavy-Duty Dust Sheets: A mix of plastic sheets to cover furniture and heavy canvas sheets to protect living room floors.

Sugar Soap (Liquid Degreaser): For washing down walls to strip away skin oils, grease, chimney soot, and dust.

Top Tip: Work is 80% Prep.
Never skip washing your walls with sugar soap, especially in older living spaces. Living room walls gather a thin, invisible layer of oil, soot, and dust over the years. If you paint directly over this, the fresh paint won't bond correctly and may bubble or peel away within months.
Top Tip: Remove the Tape While Paint is Wet.
Never leave your painter's masking tape on the wall until the paint is bone dry. If you wait, the dry paint film will bond to the tape, and pulling it off will rip chips of your new paint right off the wall. Always peel the tape away at a 45-degree angle while the final coat is still slightly tacky.

Step-by-Step DIY Installation Guide

STEP

01

Room Prep & Protection
Clear the Room:
Move all furniture away from the walls into the center of the room and cover it with plastic dust sheets.
Protect the Floors:
Lay down thick canvas dust sheets across the floor to catch any falling splatters or roller mist.
De-energise & Tape:
Unscrew the faceplates of switches and sockets slightly (ensure power is off if doing so) or apply masking tape neatly around their edges. Run tape along the top edge of your skirting boards.

STEP

02

Wall Cleaning & Structural Repair
Wash the Surfaces:
Mix sugar soap with warm water in a bucket. Using a large sponge, wipe down the walls and skirtings to remove grease, soot, and dust. Wipe clean with fresh water and allow to dry.
Fill the Cracks:
Rake out loose plaster from hairline cracks with your scraper. Use a putty knife to press your interior filler deep into the gaps. Leave it slightly proud of the surface.
Sand It Flat:
Once dry, sand the filled patches completely smooth using a 120-grit sanding block. Wipe away the fine dust with a damp cloth.
Caulk the Gaps:
Load decorators caulk into your caulking gun. Run a thin, continuous bead along the joint where the skirting boards and door frames meet the plaster wall. Smooth the bead down with a wet finger and let it skin over.

STEP

03

Spot Priming
Seal the Filler:
Apply a thin coat of wall primer or watered-down wall paint (mist coat) over all freshly filled patches. If you paint directly over raw filler, it will drink up the moisture, leaving dull, patchy spots on your finished wall.

STEP

04

Cutting-In the Edges
The Borders First:
Stir your wall paint thoroughly. Dip your 50mm angled cutting-in brush roughly 25mm into the paint, tapping off the excess.
Paint the Frames:
Carefully paint a 50mm to 75mm wide band along the corners, ceiling line, around light switches, and just above the skirting boards. Work in sections so the wet edge doesn't dry before rolling.

STEP

05

Rolling the Walls
Load the Roller:
Fit your roller cover onto the frame and attach the extension pole. Dip the roller lightly into the paint tray, rolling it back and forth on the ribbed ramp to distribute the paint evenly.
Use the "W" Technique:
Paint in 1-metre square sections. Lay down paint in a large "W" or "M" pattern, then fill in the gaps with vertical parallel strokes. This ensures even coverage and eliminates thick paint ridges.
Feather the Edges:
Keep a wet edge and lift the roller gently at the end of each stroke to blend sections seamlessly. Let the first coat dry fully (usually 2 to 4 hours depending on room temperature).

STEP

06

Apply Second Coat & Clean Up
Final Coat:
Apply a second coat in the same pattern for a rich, solid depth of colour.
Remove Tape:
Carefully peel away all masking tape while the second coat is still damp.
Wash Your Tools:
Wash water-based emulsion brushes and rollers immediately under warm running water. Spin them out and hang them up to dry so they keep their shape.
How to Refresh Your Living Room with a New Coat of Interior Paint: Irish DIY Guide

Living Room Paint Calculator

1. Define Living Room Walls
Wall Location Label
Length (m)
Height (m)
2. Excluded Areas (Doors & Windows)
Interactive Living Room Wall Visualiser

Estimated Basket Materials Required

Net Wall Surface Area: 0.00 m²
Wall Emulsion Paint (5L Tins): 0 Tins
Primer / Undercoat (2.5L Tins): 0 Tins
Decorators Caulk (310ml tube): 0 Tube(s)
Interior Polyfilla (Ready-mix 1kg): 1 Tub
Painter's Masking Tape (50m rolls): 0 Roll(s)
Heavy-Duty Floor Dust Sheets: 2 Sheets
Standard Painting Basket Yield Rules:
Paint Coverage: Standard interior emulsion paint covers roughly 12 square metres per litre per coat.
Undercoat Coverage: Undercoat primers cover roughly 10 square metres per litre and are calculated based on a single spot-priming pass over repaired areas.


Get the Weekly Top Tip

Practical advice from real Topline store teams, straight to your inbox.

Locally

Owned,

Genuinely

Irish

Contact Us
Amalgamated Hardware PLC
Trading as: Topline
Naas Industrial Estate,
Naas
Co. Kildare
W91P228

Email: info@topline.ie
Follow Us
© 2026 Amalgamated Hardware PLC. All rights reserved