How to Replace Broken uPVC Window Handles and Hinges

The Step-by-Step DIY Guide

The DIY Checklist:
What You’ll Need

Drafty windows, gaps in the frame, or window sashes dropped on one side are almost always caused by failed friction hinges or broken handles. You can easily overhaul your uPVC casement windows at home by picking up this complete project basket.
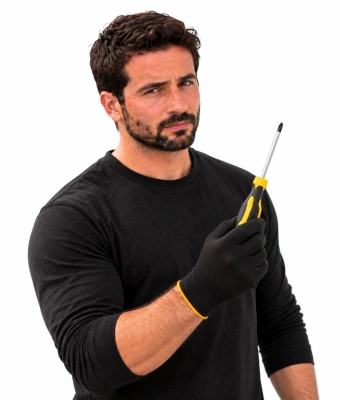
Man holding a screw driver to replace broken upvc window handles and hinges

1.

SAFETY
GEAR
(PPE)

Heavy-Duty Grip Gloves: Essential for handling heavy structural glass sashes and protecting fingers from metal hinge tracks.

Safety Glasses: Guards against metal splinters, old loose screws snapping, or window structural debris.

2.

TOOLS &
EQUIPMENT

Screwdriver Set: Standard Pozi-drive and flat-head screwdrivers to remove structural fixings.

Tape Measure: For calculating matching hinge lengths and handle spindle protrusions.

Calipers: For precision measurement of spindle width and stack heights (typically 13mm or 17mm).

Step Ladder: To safely reach higher window hinge anchors on top tracks.

Cordless Combi Drill & High-Speed Steel (HSS) Drill Bits: Used if screw heads snap or new fixing pilot paths must be established in the reinforced internal steel sash profiles.

3.

Materials, Fixings & Accessories

Replacement Window Handles: Espagnolette multi-point style handles with matching spindle lengths.

Friction Stay Hinges: Sold in matching pairs (Left/Right or Top/Bottom) to carry the heavy glass pane safely.

Window Repair Screws: Self-tapping specialized fasteners tailored for uPVC and steel reinforcing channels.

Lubrication Spray: Multi-purpose protection oil to keep the fresh metal slide joints moving smoothly.

Plastic Glazing Shims / Packers: Used to adjust sash clearance heights and pack out space if square adjustments are required.

Top Tip: The Golden Stack Height Rule.
Friction stay window hinges come in two main thicknesses: standard 13mm stack or older 17mm stack profiles. Measure this thickness accurately with calipers before purchasing your replacement set. Using the wrong size will prevent the window sash from closing flat or sealing against the weather gasket.
Top Tip: Get a Second Pair of Hands.
While handles can be changed solo, never attempt to replace friction hinges alone. When you unscrew the hinge tracks, the heavy weight of the double-glazed sash can catch you off balance, posing a drop hazard out of the building. Always have a helper support the glass frame securely.

Step-by-Step DIY Installation Guide

STEP

01

Measure and Choose Your Handle
Check Spindle Length:
Open your handle, pry away the decorative plastic screw cap cover behind the lever, and undo the two screws. Pull the handle away. Measure the protruding square metal spindle rod length (common sizes are 15mm, 30mm, or 40mm).
Identify Handing:
Note if your handle curves left, curves right, or is a universal straight design.

STEP

02

Install the New Window Handle
Set Spindle into Frame:
Insert the new square spindle into the internal gearbox opening of the window pane.
Fix and Tighten:
Align the screw slots and turn your new window repair screws firmly into position with your hand screwdriver. Do not over-torque, or you will strip the internal PVC threads. Snap the plastic cover caps on to conceal the screw heads.

STEP

03

Measure the Failed Friction Hinges
Calculate Total Track Length:
Open the window fully. Measure the total length of the long metal track fixed to the outer stationary frame (standard sizes are 312mm up to 610mm, often referenced as 12-inch up to 24-inch sizes).
Identify Hinge Type:
Confirm if it is a Side-Hung window (hinges fixed on the top and bottom) or a Top-Hung window (hinges fixed on the left and right sides). Top-hung hinges are specifically designed to hold window weight open against gravity.

STEP

04

Remove the Damaged Window Sash Safely
Secure the Sash:
Have your helper grasp the sides of the window sash firmly from inside the room.
Undo the Sash Screws:
Unscrew the fasteners holding the sliding hinge brass shoe arm to the moving window sash first. Carefully lift the window sash out of the frame openings and set it safely down onto a dust sheet.

STEP

05

Remove the Outer Frame Tracks
Clear Old Rails:
Unscrew the final remaining screws holding the old structural tracks to the exterior frame. Clean away accumulated moss, grit, or dirt slurry out of the frame corners using a cloth.

STEP

06

Mount the New Friction Hinges
Position the Tracks:
Place the new hinge track flat against the outer frame recess. Make sure the arrow markers point toward the frame corner where the window closes shut. Fix your self-tapping screws through the slotted adjustability adjustment holes first.
Mount the Sash Frame:
Lift the window sash back into position with your helper. Secure the sliding arm brackets onto the window panel frame.

STEP

07

Adjust Alignment and Lock Off
Test and Align:
Gently close the window to check if it seats square inside the outer frame. If it snags or rubs against the uPVC frame, use plastic packers or slide the adjustable screws slightly to center the frame.
Lock with Final Fixings:
Once the window closes with a perfect seal and zero drafts, fill all remaining round permanent alignment holes with window repair screws. Apply a light mist of lubrication spray across the tracking bars, then cycle the handle open and closed to bed it in.
How to Replace Broken uPVC Window Handles and Hinges: Irish DIY Guide

Window Hardware Overhaul Calculator

1. Define Window Hardware Counts
Window Location / Label
Hinge Count (Pairs)
Handle Count (Pcs)
2. Material Settings
Visual Hardware Layout Preview

Estimated Materials Required

Total Hinge Pairs Tracked: 0 Pairs
Total Window Handles Needed: 0 Pcs
Window Repair Screws Needed: 0 Pcs
Plastic Glazing Shim Packs: 0 Pack
Lubrication Spray Cans: 0 Cans
Irish Standard Window Matrices:
• Fixing Selection: Calculations assume heavy-duty 4.8mm diameter self-tapping repair screws designed to grip into old stripped pilot paths.
• Lubrication Yield: Maintenance metrics include 1 can of heavy-duty lubrication protection spray for every 6 windows serviced.


Get the Weekly Top Tip

Practical advice from real Topline store teams, straight to your inbox.

Locally

Owned,

Genuinely

Irish.

Contact Us
Amalgamated Hardware PLC
Trading as: Topline
Naas Industrial Estate,
Naas
Co. Kildare
W91P228

Email: info@topline.ie
Follow Us
Topline are proud to be affiliated with:
© 2026 Amalgamated Hardware PLC. All rights reserved