How to Replace Mouldy Silicone Sealant Around Baths & Showers

The Step-by-Step DIY Guide

The DIY Checklist:
What You’ll Need

Black mould on bathroom silicone looks unsightly and can compromise the watertight barrier, leading to structural water damage behind your tiles. Because bathrooms in Ireland experience high levels of humidity, old sealant eventually degrades and requires full replacement. To get a clean, leak-free, and trade-quality result, you will need a complete project basket containing chemical removers, tools, fresh sanitary sealant, and safety items.
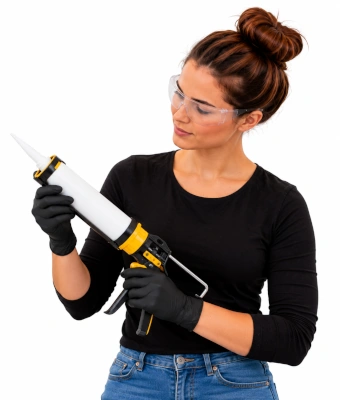
Lady holding silicone sealant gun to replace mouldy silicone sealant around baths and showers

1.

SAFETY
GEAR
(PPE)

Protective Gloves (Nitrile/Rubber): Essential to shield your skin from harsh chemical removers, strong bleach-based mould sprays, and sticky wet silicone.

Safety Glasses: Protects your eyes from chemical splashes when spraying down old joints or cleaning vertical wall surfaces overhead.

2.

TOOLS &
EQUIPMENT

Sealant Removal Tool: A specialized plastic or metal scraping blade designed to strip old silicone out of 90-degree internal corner tracks safely without scratching acrylic trays or porcelain baths.

Caulking Gun: Holds and applies steady mechanical pressure to the sealant tube, ensuring a smooth and controllable flow.

Silicone Profiling Kit: A set of plastic smoothing blocks with varied edge profiles (e.g., 6mm, 8mm, or 10mm dimensions) to shape a uniform, professional joint without messing with a soapy finger.

Utility Knife: Handy for carefully trimming away stubborn silicone roots and opening the plastic threaded tips on new sealant tubes.

3.

Materials, Fixings & Accessories

Anti-Mould Sanitary Silicone Sealant: High-grade moisture-resistant silicone fortified with powerful fungicides to permanently stop future black mould growth in wet zones.

Silicone Remover Spray: A gel or fluid chemical spray that breaks down and softens stubborn old silicone residue, making it incredibly easy to wipe away cleanly.

Masking Tape: Low-tack painter's tape used to line the upper and lower borders of the tile joint line for perfectly clean, razor-sharp edges.

Mould Killer Spray (Bleach-Based) or White Vinegar: Eradicates deep-seated mould spores hiding under the surface before the new bead is laid down.

Methylated Spirits (Meths) or Isopropyl Alcohol (IPA): A fast-evaporating cleaning degreaser that strips oils, moisture, and chemical residue away, leaving the tracks completely sterile so new sealant bonds perfectly.

Absorbent Cloths / Paper Towels: For scrubbing clean and drying out the joints during prep stages.

Top Tip: Fill the Bath Before You Seal!
Acrylic and steel baths flex slightly when filled with water. If you apply silicone to an empty bath, the joint can tear or pull away from the wall the very first time someone takes a bath. Always fill the bath entirely with cold water before applying the sealant, and leave the water inside until the new silicone has completely cured.
Top Tip: Don't Skip the Alcohol Wipe down!
New silicone will not stick to surfaces that have wet residue, old grease, or lingering chemical sealant remover. After scraping the tracks clean, always scrub the joints down thoroughly with Methylated Spirits or Isopropyl Alcohol. Let it dry completely for 10 minutes to create a bone-dry, sterile track that locks down a leak-proof seal.

Step-by-Step DIY Installation Guide

STEP

01

Slice and Strip the Old Silicone
Make the Primary Cuts:
Insert your sealant removal tool or utility knife into the edge of the old joint line. Keep the blade flat against the tiles to avoid scratching surfaces, and run it steadily along the full length of the bath or shower tray to cut the top and bottom seals.
Pull the Strands Free:
Grab one end of the loosened silicone strand and pull it firmly away from the corner wall track. Most of it should peel out in long rubbery strips.

STEP

02

Clean Up Stubborn Residue
Apply the Remover Gel:
Spray or rub your silicone remover spray over any small bits of old rubber still stuck to the wall. Let it sit for 15 to 20 minutes (or as directed on the label) to fully soften the residue.
Scrape Flat:
Use the flat plastic scraper edge of your removal tool to lift the softened residue away cleanly. Wipe down the joint using paper towels.

STEP

03

Sterilize and Kill All Hidden Mould Spores
Kill the Spores:
Spray your bleach-based mould killer spray deep into the raw corner joint void. Even if it looks clean, invisible fungal roots can linger behind. Let it bubble for 5 minutes to sanitize the path, then scrub it clean with an absorbent cloth and clean water.
Degrease the Joints:
Soak a clean, dry cloth in Methylated Spirits or Isopropyl Alcohol. Scrub down both sides of the joint line to strip away all leftover chemical films, oils, and soap scum. Let it stand for 10 minutes to dry completely.

STEP

04

Tape the Border Guidelines (Optional)
Line It Up:
For an ultra-neat finish, apply long strips of masking tape roughly 6mm above the joint on the tiles, and 6mm below on the bath rim. This traps any accidental overflows cleanly.

STEP

05

Prepare and Load Your Sealant Tube
Cut the Plastic Thread:
Use a utility knife to slice the plastic threaded tip off the top of the silicone tube, making sure you don't cut into the screw threads. Screw the plastic application nozzle onto the open thread path.
Angle the Tip Cut:
Cut the tip of the plastic nozzle at a 45-degree angle to match the target width of your joint line (typically around 6mm to 8mm wide). Load the prepped tube firmly into your caulking gun frame.

STEP

06

Lay Down a Steady Bead of Silicone
Position and Squeeze:
Hold your caulking gun tip at a 45-degree angle inside the starting corner. Squeeze the trigger smoothly while moving the gun along the joint line at a steady, consistent speed. Aim to push the sealant forward into the gap to fill it completely.

STEP

07

Profile, Smooth, and Leave to Cure
Tool the Joint:
Select a matching edge size on your silicone profiling kit tool piece. Pull the plastic smoothing block steadily along the freshly poured wet bead in a single, continuous sweep. Wipe any collected excess paste off the tool using a wet cloth or paper towel as you work.
Peel and Dry:
If you used masking tape, peel it away carefully while the silicone is still wet. If you are sealing a bath, ensure it stays full of water. Leave the finished bead to cure untouched for a full 24 hours before running any hot water in the shower or bath space.
How to Replace Mouldy Silicone Sealant Around Baths & Showers: Irish DIY Guide

Sanitary Sealing Basket Calculator

1. Define Bathroom Areas to Seal
Sanitary Unit Label
Length of Tracks (m)
2. Configuration Selections
Watertight Joint Cross-Section View

Estimated Project Basket Required

Total Sealing Distance: 0.00 m
Sanitary Silicone Tubes (290ml): 0 Tube(s)
Silicone Remover Spray (250ml): 0 Can(s)
Mould Killer Sanitizer (500ml): 1 Can
Methylated Spirits Cleaners (500ml): 1 Bottle
High-Adhesion Masking Tape: 1 Roll
Standard Sanitary Basket Yield Rules:
• Silicone Tube Yield: One standard 290ml cartridge yields roughly 9 to 10 linear metres of a 6mm x 6mm square bead run line profile.
• Remover Gel Coverage: 1 standard 250ml canister safely softens roughly 5 to 6 linear metres of stubborn built-up adhesive backing tracks.


Get the Weekly Top Tip

Practical advice from real Topline store teams, straight to your inbox.

Locally

Owned,

Genuinely

Irish.

Contact Us
Amalgamated Hardware PLC
Trading as: Topline
Naas Industrial Estate,
Naas
Co. Kildare
W91P228

Email: info@topline.ie
Follow Us
Topline are proud to be affiliated with:
© 2026 Amalgamated Hardware PLC. All rights reserved