How to Restore and Paint Your Front Door with a High-Gloss Finish

The Step-by-Step DIY Guide

The DIY Checklist:
What You’ll Need

A beautifully finished front door dramatically enhances the kerb appeal of your home. Due to the frequent rain and fluctuating humidity levels in Ireland, external timber doors take a beating. To achieve a smooth mirror-like high-gloss look that will not crack or peel, you need to follow a thorough process and build a complete basket of restoration products.
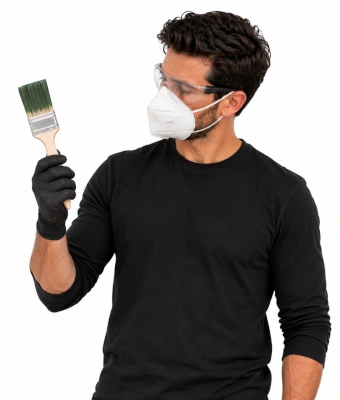
Man holding a paint brush to gloss a front door

1.

SAFETY
GEAR
(PPE)

Dust Mask (FFP2 or FFP3): Critical to prevent inhaling fine wood dust, old lead paint particles, or chemical fumes during scraping and sanding.

Safety Glasses: Essential protection to shield your eyes from flying paint flakes, wood shards, or chemical splashes.

2.

TOOLS &
EQUIPMENT

Screwdriver: For removing door handles, letterboxes, numbers, and lock faceplates prior to preparation.

Paint Scraper or Hot Air Gun: Highly recommended to strip away years of old, thick, bubbling paint layers effectively down to the bare wood.

Stripping Knife: A flexible blade for scraping softened old coatings out of intricate mouldings or corners.

Sanding Block: Holds sandpaper flat, ensuring uniform leveling across wide flat panels without creating divots.

Fine-Bristle Wood Brushes: Top-quality brushes designed to minimize brush marks and lay down a perfectly uniform paint coat.

Mini Foam Roller & Tray (High-Density Gloss Foam): Essential tool for laying down an ultra-flat foundation on large, flat door panels before laying it off with a brush.

3.

Materials, Fixings & Accessories

Knotting Solution (Patent Knotting): A shellac-based sealer brushed over natural wood knots to stop sticky resin from bleeding through your fresh paint finish.

Wood Filler: High-performance exterior wood filler to pack out and patch over deep grain cracks, splits, or old screw holes.

Multi-Grit Sandpaper Packs: A mix of heavy 80 grit for stripping, 120 grit for general smoothing, and 240 grit for sanding down between paint coats.

Methylated Spirits (Meths) or White Spirit: Used to degrease bare timber surfaces, wipe away sap, and clean dust off the panels safely.

Tack Cloths: Sticky cheesecloth squares that grab onto every single microscopic dust particle right before you start painting.

Painter's Tape: High-quality masking tape to block off glass inserts, hinges, or permanent lock fixtures cleanly.

High-Gloss or Exterior Satin Door Paint: Premium weatherproof finish coat engineered to endure direct driving rain and UV degradation.

Exterior Wood Primer: A robust weather-resistant undercoat base layer that locks onto bare wood and gives the gloss paint a solid anchor.

Top Tip: Check the Weather Forecast!
High-gloss paint handles moisture very poorly when curing. If the relative humidity is too high or if rain hits your freshly painted front door within 6 to 8 hours, the gloss finish will instantly turn cloudy, flat, and dull. Aim for a dry, calm day with a clear window of dry weather.
Top Tip: Take the Door Off the Hinges if Possible.
While you can paint a door hanging up, you will get a far superior mirror-smooth finish by tapping the hinge pins loose and laying the door completely flat across a pair of sturdy sawhorses. This stops gravity from creating paint sags, runs, or curtains along the bottom edges of the panels.

Step-by-Step DIY Installation Guide

STEP

01

Strip All Hardware & Mask Up
Remove Fixtures:
Use your screwdriver to detach the handles, letterbox, door knocker, and numerical signage. Place them safely in a small container.
Mask Hidden Areas:
If you left the door hanging, use painter's tape to wrap the hinges and shield any glass panel linings neatly.

STEP

02

Strip and Scrape Old Finishes
Remove Failing Paint:
If the existing paint layers are cracked, thick, or peeling, use your hot air gun and paint scraper to lift them cleanly down to the raw wood timber. Keep the heat gun moving constantly to avoid scorching the wood.
Work the Profiles:
Use your flexible stripping knife to scrape out softened old paint channels within decorative inner panel mouldings.

STEP

03

Seal Knots & Pack Flaws
Block Sap Bleed:
Put on your FFP2 dust mask and safety glasses. Coat any visible raw wood knots with two thin applications of shellac knotting solution to lock in natural resins.
Fill the Gaps:
Press exterior wood filler deeply into open grain splits, structural cracks, or dents using your stripping knife. Leave it slightly proud of the surface to allow for minor shrinking as it cures.

STEP

04

Systematic Level Sanding & Degreasing
Sand Flat Panels:
Wrap 120 grit sandpaper over your sanding block. Sand the entire face of the door firmly, always keeping your movements going in the exact direction of the natural wood grain lines.
Wipe Surface Clean:
Splash methylated spirits or white spirit onto a clean rag and rub down the sanded door to lift away residual sap, oils, and grease. Let it evaporate completely.

STEP

05

Apply Undercoat Primer Foundation
De-dust completely:
Run a fresh sticky tack cloth over every pane to trap invisible remaining airborne dust.
Prime Panels:
Use your high-density gloss mini foam roller to roll exterior wood primer swiftly across large flat sections. Immediately use your fine-bristle brush to smooth the wet paint out in long elegant strokes. Paint the inner mouldings first, followed by horizontal rails, and finish with vertical stiles.

STEP

06

Fine Sanding Between Undercoats
De-nib Imperfections:
Let the primer cure fully according to the guidelines. Take a ultra-fine 240 grit sandpaper strip and lightly pass it over the door to knock back tiny raised paint grains (nibs). Wipe down a final time with a fresh tack cloth.

STEP

07

Lay the Final High-Gloss Coats
Apply Gloss Paint:
Load your fine-bristle brush with high-gloss exterior paint. Apply the paint in thin, even coats to prevent sagging. Work in manageable sections using the same sequence as the primer. Do not over-work or brush the gloss coat too long once it begins to tack, otherwise you will leave brush line marks.
Reassemble and Curing:
Allow 12 to 24 hours of drying time. Apply a second gloss layer if required. Carefully re-attach your hardware once the surface is completely hard to the touch.
How to Restore and Paint Your Front Door with a High-Gloss Finish: Irish DIY Guide

Front Door Painting & Restoration Calculator

1. Define Door Project Dimensions
Door Location Label
Width (mm)
Height (mm)
2. Undercoat & Coating Choices
Door Surface Refinishing Preview

Estimated Basket Materials Required

Total Surface Area Profile: 0.00 m²
Exterior Wood Primer Required: 0.00 Litres
High-Gloss Finish Paint Required: 0.00 Litres
Exterior Wood Filler Packs: 0 Packs
Knotting Solution Sealer: 0 Bottles
Multi-Grit Sandpaper Packs: 1 Pack
Sticky Tack Dust Cloths: 0 Pcs
Standard Paint Basket Yield Rules:
Coating Spread Rates: Premium exterior wood primer and high-gloss topcoat paint spreads are calculated at a standard coverage rate of 12.0 square metres per litre per coat layer.
Baskets Rounding Allocation: Because paint is sold in discrete tin volumes, minimum retail basket provisions automatically round up to standard retail container limits.


Get the Weekly Top Tip

Practical advice from real Topline store teams, straight to your inbox.

Locally

Owned,

Genuinely

Irish.

Contact Us
Amalgamated Hardware PLC
Trading as: Topline
Naas Industrial Estate,
Naas
Co. Kildare
W91P228

Email: info@topline.ie
Follow Us
© 2026 Amalgamated Hardware PLC. All rights reserved