How to Revive Your Patio with Cleaning and Repairs

The Step-by-Step DIY Guide

The DIY Checklist:
What You’ll Need

A beautiful patio is the heart of an Irish garden, but damp winters can leave paving slabs covered in slippery green algae, weeds, and loose jointing sand. Reviving your outdoor living space requires a complete basket of cleaning agents, repair aggregates, essential trade tools, and proper protective gear to complete the job safely and professionally.
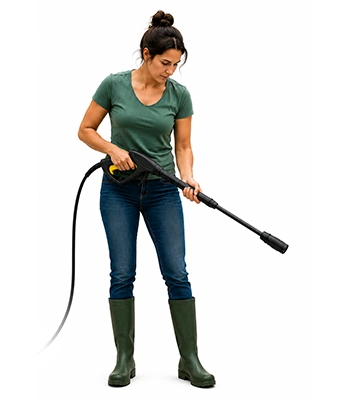
Lady holding a hosepipe

1.

SAFETY
GEAR
(PPE)

Safety Glasses: Essential to guard your eyes against high-pressure water spray, flying dirt, stone chips, and chemical cleaning splashes.

Heavy-Duty Protective Gloves: Protects hands from abrasive sand, rough concrete edges, and chemical cleaners.

Knee Pads: Highly recommended to prevent knee strain while kneeling on hard paving stone during pointing and jointing repairs.

2.

TOOLS &
EQUIPMENT

Pressure Washer: For deep-cleaning paving surfaces and blasting away stubborn grime, weeds, and decayed organic matter from paving gaps.

Stiff Push Broom / Scrubbing Brush: Used to agitate patio cleaning solutions and sweep jointing sand deep into paving gaps.

Pointing/Trowel Kit: A pointing trowel or jointing iron helps pack jointing material firmly into open paving seams for a long-lasting finish.

Spirit Level: To ensure replacement paving slabs are set flat and fall away from the house at a gentle slope for drainage.

Rubber Mallet: For tapping replacement slabs gently into their sand/cement mortar beds without cracking the stone.

Wheelbarrow and Shovel: Essential for mixing sub-base materials, sharp sand, or mortar, and moving them across your garden.

Wet & Dry Vacuum (Optional): Useful for removing pooled dirty water and clearing clean joint lines before refilling.

Drain Unblocker (Optional): Handy for flushing out surrounding gulleys and drains that might get clogged with dirty wash runoff.

3.

Materials, Fixings & Accessories

Patio & Algae Cleaner (Biocide): A specialized cleaning treatment designed to break down and eliminate green algae, mould, and lichens, keeping them away longer.

Jointing Sand / Polymeric Sand: Specialized sand swept into paving joints to lock slabs in place. Polymeric sand contains binders that harden when wet to resist weed growth.

Replacement Paving Slabs/Flags: Matching paving flags to replace any cracked, sunken, or structurally damaged stones.

MOT Type 1 (Hardcore) & Sharp Sand: Granular sub-base material and coarse sand to create a solid, level foundation bed for any replacement flags.

Weed Killer (Optional): A targeted systemic weed killer to clear deep-rooted weeds from paving joints before washing.

Top Tip: Work Safely with High Pressure.
When pressure-washing paving, hold the spray lance at a 45-degree angle rather than pointing it straight down. Sweeping at an angle helps lift surface grime cleanly without digging too deep into the bedding layer underneath your slabs.
Top Tip: Choose Your Dry Jointing Window Carefully.
Polymeric jointing sand must be swept into paving joints when the stone surface is 100% dry. If you sweep it onto damp paving, the polymers will activate prematurely, stick to the face of your slabs, and leave permanent, unsightly white stains. Check the Irish weather forecast for a clear 24-hour dry window!

Step-by-Step DIY Installation Guide

STEP

01

Clear the Area and Kill Weeds
Clear the Space:
Move all garden furniture, plant pots, and barbecues away from the patio surface to ensure an unobstructed working area.
Target Stubborn Weeds:
Pull out large weeds by hand or apply a targeted systemic weed killer to any deep-rooted growth nesting in the joints. Allow the treatment to take full effect according to the manufacturer's instructions.

STEP

02

Deep-Clean with Algae Cleaner
Apply the Biocide:
Dilute your patio and algae cleaner with water as directed. Pour it evenly across the surface and scrub it vigorously into the paving flags using a stiff push broom.
Let it Work:
Allow the cleaning solution to sit and break down the organic layer (typically 15 to 30 minutes, or as indicated on the product packaging). Do not let the solution dry out completely during this phase.

STEP

03

Power Wash the Grime Away
Blast the Surface:
Put on your safety glasses. Set up your pressure washer and sweep across the flags systematically, working from the highest drainage points downward.
Clear out Loose Joints:
Use the pressure washer to clean out decayed, loose, and crumbly jointing material, leaving clean, open channels between the slabs ready for repair. Ensure all dirty water runoff drains away safely.

STEP

04

Lift and Replace Damaged Slabs
Remove Broken Flags:
If you have cracked or severely sunken paving slabs, carefully chip out the surrounding joint mortar and pry the damaged slab up using a shovel or crowbar.
Prep the Base Bed:
Dig out the loose, old bedding layer. Place down a thin layer of MOT Type 1 hardcore if the ground is soft, compact it, and add a layer of damp sharp sand mixed with cement to form a flat, solid mortar bed.
Set the New Flag:
Lower the replacement paving slab into position. Use your spirit level to make sure it aligns perfectly with the surrounding patio surface. Tap it gently with your rubber mallet until it sits completely level and stable.

STEP

05

Fill the Joint Gaps
Ensure the Patio is Dry:
Wait for the cleaned patio to dry out completely. Sweep any standing water away or use a wet & dry vacuum to accelerate drying inside the joint lines.
Sweep in Jointing Sand:
Pour jointing sand or polymeric sand across the patio. Use a dry, soft push broom to sweep the sand diagonally back and forth over the joints, packing the gaps tightly from bottom to top.
Pack and Clean:
Use a pointing tool or jointing iron to pack the sand down firm. Sweep away all excess sand from the face of the paving stones until no loose grains remain on the flags.

STEP

06

Activate and Cure
Mist with Water:
If using polymeric sand, set your hose nozzle to a gentle mist setting and spray the patio lightly. Wet the sand thoroughly to activate the binders, but do not use high pressure or flood the area, as this will wash the sand away.
Let it Cure:
Avoid walking on the newly repaired patio for at least 24 hours to let the jointing compound cure into a solid, flexible, weed-resistant barrier.
How to Revive Your Patio with Cleaning and Repairs: Irish DIY Guide

Patio Cleaning & Repair Calculator

1. Define Patio Dimensions
Patio Section Label
Length (m)
Width (m)
2. Product Specifications
Patio Layout Visual Preview

Estimated Basket Materials Required

Total Patio Surface Area: 0.00 m²
Algae Cleaner (5L bottles): 0 Bottles
Jointing Sand (20kg bags): 0 Bags
Replacement Slabs Required: 0 Pcs
MOT Type 1 Sub-Base (25kg bags): 0 Bags
Sharp Sand (25kg bags): 0 Bags
Standard Patio Material Yield Rules:
Algae Cleaner: One standard 5L bottle of concentrated biocide cleaner covers roughly 25 m² when diluted.
Jointing Sand: Calculated at roughly 1 bag (20kg) per 15 m² for standard 10mm joints. Narrower joints require less, wider joints require more.
Slab Repair Base: Replacing a damaged slab requires roughly 1 bag of MOT Type 1 and 1 bag of Sharp Sand to reconstruct a solid bedding layer per 2 slabs.


Get the Weekly Top Tip

Practical advice from real Topline store teams, straight to your inbox.

Locally

Owned,

Genuinely

Irish

Contact Us
Amalgamated Hardware PLC
Trading as: Topline
Naas Industrial Estate,
Naas
Co. Kildare
W91P228

Email: info@topline.ie
Follow Us
© 2026 Amalgamated Hardware PLC. All rights reserved