How to Set Up a Traditional Outdoor Clothesline Post

The Step-by-Step DIY Guide

The DIY Checklist:
What You’ll Need

A traditional outdoor T-bar clothesline is a permanent fixture in many Irish gardens, offering a robust and environmentally friendly way to dry laundry. Given our high winds and soft ground conditions, setting your clothesline posts deep in a solid concrete base is critical to avoid leaning or structural failure. This guide covers everything from the posts and line hardware to the specific ground tools and protective gear needed for a professional finish.
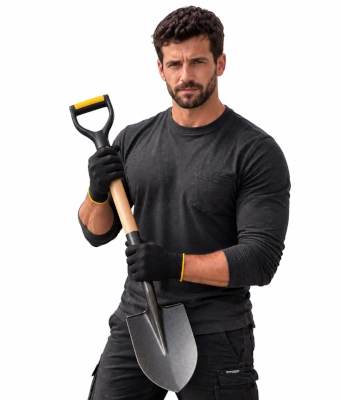
Man holding a shovel to set up a traditional outdoor clothesline post

1.

SAFETY
GEAR
(PPE)

Heavy-Duty Safety Gloves: Protects your hands against blisters while digging, rough concrete burns from postcrete powder, and sharp cable edges.

Safety Glasses: Essential eye protection against flying stone chips when digging hard ground or splashing wet postcrete mix.

2.

TOOLS &
EQUIPMENT

Post-hole Digger: Cuts narrow, vertical, cylindrical holes cleanly, drastically reducing the amount of postcrete required compared to a standard square dig.

Shovel: Used to clear out loose soil, edge the turf, and lift dirt away from your work zone.

Spirit Level: Critical to check that your posts stand completely straight and plumb in the ground before pouring your fast-setting concrete.

Adjustable Spanner: Used to tighten down turnbuckles, nuts on heavy-duty eye bolts, and wire rope clips tightly.

Wire Cutters: High-leverage cutters to slice through thick PVC-coated steel wire line cleanly without fraying the core.

Tape Measure & Pencil: For marking out post hole positions, measuring depth marks, and leveling wire attachment spacing along the T-bar.

Maul / Sledgehammer or Wheelbarrow: A sledgehammer is handy for tamping down post hole bases, while a wheelbarrow makes transporting heavy bags of postcrete effortless.

3.

Materials, Fixings & Accessories

Heavy-Duty Steel T-Posts or Treated Timber 4x4 Posts: The main structural posts, typically 2400mm long to allow at least 600mm to be buried below ground line.

PVC-Coated Line Wire: High-tensile steel wire coated in smooth PVC plastic, ensuring excellent load-carrying capacity without snagging wet clothing.

Turnbuckles: Adjustable tensioning hooks fitted at one end of the line wire run, making it easy to eliminate slack over time.

Postcrete Bags: Fast-setting specialized concrete mix that sets up in minutes when mixed with water right inside the excavated hole.

Pulley Wheels: Optional smooth running wheels attached to the T-bar loops to make line pulling fluid and frictionless.

Wire Rope Grips / Thimbles: Steel U-bolt clamps and teardrop loops designed to lock wire line ends around eye bolts securely without kinking.

Heavy-Duty Eye Bolts or J-Hooks: Structural anchors bolted directly through the post cross-arms to attach lines, pulleys, or turnbuckles.

Exterior Paint or Metal Primer: Essential weatherproofing basecoat to protect steel configurations from corrosion or timber from damp rot.

Top Tip: Dig Deep to Beating the Wind.
Irish garden soils hold a high volume of ambient dampness, which softens upper turf layers. Never skimp on your base hole depth. Ensure your holes are at least 600mm deep and 300mm wide so the concrete anchor sits safely below the frost line and resists severe winter gales.
Top Tip: Paint Before You Bury.
If you are using steel T-posts or raw treated timber, apply your metal primer or exterior paint coat across the bottom section before placing it into the hole. Once encased in postcrete, wet ground moisture can get trapped right at the ground line junction, which triggers premature rot or rust if left unprotected.

Step-by-Step DIY Installation Guide

STEP

01

Map the Line Run & Excavate
Determine the Run Length:
Select a clear, sunny, unshaded section of your garden. Measure out your targeted clothesline length. Mark your starting and ending post centers clearly with a pencil or peg.
Dig the Post Anchor Holes:
Using your post-hole digger, cut down vertically into the turf at your marked marks. Excavate until the hole reaches a depth of 600mm and a width of roughly 300mm. Clean out loose mud from the base using a shovel.

STEP

02

Prepare and Primer Your Posts
Apply Primers/Coatings:
Lay your steel T-posts or 4x4 timber posts down on scrap cardboard. Coat the bottom 800mm section with metal primer or end-grain preservative. Let it dry completely according to product labels.
Mount Eye Bolts:
Bolt your heavy-duty eye bolts or J-hooks through the pre-drilled holes on your post's horizontal cross T-arm. Secure them tightly using an adjustable spanner.

STEP

03

Set and Plumb the Structural Posts
Position the Post:
Lower the treated post down into the center of your excavated hole. Fill the base of the hole with roughly 50mm of gravel or loose dry soil to help water drainage beneath the foot.
Hold Plumb Level:
Place your spirit level against the front and side faces of the post structure. Hold the frame completely vertical. Use wood braces or ask a assistant to keep the post straight during the next step.

STEP

04

Pour the Fast-Setting Postcrete Base
Add Water and Powder:
Pour water into the hole until it fills roughly one-third of the depth. Empty your first bag of fast-setting postcrete powder directly around the post, distributing it evenly. The water will absorb the mix instantly.
Tamp and Slope:
Use a wood stick or shovel handle to poke the wet mix to clear any trapped air bubbles. Use a trowel to shape a slight slope on the wet top surface of the concrete right at the ground line line. This allows rainwater to roll away from the post instead of pooling against it. It will harden up solid within 10 to 15 minutes.

STEP

05

Rig and Tension the Line Wires
Assemble Turnbuckles & Grips:
Hook your turnbuckles into the eye bolts on your primary post face. Thread the end of your PVC-coated line wire through a steel teardrop thimble, loop it back, and clamp it down using wire rope grips. Tighten the tiny nuts securely with your adjustable spanner.
Run and Strain the Line:
Pull the wire line across your lawn space to the opposite post's eye bolt or pulley configuration. Pull the wire line taut by hand, cut it to length with wire cutters, and clamp it off using another wire grip loop. Twist the central turnbuckle body to tension the wire to your preferred tightness.
How to Set Up a Traditional Outdoor Clothesline Post: Irish DIY Guide

Traditional Clothesline Post Calculator

1. Define Installation Scope
2. Anchor Specification Details
Clothesline Layout Rigging Preview

Estimated Materials Basket Required

Main Support Line Posts: 2 Pcs
PVC-Coated Wire Line Needed: 0.00 m
Fast-Setting Postcrete Bags: 0 Bags
Adjustable Turnbuckles: 0 Pcs
Wire Rope Grips & Thimbles: 0 Pairs
Heavy Duty Eye Bolts / Hooks: 0 Pcs
Protective Weathercoat Tins: 1 Tin (750ml)
Standard Hardware Basket Yield Specs:
• Line Calculations: Total wire required equals your run distance multiplied by the number of loops, plus a 2-metre extra allowance buffer for knot looping and termination tiebacks.
• Hardware Matching: Every independent line track loop automatically allocates 1 turnbuckle tensioner, 1 pair of wire rope grips/thimbles, and 2 structural eye bolts across the opposing ends.


Get the Weekly Top Tip

Practical advice from real Topline store teams, straight to your inbox.

Locally

Owned,

Genuinely

Irish.

Contact Us
Amalgamated Hardware PLC
Trading as: Topline
Naas Industrial Estate,
Naas
Co. Kildare
W91P228

Email: info@topline.ie
Follow Us
Topline are proud to be affiliated with:
© 2026 Amalgamated Hardware PLC. All rights reserved