How to Upgrade to Smart Home Wireless Light Switches

The Step-by-Step DIY Guide

The DIY Checklist:
What You’ll Need

Upgrading to smart wireless light switches is a fantastic home improvement project. It allows you to control your lighting via phone apps, set automated schedules, and save energy. Unlike old smart bulbs that lose connectivity when the wall switch is flipped off, smart switches keep your system online 100% of the time. This guide is tailored for standard single-phase residential lighting circuits. Gathering a complete project basket ensures you have the right equipment, tools, and safety gear to get the job done smoothly.
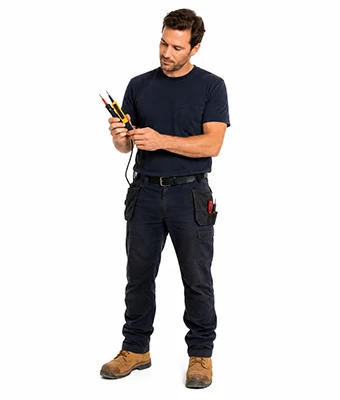
Man holding a voltage/circuit tester

1.

SAFETY
GEAR
(PPE)

Safety Glasses: Essential eye protection against falling dust, plaster crumbs, or loose wire insulation when working under ceiling roses and inside wall boxes.

Insulated Work Gloves: Form-fitting utility gloves to protect your hands from scrapes inside metal back boxes.

2.

TOOLS &
EQUIPMENT

Two-Pole Voltage Tester: Absolutely critical. Do not rely on cheap neon screwdriver testers. You need a reliable two-pole tester or multimeter to guarantee the power is 100% dead before touching wires.

Insulated Screwdrivers (VDE Rated): Safety-rated screwdrivers (usually marked up to 1000V) to turn switch faceplate screws and wire terminals without any conductive paths.

Wire Strippers / Side Cutters: For cleanly snipping old copper ends and stripping outer plastic sheathing to reveal fresh conductor metal.

Torch or Headlamp: Since you will be turning off the lighting circuit at the main consumer unit (fuse board), a bright headlamp is essential to see what you are doing in the dark.

Tape Measure & Sharp Pencil: For marking screw positions or aligning multi-gang switch boxes.

3.

Materials, Fixings & Accessories

Smart Light Switches: Wireless-enabled switches (WiFi, Zigbee, or Z-Wave). Choose "No-Neutral" switches if your home lacks a neutral wire at the switch wall box (very common in older Irish houses built before 2005).

Connectivity Hubs: Required if you select Zigbee or Z-Wave switches. These plug directly into your home router to coordinate signals.

Wire Connectors: High-quality lever-lock terminal connectors (Wago-style) to securely join neutral loops, earths, or bridge connections inside the back box.

Smart LED Bulbs (Optional): Paired with dimmable smart switches to ensure perfect dimming curves and variable colour temperatures without flickering.

Plasterboard Wall Plugs: Sized nylon plugs if you need to secure switch plates to hollow plasterboard drylining.

Top Tip: The Golden No-Neutral Rule.
Standard switches only interrupt the live wire, meaning there is often no neutral wire behind your old light switch. If your home was wired before the mid-2000s, you almost certainly do not have a neutral wire at the switch. Make sure to purchase "No-Neutral Required" smart switches. These use a tiny trickle of power through the load to stay online, saving you from having to pull new wires through the walls!
Top Tip: Double-Test Every Wire.
Never assume a circuit is dead just because you flipped a breaker. Turn the light switch ON, go to your consumer unit, switch off the correct breaker, and ensure the light goes out. Then, return to the switch and use your two-pole voltage tester across the live and earth terminals to confirm there is absolutely zero voltage present before loosening any terminal screws.

Step-by-Step DIY Installation Guide

STEP

01

Isolate the Power & Double-Test
Turn Off the Breaker:
Locate your home's main consumer unit (fuse board) and turn off the breaker labeled "Lights" or "Lighting Circuit".
Verify It Is Dead:
Test the physical light switch to confirm the light no longer turns on. Put on your headlamp, unscrew the faceplate, pull it forward, and use your two-pole voltage tester on the terminal screws to guarantee no current is flowing.

STEP

02

Document the Existing Wiring
Take a Photo:
Before disconnecting any wires, take a clear picture of the terminals on your smartphone. Note which wires go into the COM (Common), L1, and L2 terminals.
Label the Wires:
Use small pieces of electrical tape to mark the Permanent Live wire (usually coming from the consumer unit) and the Switched Live wire (going up to the light fixture).

STEP

03

Prep the Back Box & Wires
Disconnect the Old Switch:
Loosen the terminal screws and pull the wires free. Inspect the copper ends. If they look tarnished or bent, snip them clean with your cutters and strip back 8mm of fresh copper using your wire strippers.
Manage Earth Connections:
Ensure the bare copper earth wires are sleeved in green/yellow insulating sleeving and joined together securely inside the back box using a lever-lock wire connector.

STEP

04

Wire the Smart Switch
Standard No-Neutral Wiring:
Insert your Permanent Live wire into the "L" or "Line" terminal of the smart switch. Insert the Switched Live wire (usually marked with brown tape over a blue core) into the "L1" or "Load" terminal.
Secure the Connections:
Tighten the terminal screws firmly with your insulated VDE screwdriver. Pull lightly on each wire to ensure they are locked in and cannot slip out.

STEP

05

Mount the Switch to the Wall
Tuck Wires Neatly:
Carefully fold the wires into the back box, making sure they are not pinched behind the switch chassis or crushed against sharp metal edges.
Fix the Screws:
Align the smart switch chassis with the back box screw holes. Insert the fixing screws and tighten them until the switch sits completely flush and level against the wall. Snap on the decorative outer cover plate.

STEP

06

Power Up & Configure
Restore Power:
Return to your consumer unit and switch the lighting breaker back ON.
Test Manually:
Press the button on the new smart switch to ensure it turns the light on and off manually.
Pair to Your App:
If using a hub, plug it into your router. Put your smart switch into pairing mode (usually by holding the switch button down for 5-10 seconds until a light flashes) and complete the setup inside your smartphone smart home app.
How to Upgrade to Smart Home Wireless Light Switches: Irish DIY Guide

Smart Switch Upgrade Calculator

1. Map Out Your Light Switches
Room / Zone
Switch Gangs (1-3)
Neutral Present?
2. Extras & Spares Buffer
Smart Switch Wiring Preview

Estimated Basket Materials Required

Total Smart Switches: 0 Switch(es)
• No-Neutral Type: 0
• Standard Neutral Type: 0
Connectivity Hubs Needed: 0 Hub(s)
Smart LED Bulbs: 0 Bulb(s)
Lever Wire Connectors (Wago-style): 0 Connector(s)
Safety & Testing Tools: 1 Set Required
Standard Wiring Allocation Rules:
Connectivity Hubs: Standard Zigbee systems require 1 central hub to bridge wireless communications to your home internet router.
Wire Connectors: Every switch upgrade typically requires at least 3 lever-lock connectors to join earth lines and neutral loops inside the wall box.


Get the Weekly Top Tip

Practical advice from real Topline store teams, straight to your inbox.

Locally

Owned,

Genuinely

Irish

Contact Us
Amalgamated Hardware PLC
Trading as: Topline
Naas Industrial Estate,
Naas
Co. Kildare
W91P228

Email: info@topline.ie
Follow Us
© 2026 Amalgamated Hardware PLC. All rights reserved