How to Weatherproof and Lock Your Garage Door Securely

The Step-by-Step DIY Guide

The DIY Checklist:
What You’ll Need

Garages in Ireland frequently suffer from dampness, leaves blowing under the door, and vulnerable basic locking mechanisms. Upgrading your threshold seal and lock configuration keeps heavy coastal rainwater out and protects your tools from theft.
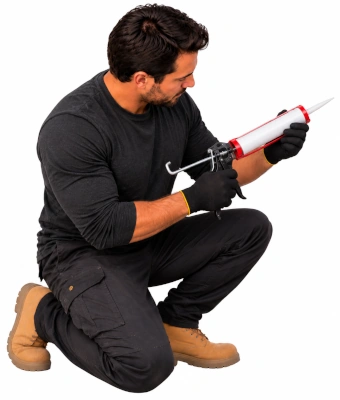
Man holding a caulking gun to weatherproof and lock garage doors securely

1.

SAFETY
GEAR
(PPE)

Safety Glasses: Essential eye protection against flying steel curls when drilling through metal garage doors or structural masonry.

Work Gloves: Tough protective fabric layer to prevent metal cuts and shielding hands from heavy-duty industrial flooring adhesives.

2.

TOOLS &
EQUIPMENT

Caulking Gun: Frame assembly used to uniformly apply thick floor adhesive sealant tracks.

Socket Set: Needed to quickly tighten down the lock chassis backing fasteners, washers, and nyloc configurations.

Drill and Metal Drill Bits: High-speed drill set including small pilot choices up to larger step diameters to clear space for lock shafts.

Utility Knife: Sharp utility blade used to cleanly cut and trim tough rubber floor threshold lines.

Tape Measure: For ensuring the horizontal span matches your floor tracks precisely.

Stiff Wire Brush & Degreaser/Methylated Spirits: Crucial prep setup to remove ancient oil splatters, tyre marks, and loose concrete crusts.

Metal Center Punch: Used with a hammer to make starting divots on slick sheet metal so drill bits do not dance across your paintwork.

3.

Materials, Fixings & Accessories

Heavy-Duty Rubber Garage Threshold Seal: High-density rubber floor profile section designed to block drafts and pooling water.

Floor Adhesive: Specialized industrial exterior structural sealant formulation designed to weld rubber to cold concrete permanently.

T-Bar Garage Door Lock Kit: Premium secure handle kit replacement with rear horizontal locking rod throw arrays.

Coach Bolts: Heavy smooth-headed security bolts that prevent attackers from unbolting your lock frame from the outside.

Nyloc Nuts and Washers: Vibration-resistant nuts containing locking nylon inserts that won't vibrate loose when slamming doors.

Top Tip: The Concrete Moisture Test.
Adhesives will fail if fixed to wet or dusting concrete. Scrub the threshold line with your wire brush and degreaser, then test fit by lowering your garage door completely. Mark the exact inside floor path line with a pencil before applying a single bead of adhesive.
Top Tip: Stepped Drilling for Clean Lock Holes.
Sheet metal can warp or tear easily if forced. Punch your center mark cleanly, run a 3mm pilot bit first, and gradually step up in sizes until you reach your final lock barrel diameter. This guarantees smooth, round entry channels without ragged edges.

Step-by-Step DIY Installation Guide

STEP

01

Prep the Floor Track Line
Clean and Scrub:
Sweep the entrance floor space clean. Use your stiff wire brush along with a degreaser or methylated spirits to break down hidden oil deposits where the door lands. Wipe dry.
Dry Test Lay:
Unroll your heavy-duty rubber garage threshold seal across the open garage span. Use a utility knife to trim the profile ends flush against your structural side pillars.

STEP

02

Mark out the Seal Positioning
Close the Door:
Lower your garage door onto the dry rubber seal. Push the rubber ramp wedge tight up against the inside face of the door bottom blade so it creates a continuous windbreak.
Pencil the Alignment:
Use a bright pencil or crayon marker to trace lines on the floor on both the front and back borders of the rubber base. Open the door and lay the rubber strip safely to the side.

STEP

03

Gun the Adhesive and Bed the Strip
Run Adhesive Lines:
Load your structural floor adhesive tube into a caulking gun. Apply parallel thick zig-zag beads directly on the concrete floor between your pencil guidelines.
Set the Threshold:
Carefully lower the rubber strip back onto the adhesive patch. Press firmly from the center out to the edges, stepping along the profile base to bed the material solidly into place. Wipe away any extra material squeeze-out.

STEP

04

Remove the Old Lock Mechanism
Unscrew Backing Brackets:
Move inside the garage. Undo the holding nuts or retaining screws clamping the ancient center handles or basic locking lock latch assemblies.
Slide out Locking Bars:
Free the mechanical side locking bars from their slider loops. Remove the face handle from the outside of the panel.

STEP

05

Mark and Drill the New T-Bar Lock
Position Template:
Hold your new T-bar lock chassis up to the center door spine. Mark the central drive spindle barrel and the companion side mounting screw holes.
Punch and Drill:
Press your metal center punch firmly on each mark. Fit your safety glasses and drill out your holes cleanly using a stepped metal drill bit progression. Clear away loose metal shavings with a gloved hand.

STEP

06

Bolting the Security Fasteners
Insert Coach Bolts:
Push the smooth-domed security coach bolts through the handle front face plate from the outside of the door panel.
Secure with Nyloc Nuts:
From the inside face, slide on large structural steel washers followed by your nyloc nuts. Tighten down the assemblies using your socket set until the lock sits fully rigid against the skin panel without distorting the metal.

STEP

07

Align the Locking Throw Rods
Connect Link Rods:
Mount the inner driver plate mechanism and attach the horizontal side locking bars into the central gear system.
Test Catch Alignment:
Throw the handle out to lock position. Make sure the heavy bars throw smoothly and enter directly into the slot holes on the side tracks. If they drag, expand the side receiver slots slightly using a metal file or drill bit. Close the assembly and leave the floor seal to cure undisturbed for 24 hours.
How to Weatherproof and Lock Your Garage Door Securely: Irish DIY Guide

Garage Protection & Material Calculator

1. Define Garage Door Width
Door Location Label
Width (Metres)
2. Hardware Quantities
Visual Installation Layout Preview

Estimated Materials Required

Total Entrance Width: 0.00 m
Threshold Rubber Seal Needed: 0.00 m
High-Bond Floor Adhesive Tubes: 0 Tubes
T-Bar Lock Hardware Kits: 0 Pcs
Security Coach Bolts Required: 0 Pcs
Matching Washer & Nyloc Packs: 0 Pcs
Standard Garage Assembly Rules:
• Adhesive Volume Yield: High-bond flooring cartridge calculations assume a dual 6mm continuous heavy zig-zag bead profile path along the floor base area (~1 tube handles up to 3.0m entry spans).
• Fixing Count Allocation: Hardware profiles allocate 4 coach bolts per center lock and 2 fixings per secondary side retaining latch.


Get the Weekly Top Tip

Practical advice from real Topline store teams, straight to your inbox.

Locally

Owned,

Genuinely

Irish.

Contact Us
Amalgamated Hardware PLC
Trading as: Topline
Naas Industrial Estate,
Naas
Co. Kildare
W91P228

Email: info@topline.ie
Follow Us
Topline are proud to be affiliated with:
© 2026 Amalgamated Hardware PLC. All rights reserved