Plant a Vibrant Seasonal Hanging Basket

The Step-by-Step DIY Guide

The DIY Checklist:
What You’ll Need

Hanging baskets are easy to create, but getting the hardware right is essential. A freshly watered basket is incredibly heavy and needs secure fixings to withstand strong Irish winds.
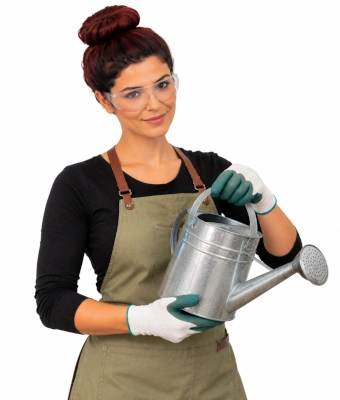
Woman holding a watering can after planting a vibrant seasonal hanging basket

1.

SAFETY
GEAR
(PPE)

Safety Glasses: Essential eye protection against flying brick dust or debris when drilling into walls.

Dust Mask: Protects your lungs from masonry dust while drilling, and also helpful if you are sensitive to dry compost dust.

Durable Garden Gloves: To keep your hands clean and protected from sharp edges or thorny plants.

2.

TOOLS &
EQUIPMENT

Hammer drill: Required to bore holes into brick, block, or concrete walls.

Masonry drill bit (or wood bit): Match the masonry bit size to your heavy-duty wall plugs (usually 8mm or 10mm). Use a wood bit if fixing directly to strong timber posts.

Screwdriver: For driving the screws tightly into the wall plugs.

Adjustable spanner / socket set: Needed if your bracket requires hex-head coach screws for extra weight support.

Watering can: With a fine rose attachment to gently water in the new plants without washing away the soil.

Empty plastic bucket (Bonus Tip): Used to sit the round wire basket into while planting so it does not roll around on your bench.

3.

Materials, Fixings & Accessories

Heavy-duty wire or plastic hanging basket: The main container. 14-inch is the standard size for home exteriors.

Coco-coir or moss basket liner: Holds the compost inside the frame while allowing excess water to drain out easily.

Premium multi-purpose container compost: Do not use soil from the garden. You need light, nutrient-rich compost designed for pots and containers.

Water-retaining polymer granules: A must-have. These swell up to store water and release it slowly to the roots during hot or windy days, stopping your basket from drying out.

Slow-release fertilizer pellets: Add these to the soil mix to feed your plants steadily over the next 6 months for maximum blooming.

Established Plug Plants, Bedding Plants, or seedlings: Pick trailing plants for the edges (like Fuchsias, Lobelias, or Ivy) and upright feature plants for the centre (like Geraniums or Begonias).

The Hanging Basket Wall Bracket: A sturdy metal bracket to mount the basket securely to your wall.

Wall Plug & Screw Pack (Heavy Duty): Standard picture frame screws will fail. You need heavy-duty fixings that can bear up to 15kg of weight.

DIY Pro Tip:
If drilling into a brick wall, always try to drill directly into the solid brick rather than the mortar joints, as mortar can crumble and cause the heavy basket to pull out of the wall.
Maintenance Rule:
Hanging baskets dry out incredibly fast in the wind. Check the soil daily. In the peak of summer, you may need to water them every single evening. Deadhead (pinch off) faded flowers regularly to force the plant to grow new blooms all season long.

Step-by-Step DIY Installation Guide

STEP

01

Mount the Wall Bracket Safely
Find the Right Spot:
Choose a location where you can easily reach the basket to water it. Make sure it gets adequate sunlight based on the plants you chose. Check the wall to ensure there are no hidden pipes or cables behind the render.
Drill and Fix:
Put on your safety glasses and dust mask. Hold the wall bracket in position and mark the drill holes with a pencil. Using your hammer drill and masonry bit, drill holes slightly deeper than your wall plugs. Tap the wall plugs in until flush, position the bracket, and drive your heavy-duty screws home tightly with a screwdriver or spanner. Give the bracket a firm tug to test its strength.

STEP

02

Prepare the Soil Mix
Steady the Basket:
Place your wire basket on top of a bucket to keep it completely stable while you work. Insert the coco-coir or moss liner.
Mix the Magic Formula:
Fill a separate container or wheelbarrow with enough premium multi-purpose container compost to fill the basket. Thoroughly mix in a handful of water-retaining polymer granules and a scoop of slow-release fertilizer pellets. This mix is the secret to professional-looking, low-maintenance displays.

STEP

03

Planting the Basket
The Base Layer:
Fill the lined basket roughly halfway up with your enhanced compost mix. Gently firm it down.
Trailing Plants (The Edges):
If your liner allows, cut a few small slits in the sides using a scissors. Push the roots of your trailing plug plants gently through from the outside in. Add more compost to cover their roots, bringing the soil level up to about 1 inch (25mm) below the rim of the basket.
Feature Plants (The Centre):
Plant your upright, showy plants right in the middle of the basket. Fill in the remaining space around the top edge with more trailing plants or bright bedding plants.
Top Up:
Fill any remaining gaps with compost, pressing down lightly around the roots. Make sure to leave that 1-inch gap at the top to act as a watering reservoir so water doesn't immediately spill over the sides.

STEP

04

Watering and Hanging
Water on the Ground:
Before you attempt to lift it, give the basket a thorough watering using your watering can. Water gently until it begins to drip from the bottom.
Lift and Hang:
Wait a few minutes for the excess water to drain out. Lift the basket carefully (remember your safe lifting techniques as it will be heavy!) and hook it securely onto the wall bracket.
Plant a Vibrant Seasonal Hanging Basket: DIY Guide & Calculator

Custom Drag & Drop Materials Calculator

1. Map Your House Exterior
Label
Basket Size
Position (Wall)
2. Additions & Wastage
Visual Wall Layout
💡 Drag baskets horizontally across the wall to space them out.

Estimated Materials Required

Total Baskets Needed: 0 pcs
Basket Liners Required: 0 pcs
Multi-Purpose Compost: 0 Litres
Total Plug/Bedding Plants: 0 Plants
Water-Retaining Granules: 0 grams
Slow-Release Fertilizer: 0 grams
Hardware Fixings:
Heavy-Duty Wall Brackets: 0 pcs
Wall Plugs & Screws: 0 pcs
Standard Planting Guide:
12-inch (300mm): Holds ~8 Litres of compost, requires ~12 standard plants.
14-inch (350mm): Holds ~12 Litres of compost, requires ~15 standard plants.
16-inch (400mm): Holds ~16 Litres of compost, requires ~18 standard plants.

Get the Weekly Top Tip

Practical advice from real Topline store teams, straight to your inbox.

Locally

Owned,

Genuinely

Irish.

Contact Us
Amalgamated Hardware PLC
Trading as: Topline
Naas Industrial Estate,
Naas
Co. Kildare
W91P228

Email: info@topline.ie
Follow Us
© 2026 Amalgamated Hardware PLC. All rights reserved